The first two articles of this Building a Shower Series, we discussed shower framing and plumbing and the shower pan construction steps of building a walk in shower. This article discusses the final step – how to tile your shower. Prior to beginning the tiling process, the steps covered in the first two articles should be complete.
All the supply and drain plumbing should be installed, tested and ready to go. Your mixing valve(s) should be in place and calibrated as needed and plumbed with the necessary supply lines for planned shower heads stubbed out, properly supported and terminate with a securely mounted drop ear elbow or suitable fitting that is stubbed out and capped.
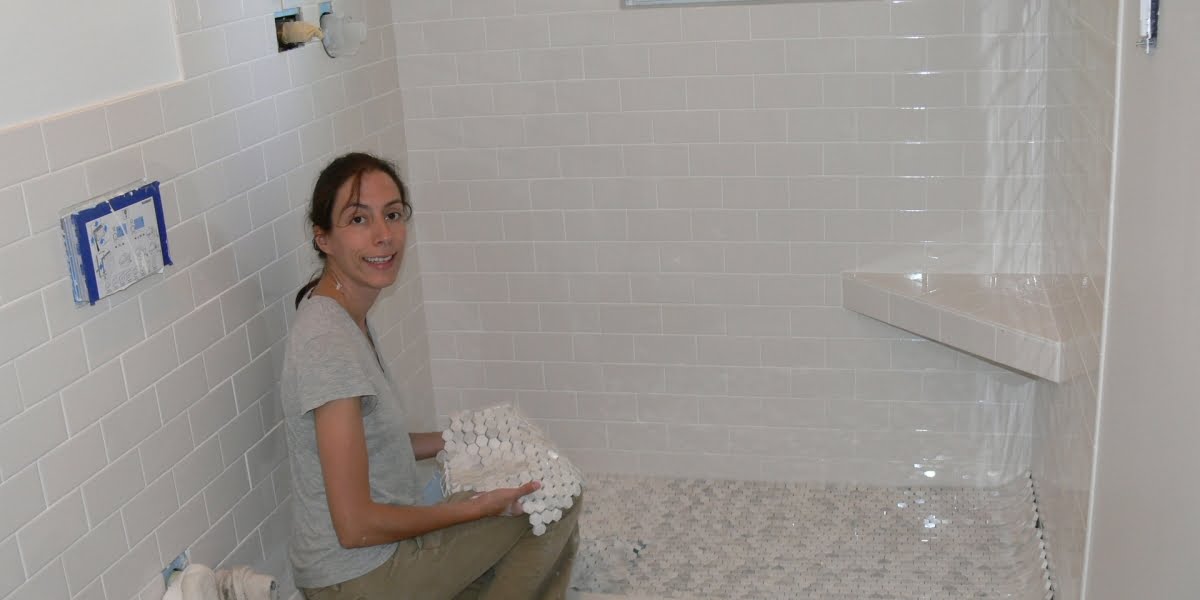
The Shower Tile Install: Backer Board, Thin Set and Grout
The first step of tiling a shower is to create a stable, tile-friendly surface. Tile installations require a fairly flat, stable surface that is appropriate for the adhesive thin-set mortar used to install tile.
Tile installed in wet environments (like a shower), require water-resistant backer materials. Use only tile backer products approved for shower and wet locations.
In the past, water-resistant gypsum wallboard (“green board”) was used as a low-cost wall sheathing and tile backer in wet areas like showers. This product is a wax coated gypsum wall board, that routinely failed when used in wet environments.
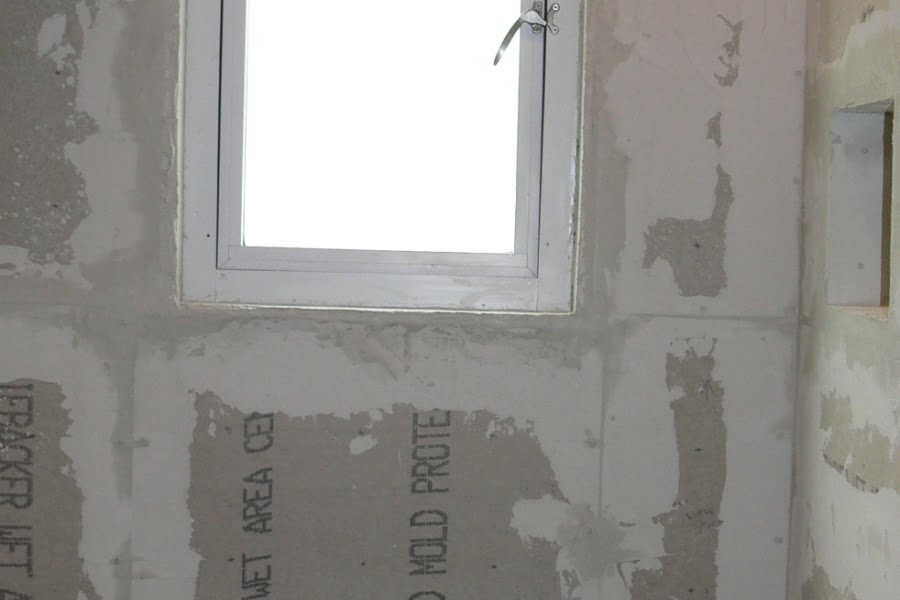
Building codes now prohibit the use of these products as the tile backer in showers. Do not use Green board as a tile backer in showers!
Today, there are many tile backer boards designed for bath and shower use. In general, there are four main types of backer board that can be used for shower construction. They are:
- cement board – fiberglass reinforced Portland cement (Durock, WonderBoard, Permabase)
- fiber cement board – Portland cement with added cellulose fiber (HardieBacker, BackerBoard, FiberCement)
- gypsum core board – gypsum based board with waterproof facing (Fiberock)
- polystyrene board – polystyrene board with reinforced resin facing (Kerdi-Board, ProPanel)
Comparison of Common Tile Backer Boards
| TYPE | BRANDS | COST | WEIGHT | WATER | SHOWER USE | FLOOR USE | STRENGTH | SURFACE |
| Cement | Durock Wonderboard PermaBase |
$ | heavy | waterproof | yes | yes, may crack | fair, brittle | rough |
| Fiber Cement | HardieBacker BackerBoard FiberCement |
$$ | medium | water-resistant | yes | yes, best | high | smooth |
| Gypsum Core | Fiberock Dens-shield DiamondBack |
$$ | light | water-resistant | Fiberock | no | low | smooth |
| Polystyrene | Kerdi-Board ProPanel Wedi |
$$$ | lightest | waterproof | yes | no | fair | smooth |
HardiBacker Use For Both Shower And Bathroom Walls
We used HardieBacker fiber cement backer board for this shower build. I chose this product over fiberglass reinforced cement board (Durock or similar) for its’ combination of water resistance and and smooth surface making it easy to paint in areas that will not be tiled. My plan was to use the HardieBacker board to sheath the entire bathroom.
As further waterproofing for the bath and shower, I added a paint-on moisture barrier. I applied this barrier over the HardiBacker in the shower and behind the sink and toilet in the bathroom.
Although wet-area approved tile backer boards are quite water resistant, many do not stop the movement of water. Vapor barrier requirements depend on local codes and specific applications (Steam Shower use, etc.).
Most installations in showers should have either a vapor barrier behind the backer board (poly sheeting) or one on top of the backer board (paint-on membranes) applied before tiling.
I prefer paint-on barriers. I like the idea of blocking water before it passes through the cement board. Also, consider that any vapor barrier behind the cement board will have fastener penetrations compared to the continuous, uninterrupted barrier that a paint-on product provides.
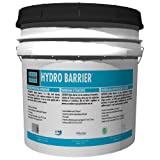
Two commonly available paint-on membranes are; Redgard (Custom Building Products, Home Depot), HydroBarrier, and Hydro Ban (Laticrete). I used Hydro Barrier by Laticrete (highly recommended). Both products allow thin-set tile adhesives to be applied directly to the membrane once it has dried.
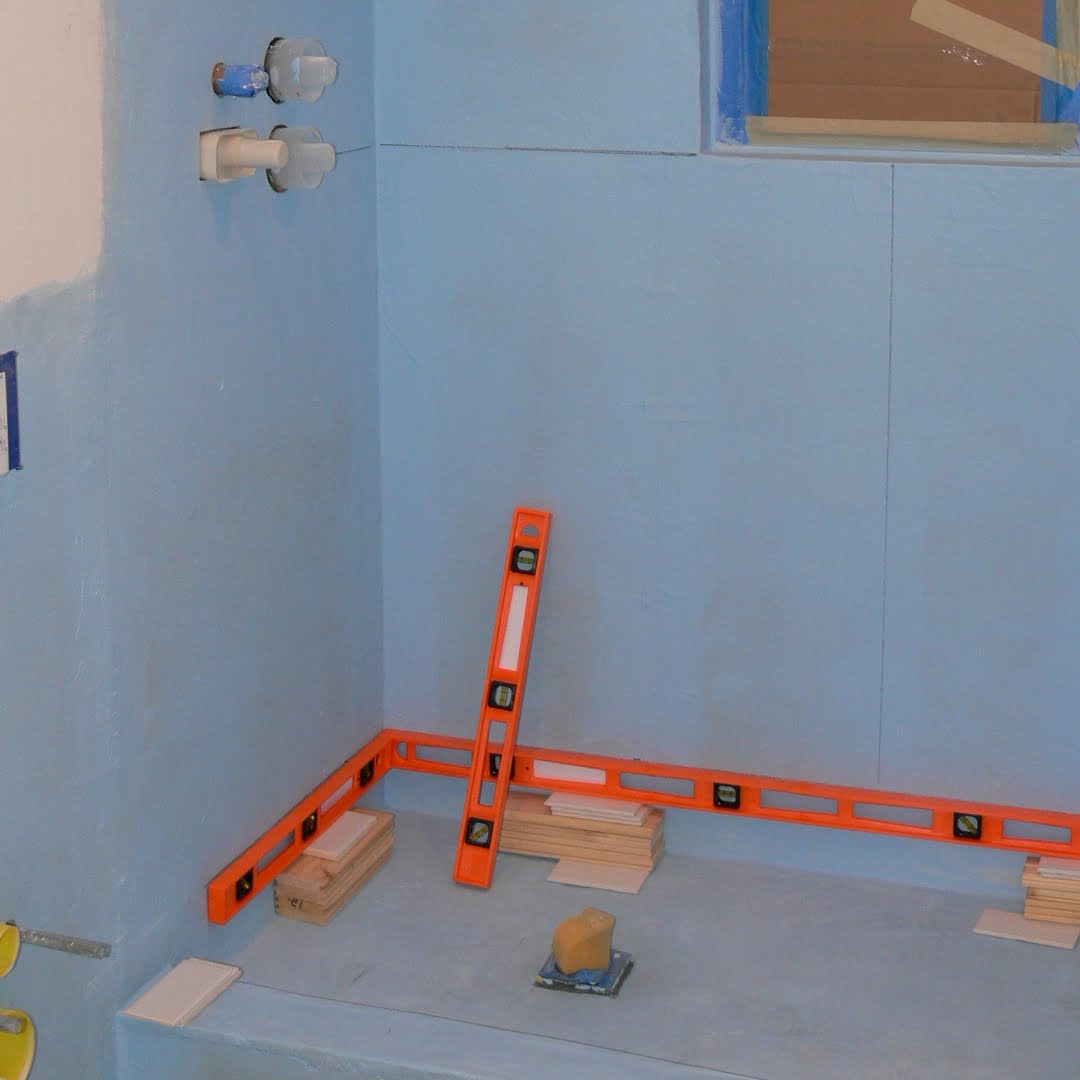
Once you have installed, taped and waterproofed your tile backer, it’s’ time to install your tile.
So What Is Tile And How Is it Installed?
Tiles are thin flat pieces of clay, stone, or other material used as a construction surface finish.
Tile is often used to finish floors, walls, showers, pools, patios, and counter-tops. Tile finishes are very durable and perform well in wet environments.
Tiles are installed side-by-side using mortar based adhesives called thin set. The gaps between the tiles are then filled with grout; a durable filler often mortar-based with or without sand.
The Layers Of A Tile Surface
- Layer 1: Stable, smooth, tile backer surface (concrete, tile backer board, etc)
- Layer 2: Tile adhesive (thin-set mortar, mastic)
- Layer 3: Tile
- Layer 4: Grout
- Layer 5: Tile and Grout Sealant (optional)
How To Pick The Right Tiles For Your Shower
Tiles used in shower construction should generally be durable and have low water absorption characteristics.
Tiles are classified by the ISO (International Organization for Standardization) for 16 different standardized characteristics including water porosity or absorption.
Tiles with the lowest rates of water absorption (<0.5%) are classified as “impervious” and generally made of Porcelains. Porcelain are formed by heating ceramics to high temperatures to give glass-like characteristics (vitrification). Ceramic tiles can be heated to a range of vitrification points and are classified as:
- Non-vitreous – water absorption of > 6.0% (ceramic)
- Semi-vitreous – water absorption of > 3.0% but < 6.0% (ceramic)
- Fully Vitrified – water absorption of > 0.5% but < 3.0% (ceramic)
- Impervious – water absorption of < 0.5% (porcelain)
Impervious or Fully Vitrified tiles are often the best tiles for shower walls and floors, but many common ceramic tiles used in shower are rated non-vitreous. Non-vitrified ceramics or natural stone tiles can be used in showers, they just tend to be more difficult to keep clean and may be susceptible to mineral and other staining. If using these products it is important to seal, frequently clean and reseal these materials.
Understand that many tiles sold as shower tiles will absorb and pass water. Even the most impervious tile installations will have grout seams and grout seams are generally very water porous and tend to crack over time. It’s OK if water moves through tiles and grout lines IF the underlying shower wall and pan construction are sound and water impenetrable. Obviously, lower porosity tiles and grout finishes reduce the water moving into the shower wall and can be important.
We have a walk-in shower we tiled with Carrara marble tile. We carefully sealed the tiles after installation, but they do hold water after use. Because we used a paint-on waterproofing membrane over our tile backer board that lives under the tile, it’s probably fine long term. Will these tiles tend to stain and be more difficult to clean? Sure. The point is, if the underlying shower structure is well built with approved backer board and a water-proof surface membrane, more permeable tile is likely fine.
The same argument can be made for the shower floor tile. The tile surface of your shower pan (floor) is not totally waterproof. Water will move through the grout lines, the tile (depending on the tile) and any imperfections that develop over time. It is the job of the shower pan, with its’ embedded waterproof liner, that is responsible for a leak-free shower floor.
So, bottom line, using less than impervious tile on shower walls and the floor will work if the underlying structure is properly built, but will require more work and maintenance.
Our main home is an example of this. We re-built our bathroom shower 4 years ago and used large Carrara marble tiles for the walls and a marble mosaic for the shower floor. Both are very porous and readily hold and pass water, but were installed over cement backer board that was completely sealed with a paint-on membrane and a mortar shower pan with an embedded shower liner.
Four years later, our marble-tiled shower still looks great. It takes a bit of work to maintain (we squeegee daily after each shower!), but it can work if done properly.
Shower Tile Size and Surface Characteristics
Tile size and surface finish of shower tile should be considerations as well.
Tile surfaces characteristics should match the function and location of the shower tile. Wall tiles with glossy, smooth and durable finishes are easy to clean and easily stand up to cleaning and scrubbing. Shower floor tiles with glossy, slippery surface finishes can be dangerous. Consider choosing a textured, less-slippery finish tile for the shower floor.
When choosing tile size for your shower, consider the desired finished look, grout lines and the flatness of the surfaces in your shower. Using larger tiles tends to give a more modern, sleek look and result in fewer grout seams to clean later. Smaller uniform tiles finish with many grout lines, but look classic and install better on slightly curved or irregular surfaces.
Shower floors (shower pans) are intentionally sloped and generally require smaller, mosaic-style tiles to accommodate the sloping curves of the shower pan.
Tile Layout Patterns and Tile Grout Lines
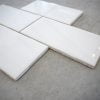
When planning your shower tile layout, consider the tile layout pattern design you would like. There are many different tile layout patterns which give different looks. Stacked, straight, brick patterns, classic subway (what we used), herringbone, french, vertical, and many others. Pick a pattern that matches the tile and the projects. For our cabin shower, a classic 50% brick (subway) layout with classic 3″ by 6″ subway tiles was perfect.

What is Thin-set Mortar and Which Thin-set Mortar Should I Use For Shower Tile
Thin-set mortar or thinset, is a Portland cement based mortar mix of fine sand, Portland cement, water and often additives to retain moisture during curing and to improve performance of the mortar.
The main two categories of thin-set mortar are generally those fortified with polymers (like latex) often called “Modified or Fortified” and those that are not fortified known as “Unmodified”, “Dry-set” or “Unfortified” mortar.
Polymer fortified thin-set mortars add latex or similar polymer compounds to improve tile adhesion and bond-strength (depending on the surfaces), water resistance, tolerance to freeze-thaw cycles, prolonged application and working times and improved flexibility and durability.
Historically, un-modified mortar was used when tiling over concrete, cement board and dry-wall and modified mortar was used to install tile over challenging surfaces or those requiring improved initial bond (like wood, old tiles, ceilings, etc). Today, many tile manufacturers specify the type of thin-set mortar to use for a specific tile. It is important to use the proper thin-set mortar for the type of tile and conditions of the specific install, so carefully check the recommendations for the tile you plan to use and the recommendations of the specific mortar.

That said, I almost always use a modified thin-set mortar for my tile installs. Modified mortars are a bit more expensive, but for the smaller projects I tend to use if for, the extra cost is more than worth it.
Which Notched Trowel Size Is Correct for The Tile I Plan To Use
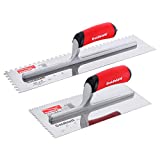
The proper notched trowel size is determined by the size of the tile you plan to install and the type of surface it will be installed on.
The goal is to provide just the right amount of thin-set mortar to properly set the tiles – enough to cover most or all of the backside surface of the tile, but not too much that the mortar bleeds out through the tile grout seams leaving insufficient space to apply grout.
The ANSI (American National Standards Institute) guidelines for tile mortar require 80% mortar coverage for all installations except for wet or exterior installations which require 95% coverage. Read the guidelines for tile mortar coverage and notched tile size here.
The following table will, in general, provide sufficient thin-set mortar coverage when installing standard tile to a relatively smooth surface (like backer board):
1/4″ x 1/4″ V-Notched
| 2″ – 4″ wall tile | 3/16″ x 1/4″ V-Notched |
| 4″ – 6″ tile | 1/4″ x 1/4″ U or Square Notched |
| 6″ – 8″ tile | 1/4″ x 3/8″ U or Square Notched |
| 8″ – 12″ tile | 1/4″ x 3/8″ U or Square Notched |
| 12″ – 24″ tile | 1/2″ x 1/2″ U or Square Notched |
If you are unsure if the trowel you are using is the correct size, try installing a few tiles. The tiles should settle into the thin-set with good adhesion. If thin-set is oozing out of the grout spaces above the level of the tile surface, then there is too much thin-set and the notched trowel size is too large. If you remove the trial tiles, you should see near complete coverage of the back of the tile surface, if there is insufficient mortar on the back of the tiles, the notched trowel size you are using is too small.
OVERVIEW | Tile a Shower
SUPPLIES LIST | Tile a Shower
- Ceramic Subway Tile 3" x 6" Daltile Restore Bright White 3 in. x 6 in. Ceramic Subway
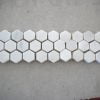
- White 1" Hex Marble Mosaic Tile Jeffrey Court Statuario Hex White 12 in. x 12 in. x 8 mm Marble Mosaic Wall Tile
-
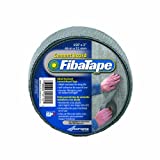 Cement Board Tape
FibaTape FDW8436-U 2-Inch by 150-Feet Cement Board Tape-Alkali-Resistant/Self-Adhesive
-
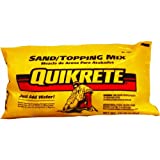 Floor Mix Mortar
Quikrete Sand/Topping Mix
For bench build
TOOLS LIST | Tile a Shower
STEPS | Tile a Shower
- Install the tile backer board
Find and wear proper safety equipment when handling silica-based products like cement board. Always wear a mask and googles when cutting, handling and installing cement board products. A word of warning before you start:
When working with and especially cutting any cement board product, use great care to avoid silica dust formation and exposure. Exposure to silica dust is linked to lung cancer and the lung disease silicosis. Always wear an approved dust mask (N-95) when working in the presence of silica dust. Use manufacturer approved cutting methods (shears, score and snap) and clean up (HEPA filter vacuums or wet clean up, avoid sweeping or methods that create dust).So, to begin, plan placement and installation of a shower-approved tile backer product. The tile backer will generally be installed only in the immediate shower area and any surrounding areas where tile will be installed.
We actually over-engineered our bathroom and sheathed all the walls and ceilings with HardieBacker 500 1/2″ cement board. The thought was this, since the walls are open, why not use the most moisture-proof sheathing we can? So we did. But back to the shower build…
Prior to installing the shower backer board, if you plan to use a poly sheeting moisture barrier, install this first. If using a paint-on water-proofing membrane you do not need to install poly sheeting (it actually may be a bad idea to use both as moisture can be trapped between the moisture barriers.
When installing backer panels, you typically can orient the panels horizontally or vertically – check the installation instructions for your product. Vertical edges should be supported and land on framing members. Install backer board by screwing panels to wall studs using cement board screws spaced every 8″.
Avoid placing fasteners within 2″ of edges and at least 3/4″ from the panel edges if possible to help avoid cracking the panel. Ensure that fastener heads are flush to the panel surface.
Roofing nails may be used instead of screws and in some cases are easier to use. Screws may be preferred for ceiling panels and fastener length should allow for at least 3/4″ fastener penetration into framing members for ceiling mounting. Space panels according to manufacturers recommendations – generally 1/8″ – 1/4″ to allow for wall movement and thermal expansion.
When mounting the backer board, horizontal blocking is not necessary for most boards but does add stability (we added horizontal blocking, where it was simple to do).
Cut panels using manufacture-approved methods like scoring and snapping the panels. Always wear a particle mask or respirator when working with these products. Avoid using of high-speed power tools (grinders, circular saws) unless they are have attached dust evacuation systems. Specialized carbide tip scoring tools are available and work well.
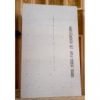
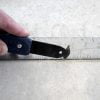
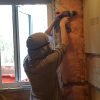
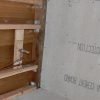
- Apply Cement Board Tape and Thin-set to Panel Seams
Once the backer board is installed, use the thin-set you plan to set your tiles in (likely a latex modified thin-set) to fill the gaps between the backer board panels.
Over this thin-set, apply cement board approved (alkali-resistant) fiberglass mesh tape. Smooth seams and tape with additional thin-set. See #6 below for more information on mixing thin-set mortar.

- Apply Elastomeric Paint-On Waterproofing Membrane To Walls and Ceiling
Waterproof your shower by applying a paint-on elastomeric surface water barrier. Shower approved tile backer boards are tolerant of water, but they do not stop it. Protect your framing and wall cavities by applying a vapor barrier.
Although it is acceptable to use plastic sheeting installed behind tile backer board as a vapor barrier, it is not the best practice.
Using paint-on waterproofing barriers block water at the surface of the backer board. Why not deny water passage into your wall, instead of trapping it behind the backer board with plastic sheeting?
There is a variety of paint-on waterproofing products available. I used HydroBan from Laticrete. This paint-on product is easy to apply and does not require fabric reinforcement at the corners and seams (some products do).
Although no fabric reinforcement is necessary, corners, penetrations, floor-wall transitions and other critical areas should be pre-treated with a liberal application of the product prior to applying two field coats.
Allow the product to cure before setting tile (2 hours for Hydro Ban). Most paint-on membranes allow the use of thin-set adhesives directly over the paint-on membrane once cured.
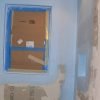

- Plan and Mark Out Tile Layout
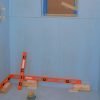
Plan the layout of your shower tile. Start by creating a level baseline just above the shower pan. Mark this baseline directly on the shower wall with a pencil or marker. Also mark significant structures (the window in our case) with a horizontal reference around the shower to help plan tile seems.
Plan out tile install. Start with level reference. Mark the walls with horizontal and vertical reference lines prior to setting tile. Notice plaster guards over mixing valves prior to starting tiling.
Dry install tiles or use a “story pole” (a stick with markings that reference stacked tile seams to help plan tile install) to adjust your base starting height to facilitate tile seams falling on desired targets (the window ledge, for example). You can also build a wall model away from the shower on a sheet of plywood, paneling or cardboard to layout tile to plan for seams and plan cuts. Adjust the starting baseline as needed to avoid unnecessary or very thin tile cuts.
Once desired baseline starting point is established, create a level base for the initial row of tile using a straight edge, level or similar. This base should start a tile width or more above the shower pan. For our base straight edge, we used several inexpensive plastic levels supported by blocks.
From this horizontal reference, draw a single or multiple vertical plumb reference lines on the to be tiled wall to help maintain a uniform, straight and level tile install. Prior to installing tile, ensure that mixing valve components are protected with included plaster guards or tape.

- Prepare Materials, Thin-set Mortar for Tile Install
Prepare to install tile by collecting all necessary supplies, tile and tools. Once thin-set is mixed and applied, you will have a fairly short period of time to set the tiles. You should have everything ready to set tiles once the thin-set is applied.
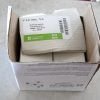
For our shower tiles, we used off the shelf 3″ x 6″ white ceramic subway tiles from The Home Depot. These tiles did not require the use of tile spacers as they have self-spacing nubs on their sides, which helps speed installation by avoiding the need to place tile spacers during the install. Installing the tiles using these self-spacers provides a grout seam of ~ 1/16″. You could always use these same tiles with larger spacers to create wider grout lines if you like.
If using tiles that are not self-spacing, use tile spacers to create uniform grout gaps between installed tiles. If you use tile spacers, decide on the proper spacer size and have them ready for use. In general, smaller tiles typically have smaller spacing (1/16″ – 1/4″) while larger tiles will be set with wider spacing (1/4″ – 1/2″)
Most very small or mosaic tiles will be mounted on a mesh backing with fixed spacing between individual tiles. You will still need to control the spacing between these pre-mounted mesh sheets.
Once you have a plan for tile spacing, assemble enough tile (and tile spacers if using) to complete your initial thin-set application. Thin-set adhesives generally have short working times and should be mixed in small batches that can be completely used within the products working time. In general, this will be area equivalent of one 3′ x 5′ backer board sheet for small tiles and several sheets for larger tiles.
For the 3″ x 6″ subway tiles we used, we found that we could easily cover the area of one 3′ x 5′ backer board panel with each thin-set batch
- Mix thin-set mortar and Start Tile Application
Using a five gallon bucket or similar, mix a small batch of thin-set according to the instructions given by the product you are using. We used latex fortified thin-set (Pro-Lastic from Superior Adhesives and Chemicals) from the Tile Shop.
For most products, start with just the liquid (water or latex if two-part) in the bucket. Slowly add the dry mortar while mixing. Continue to add the dry component until the thin-set has the consistence of peanut butter. Proper thin-set should stick to the bottom of a trowel when turned upside down. Mixing attachments for drills make the task of repeatedly mixing mortars and grout much easier. We used a mixing paddle connected to a 1/2″ heavy duty drill and I highly recommend doing the same.
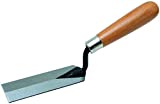
Then, using the proper sized notched trowel, apply an even coat of thin-set to a small area just above the beginning point of your tile install. The proper notched trowel size is determined by the size of the tile you plan to install and the type of surface it will be installed on. The goal is to provide sufficient mortar coverage of the back of the tile surface for proper adhesion of the tiles to the backer board.
If you are unsure if the trowel you are using is the correct size, try installing a few tiles.
The tiles should settle into the thin-set with good adhesion. If thin-set is oozing out of the grout spaces above the level of the tile surface, then there is too much thin-set and the notched trowel size is too large. If there is insufficient mortar on the back of the tiles (they should be completely covered with mortar), the notched trowel size you are using is too small.
Begin thin-set application above the starting point for your first row of tiles. Apply thin-set to an area that you believe you can finish tiling within the working time for the thin-set mortar product you are using (generally 10 – 20 minutes). Apply an uniform layer of thin-set using a notched trowel.
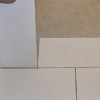
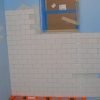
Start installing tiles beginning at the bottom row at a corner using the level straight edge base that you previously assembled. Set each tile into the thin-set mortar bed by applying gentle pressure and moving the tile back and forth slightly. As you install tile, reference the previously marked plumb vertical lines to ensure proper tile alignment.
When staggering rows to install the subway tile in a “brick” pattern, a good trick to help center tiles is to use a tile turned sideways as a guide. Subway tiles are half as wide and they are long creating the perfect spacer.

- Continue tile installation, Complete rows with Cut Tiles
For almost any tile job you will need to cut tiles.
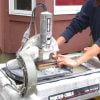
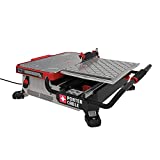
There are several ways to cut tile depending on the type of tile you are using. The best way is typically a wet tile saw. Many tiles can also be cut using a score and snap tool. Small cuts can be made with a hand nippers.
Wet tile saws use hardened circular blades cooled by water to cut tile. Wet saws provide very clean cuts and typically employ a sliding guide that easily produces straight cuts. Wet saws can be expensive, but many home improvement stores rent tile saws and having a wet saw for a major tile project is often worth the money.
If you are using a thin ceramic (like the subway tile we used) or other easy to cut tiles, a simple score and snap cutter and hand nippers may be sufficient for your project.
When cutting partial tile to end rows at the corner, cut the tile to fit with a small (1/8″ or so) gap. Cutting end pieces to close can cause tiles to buckle with wall movement and these small gaps will be covered by the adjacent wall tile.
In addition to cutting tiles you will probably need a supply of various trim tiles depending on your project. Trim tiles offer easy transitions (coves, etc) and finished edges at corners and the end of rows (bull nose finish tiles). We used two types of bull nose finish tiles to complete the window edge, the shampoo niche and the leading edge of the shower.
- Install a Corner Shower Bench (optional)
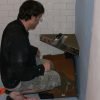
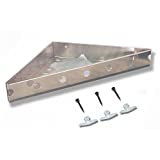
A shower bench can be built into the shower framing or added during the tiling process. We did not frame in a bench, but planned to add a bench during the tiling process. We built our shower bench using the Better-Bench® system by Innovis Corp
. The system features an aluminum pan which is mounted onto the shower wall and then filled with floor mud and tiled to create a very strong, concrete shower bench. The system offers several sizes of triangular and rectangular forms.
Building a shower bench with the system is easy. First, install the aluminum frame onto the shower wall. Fill the frame with floor mix mortar (sand and Portland cement), trowel smooth with slight slope to shower and finish with tile. The finished bench is very strong (rated for 400 lbs.) and has the benefit of open space below the bench, unlike many framed in benches. The Better-Bench® at Amazon.
.
- Complete Setting wall and ceiling tiles, Adding Edge trim and details.
Continue setting tile working your way up and around the shower. Carry plumb and level lines onto side walls prior to setting tile. If you need to stop tiling during the process but have areas of thin-set already applied to the wall, simply scrape off the thin-set before it dries.
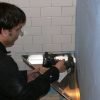
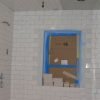
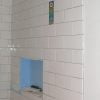
Use trim tiles to finish edges and complete exposed tile edges. For this project we used short side bull nose tiles to finish the vertical leading edges of shower entrance (see below image) and for the window and alcove, and long side bull nose tiles to provide a finished edge for horizontal borders of the window opening and alcove.
To personalize the shower, we added a few small tiles that we brought home from a trip to Italy. As long as the tile thickness is similar, it is quite easy to add a contrast or a detail tile within the tile field — just cut out the space for the tile leaving a grout gap to match the main tiles.
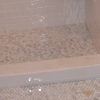
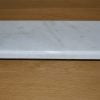
Tile the shower curb we used the same white subway tiles we used for the shower walls. For the top or threshold of the shower curb, we used a 6 1/2″ x 3/4″ x 36″ pre-cut Carrara marble threshold from the Tile Shop. Thresholds made from many different materials are readily available from home improvement and tile stores. Our shower threshold was longer than 36″ so we needed to use two pieces seamed to fit our shower.

- Grout the tile
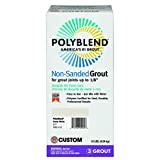
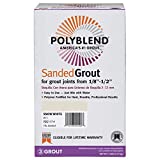
After all the tiles are installed and the thin-set is cured (24-48 hours), grout the tiles.Grout is available in sanded and non-sanded forms. Sanded grout is generally used for grout seams greater than 1/8″. Non-sanded grout is used for grout seams 1/8″ or narrower and for use with tile surfaces that could be scratched by sand.When choosing a grout for wet areas use latex fortified mixtures. We used Polyblend polymer-modified non-sanded grout available at The Home Depot stores.
Grout, like thin-set mortar, also has a short working time and should be mixed in small batches. Mix an amount of grout that you can apply in less than 30 minutes. Consult the specific instructions for the product you are using, and know that some modified grout products require an admix in addition to water.
Prior mixing and applying grout, look over the entire tile install for excess thin-set in the tile joints. If tiles joints are full of thin-set, there will be little room for grout. Remove excess grout between tiles using a small nail or a standard screw driver turned sideways.
Mix grout to a smooth, lump free consistency similar to peanut butter. Occasionally mix grout as you are using it and discard once it stiffens or becomes lumpy.
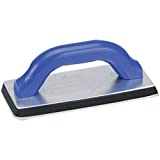
Apply grout to tile using a grout float held at a 30 to 45 degree angle to the tile surface. Work the grout into the tile joints using a criss-crossing motion. Once the grout joints are uniformly filled, tip the grout float to a steeper angle (70 to 90 degrees) to remove excess grout from the tile surfaces.
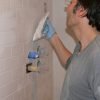
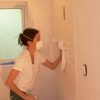
Next, remove excess grout and smooth the grout seams using a slightly damp sponge rinsed frequently in a 5 gallon bucket of clean, cool water. Use as little water as possible, but thoroughly rinse sponge repeatedly during the process. Excess water can weaken grout.
After sponge cleaning, allow the grout dry until a haze appears on the tile surfaces (30 minutes to several hours). Remove this haze by wiping with a dry cotton cloth. Grout haze removal products are available for difficult to remove grout haze, but these products should generally not be used until the grout has cured (24 – 48 hours).
Some tiles with porous surfaces are prone to collecting grout haze and may benefit from pre-sealing the tile surface with a light coating of tile sealer prior to grouting. If you do this, use care to apply sealer only to the face of the tile and avoid contact with the grout joints as this may compromise the bonding of the grout between tiles.

- Tile the shower Floor
In theory we would tile the shower floor (shower pan) first to promote our desired water path down the wall tile and over the shower pan. But for most shower builds, this layering is not necessary as the shower liner protects this area of the shower.
Even if water did get past the tile at this interface, the shower liner will redirect it to the drain. Remember the shower liner runs up the base of the shower walls some distance (usually at least as high as the shower curb) to waterproofing the coves and base of our shower pan. So, for practical reasons, many installers complete the shower pan tiles last, to help prevent damage to them while installing tile on the shower walls and ceiling.
To begin tiling your shower pan, dry set you tile in the pan prior to applying thin-set. Tiles should follow the slope of the pan and still have solid support. If tile are unsupported or rock back and forth you may need to cut tiles to follow the slope or use smaller tiles.
Some correction for unsupported tiles can be made up with the thin-set mortar bed, but tiles should be relatively stable prior to setting them. Smaller tiles, especially small mosaics (pre-mounted on mesh) tend to work best on the sloped shower pan surface.
Prior to setting the shower pan tiles, check the drain height in relation to the finished tile height (add a bit of height for the not yet applied thin-set) on the shower pan. The drain should be level or slightly lower than the finished surface of the shower pan tile.
If drain height correction is needed, most drains allow adjustment by turning the drain riser, which in many designs, is threaded, and moves up or down with turning.
Once satisfied with the tile layout and drain height, remove tiles, clean the shower pan (make sure the surface is smooth and free of any thin-set, grout or debris), and prepare to set the shower pan tiles.
Mix enough thin-set mortar (latex modified thin-set for wet areas) to cover the shower pan. Apply thin-set and set tiles. Ensure good contact between the tiles and thinset — your goal should be that every tile is soundly set into the thin-set with no gaps or unsupported tiles. This is important as these will be weight bearing tiles.
When setting the tiles, make sure the top surface of the tiles is smooth and each tile flat relative to each other. You do not want high spots or sharp edges in the finish of your shower floor. Prevent high edges and tiles by smoothing the surface of the tiles before the thin-set hardens. A good trick is to use a short piece of 2 x 4 covered with fabric or carpet to help level the tiles as you set them. Push the covered 2 x 4 into the tiles as you slide it over the entire surface of the floor tiles. Use your hand to feel for high spots or sharp edges and correct before the thin-set hardens.
Allow the thin-set to cure for 24 – 48 hours, then grout the floor pan.
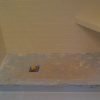
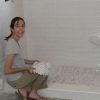
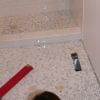

- Seal The Tile and Grout lines
Allow grout to cure for at least 48 hours before applying sealer. Make sure tile surfaces are clean and free of thin-set, grout or grout haze. If necessary clean tile surface with grout haze remover prior to sealing. Follow the directions of the product you plan to use (we used 511 Impregnator Sealer from Miracle Sealants). For most products, apply the sealant to the grout seams using a foam brush, or sponage to saturating each joint. Then use a sponge to lightly coat the surfaces of the tile.Allow sealant to soak in for several minutes. Then, using a clean, dry soft cloth, wipe off the excess sealant from the tile surfaces before it dries. Repeat. Test sealant by dropping water onto the grout and tile surface. If properly sealed, the water should bead and run off the surfaces. If the water does not bead, repeat sealant application until it does.
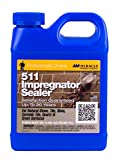 My favorite tile and grout sealant – Miracle Sealants 511 impregnator
 - Mount Shower Plumbing Fixtures and Trim
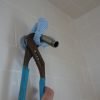
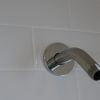
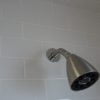
Install the shower head arm (supply pipe), shower head(s) and knobs and trim of your controls. The shower arm is typically a short, slightly bent 1/2″ pipe that is threaded on both ends and finished to match your shower fixtures. The shower arm connects the rough in plumbing behind the wall with the shower head. The rough in plumbing that the arm connects to usually ends with a drop ear elbow fitting designed for this purpose. Often, this drop ear elbow is connected to a short piece of 1/2″ capped pipe (“stubbed out”) when the rough in plumbing is installed. If yours is stubbed out you will have to remove the pipe stub before installing the shower arm. Before you do make sure the mixing valve is off.
To install the shower arm, first wrap several rotations of teflon tread tape or apply teflon thread dope to the wall end of the shower arm. Wrap the Teflon tape clockwise as you hold the threaded end facing yourself. Proper wrap direction of the thread tape helps maintain the tapes integrity when installing the pipe.
With the thread tape applied, pass the shower arm through the wall and into the drop ear elbow of the rough plumbing. Be careful to line up the threads properly to avoid cross-threading the elbow (which is copper or brass and quite soft). Hand tighten to the point of proper alignment.
Then wrap a rag or strip of rubber around the pipe to protect it, and using an adjustable wrench or pipe wrench tighten the shower arm 1 – 2 additional turns until the shower arm is properly align. Do Not Over Tighten!! Remember that the drop ear elbow is soft and very hard to replace!
Next, test the shower arm for leaks by capping the shower end of the elbow and turning on the water. Use a flash light to peak into the wall at the drop ear elbow by looking through the space between the shower arm and the hole cut in the wall (the hole should be slightly larger than the pipe). If no leaks, turn the water off, and remove the cap placed to test the shower arm. Next, slide the shower arm escutcheon (round trim piece that covers the hole in the wall) onto the shower arm and slide it down to the wall.
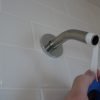
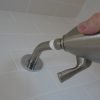
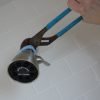
To install the shower head, first wrap several wraps of Teflon pipe thread tape around the threads of the shower arm pipe. Wrap the tape in the same direction you will be turning the shower head to tighten it (clockwise) to avoid unwrapping the tape as you turn the shower head.
Tighten until hand tight, then tighten an addition 1 – 2 turns with a wrench. Protect the finish of the shower arm and shower head with a folded rag if needed. Check for leaks. If leak, re-tighten.
Finally, install the mixing valve trim plate and knobs. Follow the directions of the manufacturer of the product you are using. Trim plates should install flush to the wall. Once installed, carefully run a bead of silicone or elastomeric sealant (lexel) around the trim plate.
Tape the trim plate and shower wall with painters tape for a neater caulk application. Leave just enough of a gap between the tape for the caulk bead. Smooth caulk with tape still on, then remove tape. If using an elastomeric sealant (like Lexel), work very quickly to smooth the caulk bead as the surface of these sealants firms very quickly. Before using the shower, let the tile sealant and caulk cure for 24 – 48 hours. Remember to refresh the grout sealant and check the condition of the caulked areas periodically.
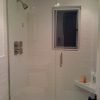





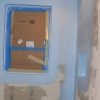

Fantastic advice and teachings in all the series. Thank you very much for doing this
This info is proving to be very helpful! I have a “self taught handyman/carpenter” who has remodeled a few bathrooms for customers already & his work is very impressive. When I asked if he uses the plastic wrap or waterproof paint on the backer board before applying the tiles, he stated “neither”. I want him to do my bathroom for me just like this, taking out the tub & making it a walk in shower (but no bench). I hope when I show him these step by step instructions he’s not insulted.
I have a question really. Can I tile over a painted shower pan. The paint is a water sealing type. Any thoughts?
You get a 10! One question, how do you cut out for plumbing fixtures and get holes for grab bars?
Thanks Jeff,
You can cut holes for plumbing using a few different methods.
If you have large tiles, or would like to cut the entire hole on a single tile, use a diamond wet/dry hole saw (~$25+) drill attachment. Wet the tile as you cut to control the temperature.
If you have smaller tiles, you will likely need to plan the plumbing cutouts around multiple tiles and can use any method that allows you to create an arc (or a rough approximation of an arch – think tile nippers). This how we created our plumbing cutouts, using our tile saw to make multiple radial cuts and then break the connecting waste tile to create a rough cut out. You may also find that many fixtures do not require a circular cutout and a simple square or rectangle will work. Here is photo to help get the idea of what we did:
To drill holes for mounting bars, use glass/tile drill bits. Many will plan to drill holes over grout lines for ease of drilling and to help avoid damaging the tile. If installing grab bars, consider the expected load on the bars and consider fastening into studs if possible or heavy duty anchors where studs are not accessible.
Enjoy!
CDIY
hi,
in your materials list, you listed only 10 square feet of tile was used for the walls. was this a typo? i measured my existing shower stall and i need about 5 times that (i’m measurement challenged so it kinda alarmed me). was it 10 or 100? thanks.
Hi Meghan –
I believe the 10 sq ft is referring to the price per 10 sq ft ($18 / 10 sq ft). You are right, you will likely need in the range of 50 – 100 or more sq ft of tile coverage for a typical shower.
Gary
Another great article, and beautiful project.
I am about to start my bathroom, and hope it turns out like this one.
Just one question, what is the purpose of the mesh used on the curb prior to the liner going on?
Hi Richard,
Thanks for the kind words and question.
The mesh holds and reinforces the mortar layer applied to the curb.
G
Enjoyed reading over how to DIY on the shower which helped me with where to start and how it needs to be done. A question I have is my small shower is right in from of my bathtub and I’m wanted to rip out both the shower and tub and replace it with a walk in shower. I have an idea on the best way to start but wanted to know if know of any sites other reading material that can help me better understand how to build the walking part. I can cap the water lines for the tub and plug up the drain for the tub but would like to have a better understanding where to go from their.
Thanks, Jeff
Hi Jeff,
These are all excellent sources of additional info:
FineHomeBuilding.com
FloorElf.com
BuildingScience.com
Thanks. Will take your advice.
Hi Gary,
I’m so glad I found your blog as I need to build a shower stall from scratch. Well almost the plumbing is all ready in. I have never done it before. I do have a question however.
The area I’m building it in has new drywall in it and I’m would like to know if I can cover it with ¼” “Fiberrock” over the existing drywall or if I need to pull out the existing drywall and replace it with 1/2”. I am intending to water proof with “Redgard” everywhere but am somewhat concerned about deterioration of the drywall over time.
Thanks,
Fred
Hi Fred,
I would remove the drywall and replace with an appropriate tile backer board approved for shower use. The paper of the drywall will likely eventually get wet and grow mold.
Gary
Great site! I am ready to tape my seams and thinset them, but I was curious if you taped the seam between the shower pan and cement bord? From your picture it looked as though you did so? If so did you also use topical membrane on those seams as well? Just worried about creating the mold sandwhich if you will. Thanks!
Hi Kevin –
Thanks for the question.
Regarding the corner seam between the cement board and shower pan, I did not tape this seam. This bottom section of cement board is embedded in the mortar of the shower pan and therefore very stable. I did, however, fill it with thinset to even and smooth this interface of the cement board and shower pan. For all of the other cement board seams, I used cement board approved fiberglass tape embedded in a latex fortified thinset.
That said, once the shower pan was completed and the thinset/tape seams of the cement board where complete and dry, I did add a paint-on waterproofing membrane to the walls and shower pan and did use a waterproofing reinforcement tape at the seam between the bottom of the cement board and the shower pan. I used a 5" fabric product by Schluter called Kerdi-Band.
The waterproofing of the shower pan is not necessary (any passed water is stopped by the shower liner embedded in the shower pan), but I believe the paint-on waterproofing of the cement board is a very good idea.
Enjoy you shower building. Feel free to upload an image of your project using the "Upload an image" button below.
Gary
Hey I really appreciate this article helped me out tremendously, but I was wondering when building my mortar shower pan, do I build up to and around right under the neck of the drain or only up to the outer second peice of the drain assembly where the weep holes are?
Hi Don,
Thanks for the kind words and using our site.
When pouring the top layer of floor mix, first cover the weep holes of the drain with pebbles or tile spacers to help improve the drainage path into the weep holes. Then pour the floor mix over and around the drain and covered weep holes bringing it flush to the top drain flange level.
Gary
I am wondering about the use of the green water resistant wallboard for my shower walls as I will be using that 1/8″ plastic shower wall material for my walls. or should I still use the cement board?
Hi Jack,
I assume you are installing a fiberglass or acrylic panelized or one-piece shower insert. These systems differ depending on the manufacturer, so the best information may be the install instructions from the manufacture of the product you are using.
Many of these units are designed to be installed directly to the wall studs. Finishing around the unit is then completed using a water-resistant wall board. As with any wall board to be used in bathrooms and especially around shower areas, I would recommended not using gympsium based "green board" or similar products. These products tend to fail in high moisture environments.
There are many excellent products designed to be used in and around showers — see the chart at the beginning of this article. Since you will likely be painting the board, choose a product with a smooth finish. Cement boards are excellent backer boards for tiling, but a fiber cement smooth finish product like HardieBacker would be a better choice.
Thanks for the question and visiting our site,
Gary
I need to know if I should polish the marble tile before I put the protective finish on the tile on my new marble tile on my shower walls
Hi Leona,
You should clean the tile as needed prior to applying any sealant. Make sure there is no residual grout or grout haze on the tile prior to sealing. That said, sometimes using the sealant to help release difficult to remove grout haze is helpful.
CDIY
Any advice on making an accessible shower pan (no threshold)? Also, what kind of toilet is that? I have a very small bathroom and that looks like a space saver.
Hi Matt –
Thanks for the question and thanks for using the site. I have limited experience with curbless showers. There are some excellent resources available to help – on of my favorites is Fine Home Building Magazine / Website. Here is a discussion about this very issue: discussion on curbless showers. From my understanding, the main issues are the requirement of a larger shower pan area which in turn requires a deeper mortar bed which will weigh more. Another issue is the potential for flooding related to building codes.
The toilet is a wall mounted system. I have an article about it here: wall mounted toilet install
Gary
Very inspirational bathroom! For the vertical wall entering the shower did you use tile with the bullnose on the 3″ side. If so we’re did you find it? My local home Depot only carries it with bullnose on 6″ side. Also when you cut the tile in half And it’s grouted I would think the sharp edge would be visible in the shower what are your thoughts. Thank you.
Hi Phil!
Thanks!
Yes, we did use end bullnose (3″ side) tiles to finish the leading front edge of the shower. Like you, we did not find them at The Home Depot. We instead ordered them from a local tile store in Plymouth, MN – Tile X Design.
You are also correct that when using a cut half tile of this bullnose material, the rear seamed joint does include the “sharp” cut end of the bullnose. Although not that noticeable, you can soften the edge with a tile stone or similar abrasive tool. I suspect you can also order the same bullnose tile in half sizes “3” x 3″.
We also considered not using bullnose for the front leading tile edge, but just transitioning with a blended bead of caulk
Gary
I’m leaning towards a bead of caulk painted to match the walls. I wonder if you can smooth the end pieces like you said with a stone and then paint them white or better yet grout the ends. I think adding a vertical border takes away from the clean look.
Phil,
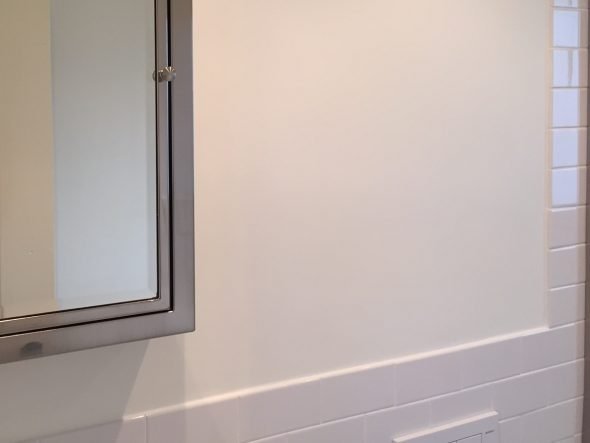
Here is a photo showing the leading edge a bit better. I took it this weekend. Unfortunately the image doesn’t show the tile that well, but it gives you an idea of what it will look like.
These are bullnose tiles. However, I think standard tiles with some grout / paint / caulk will look fine too. I almost skipped the bullnose tile and just used the standard tiles. The difference, if I remember, is the bullnose has just a bit more finish wrapped around to the edge. You should check your tiles, some of the subways have spacer tabs molded into the tile that may look odd.
Regarding the cut edge of the half tiles; we oriented the tile so the cut edge was toward the shower. Once grouted, the joint blends in fairly well with the tile. If you look close, you can see the difference of the cut edges.
Here is the image:
Gary
I guess the other option, that neither of us mentioned, would be to use the long side bullnose from Home Depot and turn them sideways to create a border around the shower. You would obviously need to cut some half tiles to make the straight edge prior to the border.
Just another option.
Gary
Thanks for the great tutorials and material lists, they have been invaluable as we tackle our own bathroom renovation. I believe you said you used hardibacker for all of the walls in the bathroom, not just the tiled surfaces. We are considering this as it is a small room and we are tiling the shower and half of the walls anyway. How did this work out for you? What did you use to joint/finish the non-tiled areas? Did you skim coat with joint compound and paint? Is your finished surface holding up well? I am worried about spending all of this time and $ on a bathroom just to have it end up looking amateur where we don’t have tile. Thanks again!
Hi Tracy!
Thanks for using the site and thanks for the positive feedback.
We used tile backer board for our entire bathroom – ceiling, walls (and floor on top of plywood). We tiled the walk-in shower and behind the sink and toilet, and painted everything else.
It was a great way to do it. For a bit more money, you get the absolute best wall covering for a very challenging environment. I would also recommend a high-quality bathroom exhaust fan (I like Panasonic – very quiet and functional, also buy a digital fan countdown timer to wire to fan to (see in the below photos) – it allows the fan to run for a set time after you leave the bathroom – awesome!.
We used a mix of Hardiebacker and Backerboard by Certainteed. Both have a smooth finish, making finishing and painting them much easier. I would not use straight up cement board unless you plan to skim coat it for a smooth finish. As you can see in the photos, we fastened the bathroom wall backer board panels to the studs with roofing nails (for the shower we used screws, but later switched to roofing nails as it was much easier and left a smoother finish).
After the panels had been installed, we used a fortified (latex added) tile thinset with an appropriate fiberglass mesh tape (check that the tape is designed to be used with tile thin set) for the seams.
Once the thin set was dry, we used drywall joint compound to smooth the walls, just like you would with standard drywall (apply, smooth, sand, repeat, etc.). After we were satisfied, we applied a high-quality drywall primer and a finish coat of a quality bathroom paint.
It has been several years and the walls look like new. I would totally do it again and cannot imagine using lesser products (green board) for such an important, difficult area of your home. This is especially true for smaller bathrooms that tend to have higher moisture content in use.
Good luck and feel free to upload a photo if you like.
Gary
CDIY
Thanks for the very detailed and helpful response. This is all making sense to me now. No doubt I will be referencing you often!
Sorry to keep bothering 🙂 I just saw some product called quick pitch that has the correct slope that would take the guesswork out. Any experience with that? Also, should epoxy grout be used or is that overkill? Since it is such a wet area I didn’t know if epoxy would be the best thing to use. I used a product from Home Depot recently called Fusion Pro which is a premium grout that doesn’t require a sealer and is pre-mixed and is supposed to be good for preventing mold and mildew. Since so much water will be hitting the grout I guess I just want to get it eight where it’s low maintenance and lasts a long time. Any thoughts about that?
In fact, thanks for the great questions, they provide excellent info for other readers as well.
Epoxy grout vs. traditional grout:
Epoxy grout is very different from traditional grout. Epoxy grout is an epoxy resin combined with a filler to create a very hard, smooth, permanent filler between tiles. Just like other epoxy compounds it is incredibly durable, stain-resistant and strong. It is also very waterproof and, therefore, does not require sealing. But, just like epoxy glue, it is very unforgiving as it dries and almost impossible to remove from tiles and other surfaces after it dries. Because of this and its’ relatively short working time, it can be difficult to work with, especially for beginners.
Aesthetically, it is also different. It dries to a very hard, smooth surface that gives the grout lines a shiny appearance compared to traditional grout.
Traditional grout is a mixture of portland cement with or without sand and other additives. Traditional grout is very forgiving and has a relatively long working time, depending on the specific product you are using. Latex and other additives add strength and durability and improvements in water resistance. Made up of cement, with or without added sand, traditional grout has a matte, grainy appearance similar to masonry in brick walls giving it a traditional feel.
Personally, I prefer and would recommend traditional, latex fortified grout. If you have larger tiles, you should likely use a sanded grout if you have small or very narrowly spaced tiles (like ours above), use an un-sanded grout. If you are concerned about water resistance, I would concentrate on waterproofing your tile backer board, as this is probably a much better way to protect your walls considering the eventual cracks, etc. in any tile / grout job.
Gary
CDIY
Thanks for the info. Perhaps you put plywood on the back? To make a box it makes sense to me. I was checking out some pre-fab options and ran across KBRS that makes tile basins, niches, and benches and such. Overall would be very expensive but I assumed you needed to be an expert for all of this. Now I think I can actually tackle it after reading all of this. I would imagine for the pain itself you’ve got maybe $100-$150 in it? A KBRS pre-fabricated basin is well over $800 for the size I would need.
I’m still just a bit confused about the slope and exactly how to get it right. I know it needs to slope down toward the drain, but if the drain is at .5 inches does that mean I should chalk a line all around the pan at about 1 inch? That way all the sides are level but slope down? Or would each side be a different height depending on how far it was from the drain? And I assume you do both mortar layers (the one under the liner and over the liner) following the same guidelines? I just got a little confused at that part and know it’s not a part I want to get wrong. Thanks!
Luke,
I just looked back over the images I have and found one showing the niche after I applied the paint-on waterproofing. I am fairly sure I the niche is framed on the sides by the studs and at the top and bottom by 2×4 horizontal blocking (I only had to add the top blocking as there already was blocking in the wall for the original wood paneling). I cut out pieces of backer board for the four sides. I believe these side pieces were spanned the full depth of the 2×4 wall cavity (3 1/2″).
The other side of this wall is finished with 1″ cedar vertical paneling, and I think I just pushed these pieces all the way back to the back side of this paneling. The back of the niche, I’m fairly sure is just pushed all the way back to this paneling as well. I may have mounted a piece of plywood behind it, but I don’t think you need one. I know I used a generous amount of latex fortified thin set to hold all the backer board pieces together. The thin set alone would be plenty strong to hold the back piece in place. Once all the pieces are in place; you can push thin set into all the seams and cracks to add strength.
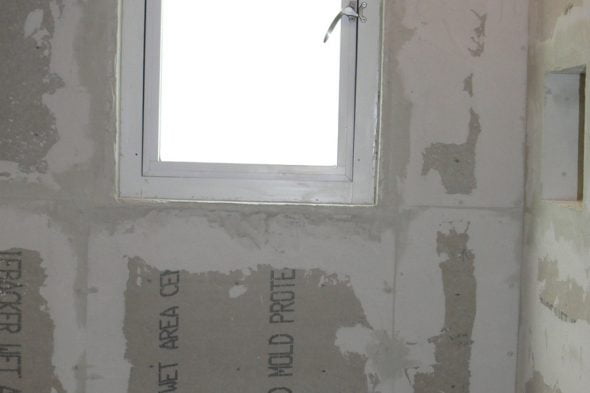
Once the thin set was dry, I added the paint on HydroBan. Don’t forget to slope the base toward the shower to drain water to the shower. You can add the slope when you install the tiles if you forget to slope the backer board. As you can see from the image below, the niche doesn’t have to be perfect, as the tiles will correct for squareness and flatness (depending on your tiles, but even so, you can flatten and square the niche walls when you install your tile, even if it is a small mosaic).
About the shower pan slope:
When you pour your first (initial) shower pan layer, it needs to be sloped. The recommended slope is 1/4″ or more of the height per foot of distance. To determine the height of the mortar on the walls of the shower measure the distance from the drain to the furthest wall. Take that distance in feet and multiple by .25″. Example: if you have a rectangular shower measuring 2′ x 4′ with a drain in the center, the longest distance from the drain to a wall will be 2′ (minus the size of the drain, but not important). Multiply 2′ by .25″ and you need a drop of at least .5″. So, on the wall 2′ from the drain the height of the mortar will be .5″ (1/2″) higher than the height of the drain. To get it right, place a 2′ level with one side on the edge of the drain and the other against the wall, and then mark the height level to the drain. From this mark add 1/2″ of height. This higher mark is the target for the mortar.
Since you will want a level bottom wall corner in your finished shower, you will need to carry this height all around the shower (just use your level). This means that on the shorter sides, the slope will be greater (in this example twice as steep). But, because the slope is relatively small, the difference in slope is not very noticeable as it is only 1/4″ different.
Once the first layer is cured and you have your shower liner installed over the dry first sloped mortar layer (above), the second layer just needs to be the same thickness throughout since the slope is already set by the first layer. In reality, many end up adding additional slope with the second layer as it often ends up being thicker at the walls than at the drain.
Here is an image showing the second layer of the shower pan – ignore the plumber butt boxer shot, but notice the wall markings for the target slope. This mark was a intentionally a bit high (more slope than 1/4″ per foot) but I used it just as a guide: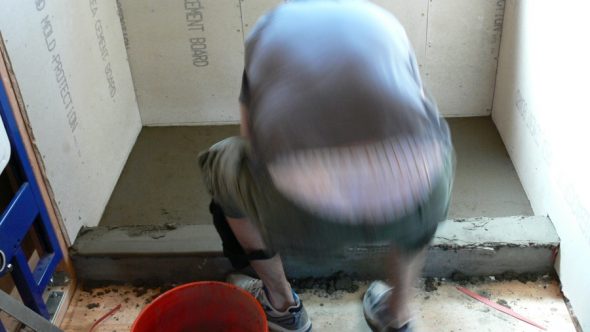
Even with a bit of an uneven slope as seen above with the shower pan and seen here with the dry shower pan and thinset applied to the backer board seams, you can easily make up for any imperfects when you install the tile.
Sorry I don’t have better pictures, some of my earlier projects suffered from a relative lack of good images. Feel free to stay in touch when you are working on your shower. Good luck and enjoy, I think you will be surprised how nice a shower you can make.
Gary
CDIY
These are fantastic tutorials. It will be a year or 2 before I do this but I plan to save these tutorials for future reference. I actually feel like I can do it now. I’m sure questions will pop up as I install, by one I have now is regarding the niche. Did you use a pre-made niche or frame it yourself and cover it with the cement board? If you framed it, how did you do it? Thanks!
Hey Luke,
Thanks for the positive feedback!
I created the niche using backer board pieces screwed to a framed box made in the stud cavity of the wall. I added horizontal 2×4 pieces for the top and bottom of the enclosure. I will have to look at some photos to see if I added any wood behind the rear “wall” piece of backer board – I may have just fit it and secured with thinset (I will check). I then added fiberglass tape to all corners followed by thinset. Once the thinset was dry, I applied several coats of paint-on water proofing (Hydro-Ban).
I will see if I have some better photos of the process.
Gary
CDIY
Hi there,
we an old glass shower cabin that is a ready made one. There are mold issues around and we have a feeling that we need to replace it or build the new one. all your instructions are quite clear… one thing that I did not get – how to install the lass? is it possible to use the glass that we have as pert of the existing shower?
what to use to hold the glass panels?
thank you
Hi Sandy,
Thanks for using our site. I apologize for the lack of info regarding the glass door and panel install. The reason I did not include any info is that we used a professional glass company to install the shower glass.
I have installed shower glass in the past, but with the small additional cost for the install (which is typically included with glass purchase, especially “heavy” glass), it make less sense to install the glass yourself as a DIY project.
That said, if you have glass that would fit the space, it may be fairly straight forward to re-install the glass (depending on the type of glass and hardware you have).
If you have a slider door system, there is typically a header bar or track to mount at either end of the shower entrance with a guide track at the base. This system should be relatively easy to remove and re-install. It will likely have a bracket at either end of the top header bar that screws into the wall. Before you try and get to these brackets, you should probably remove the sliding glass panels. The panels likely have a mounted wheel at the top that rests in a track inside the top bar. To remove try lifting the panels and shifting them out of the track which should allow you to remove them one by one. Once the panels are out, the top bar should be fairly straight forward to remove — either screws on the ends that are now visible with the panels out, or mounting brackets that support the bar. Try lifting the bar up – if there are mounting bracket the bar may just be hung on these brackets which will be exposed when the bar is lifted off. The guide tract at the bottom of the door is likely screwed down at intervals into the floor and / or attached with silicone caulk. Remove the screws as needed, cut or score the silicone caulk with a blade and the track should be removable.
If you are dealing with a swinging door system, the door is typically attached by hinges that use screws to mount. Fixed panels are often attached to the wall using “U” shaped tracks (glazing tracks) screwed and / or siliconed to the wall, floor and ceiling which the glass sits in (this is the system our shower above uses). The glass is typically secured in these tracks with rubber seals or silicone caulk.
It would be helpful if you could reply with an image of your doors to help guide any recommendations from my or any of our visitors. It would be very helpful if you could find the Make and model of the system you have and look for any documentation on the internet.
Good luck. Reply with an image if you can using the “Chosse File” link below to upload an image of your system if you like.
Hi there, what a great tutorial, it looks fantastic! Could you please confirm the grout color? Poly blend }11 Snow White? Thanks!!
Thanks for the feedback. Actually, for the grout I believe we used Polyblend #381 Bright White for the subway tile the shower. The snow white we used on the floor (i will correct this in the article, although either would look great).