Installing beadboard ceilings in your cabin or home is an easy way to add vintage-feel and character and an easy way to cover up old, ugly or boring ceilings. Our cabin’s main living space has a terrific exposed-beam vaulted ceiling, but the remaining rooms had really boring painted drywall ceilings.
We converted the boring ceilings to charming beaded board ceilings by installing 1″ beading pine tongue and groove boards and the results were terrific. This article gives a bit of info about different methods of creating a beadboard finishes and walks through our ceiling beadboard install at our cabin.

How to add authentic beadboard ceilings to your home
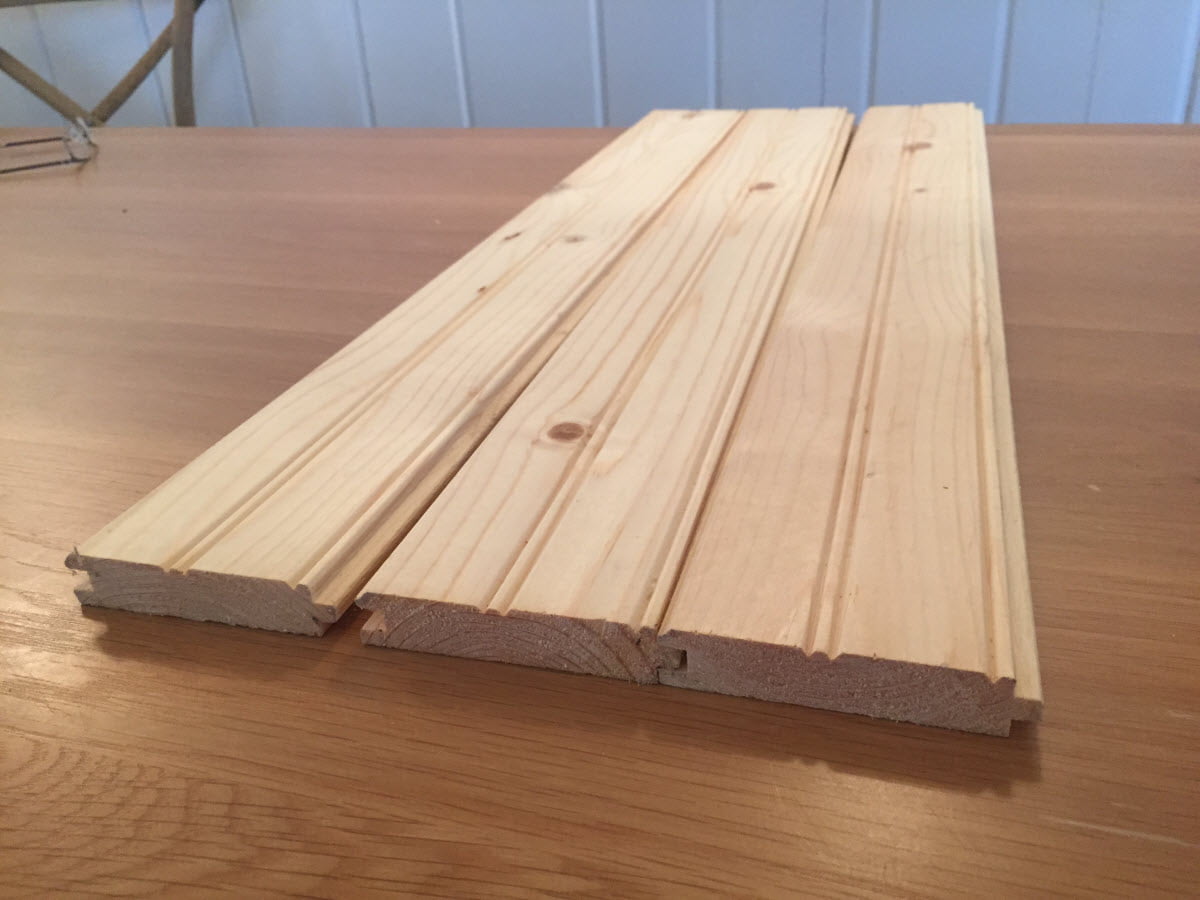
Traditionally, beadboard finishes are built using individual tongue and groove boards beaded boards. Today, beadboard surfaces can be created using a few different products, including traditional solid wood boards and beaded panels.
Beadboard-patterned panels are one way to create beadboard finishes.
While I strongly prefer using individual tongue and groove beaded boards, manufactured panels offer speed and cost savings. The trade off is a slightly generic, “too perfect” look that lacks the character, depth and feel of true beadboard created from individual boards.
That said, there may be installations that benefit from thinner, lighter beadboard panels.
These panelized products, especially those that are resistant to moisture, may perform better in certain environments or under certain building constraints. Many are lighter and easier to install too.
Choosing Between Tongue and Groove Beaded Boards vs. Beadboard Patterned Panels
| T&G Beaded Boards | Beadboard Patterned Paneling | |
| Appearance | vintage, authentic, varied | contemporary, manufactured, uniform |
| Made Out Of | solid wood – pine, oak, others | fiberboard, MDF, polymers |
| Product Size | individual boards – 3″, 4″,6″ & 8″ widths common | larger planks and panels |
| Thickness | 3/8″ – 1″ common | 1/8″ – 1/4″ common |
| Cost per sf | $1.5 – $5+ depending on species and grade | $0.5 – $4 |
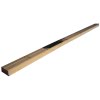
Beaded tongue and groove boards are available in a variety of dimensions, and are made from an assortment of wood species (pine is common), engineered wood and polymers. For my project, I used 3/4″ x 4″ x 12′ pine beaded boards purchased from my local lumber yard.
Considerations When Using Tongue and Groove Beaded Boards for Beadboard
Compared to using manufactured beaded panels, solid wood boards require a few considerations prior to installation. Here are a few:
Solid wood beaded boards, like any solid wood product, should be moisture stable and acclimated to the environment you plan to install it in.Purchase kiln dried products and allow them to acclimate to you home prior to install.
Consider the timing of installation if your climate and home have significant seasonal humidity variations.Boards installed during drier months will tend to expand during more humid ones and vice-versa. Plan accordingly, but allowing adequate expansion gaps for changes in humidity and anticipate board contraction during dryer times.
Primers and preliminary coats of clear finishes can and should be applied prior to installation when possible. Pre-applied finishes help protect and stabilize boards.
For much of my board and batten ceiling install, I first applied several coats of primer to all sides of the boards prior to installing.Then, after installing the boards, I only needed to apply a finish coat to ceiling. Pre-finishing tongue and groove boards are also beneficial in preventing the boards from showing unfinished tongue and groove surfaces if boards expand and contract with seasonal changes in humidity.
Solid wood boards will expand and contract more than manufactured products with changes in humidity. Consider the environment when planning your beadboard finishes.
In bathrooms and other high humidity environments, solid boards may not be the best choice. If you do plan to install solid wood boards in these areas, the boards should be well sealed on all six sides to help protect them from moisture. Choosing a wood species that performs well in humid conditions may also be helpful (teak, cedar, others).In high-humidity environments, consider alternative products instead of solid wood.
Manufactured exterior grade beadboard planks and paneling that may perform better. You may also consider avoiding wood finishes (like beadboard) in these areas. Although we added beadboard to our kitchen, bedroom and porch ceilings, we skipped it in our bathroom.
Solid wood boards may require more substantial fastening compared to paneling. Thinner, lighter panels, with greater dimensional stability can often be installed with construction adhesive. Heavier, thicker individual boards are typically nailed, and installed perpendicular to framing studs. While running beaded boards perpendicular to ceiling studs is usually not a problem, it offers challenges for a wainscot style application on walls.
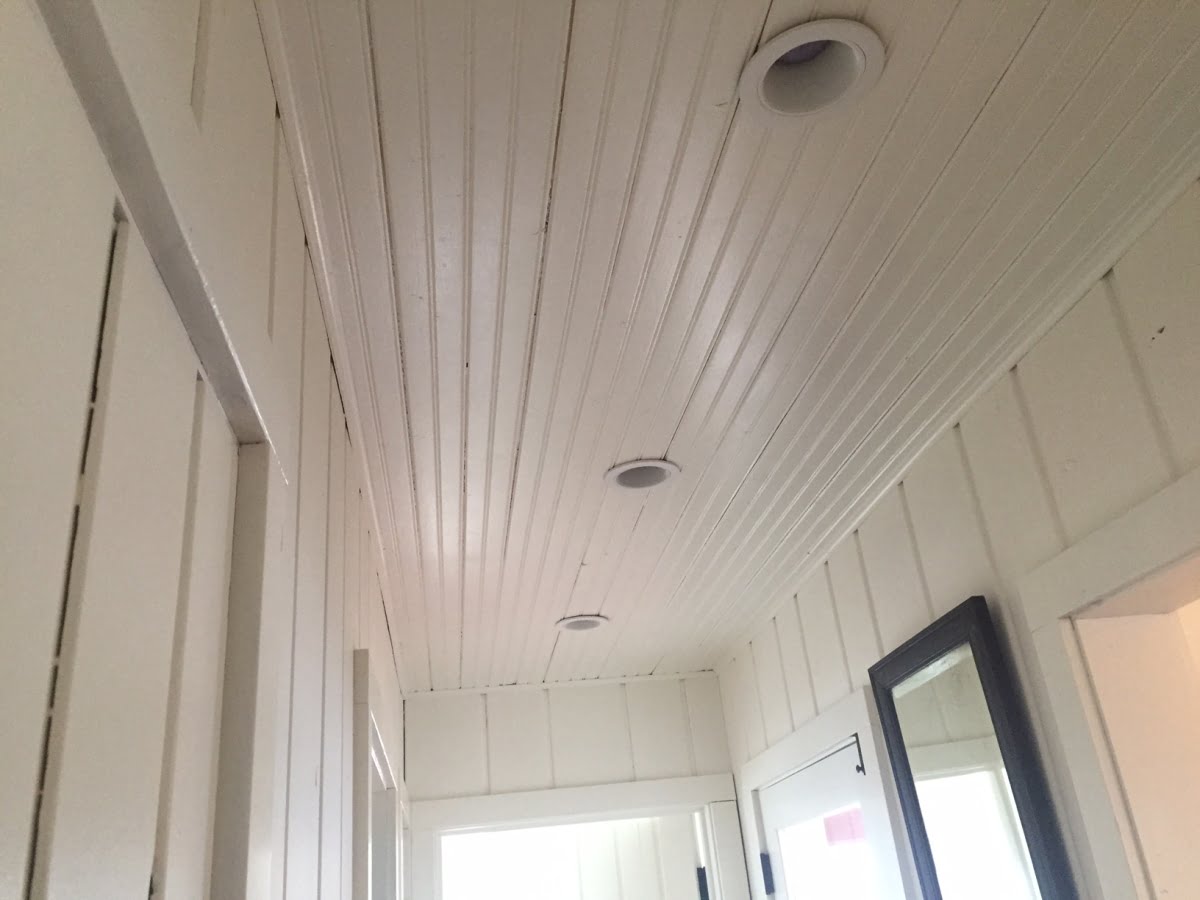
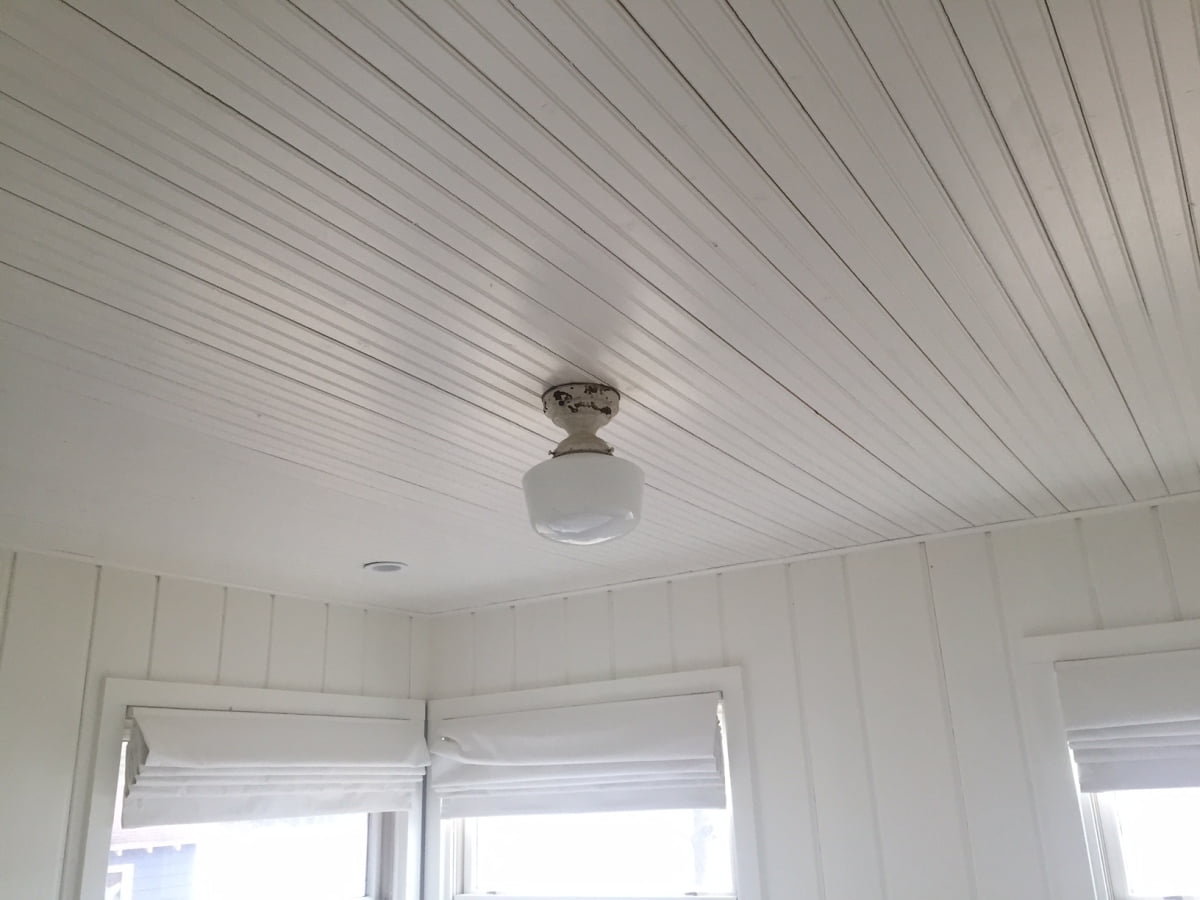
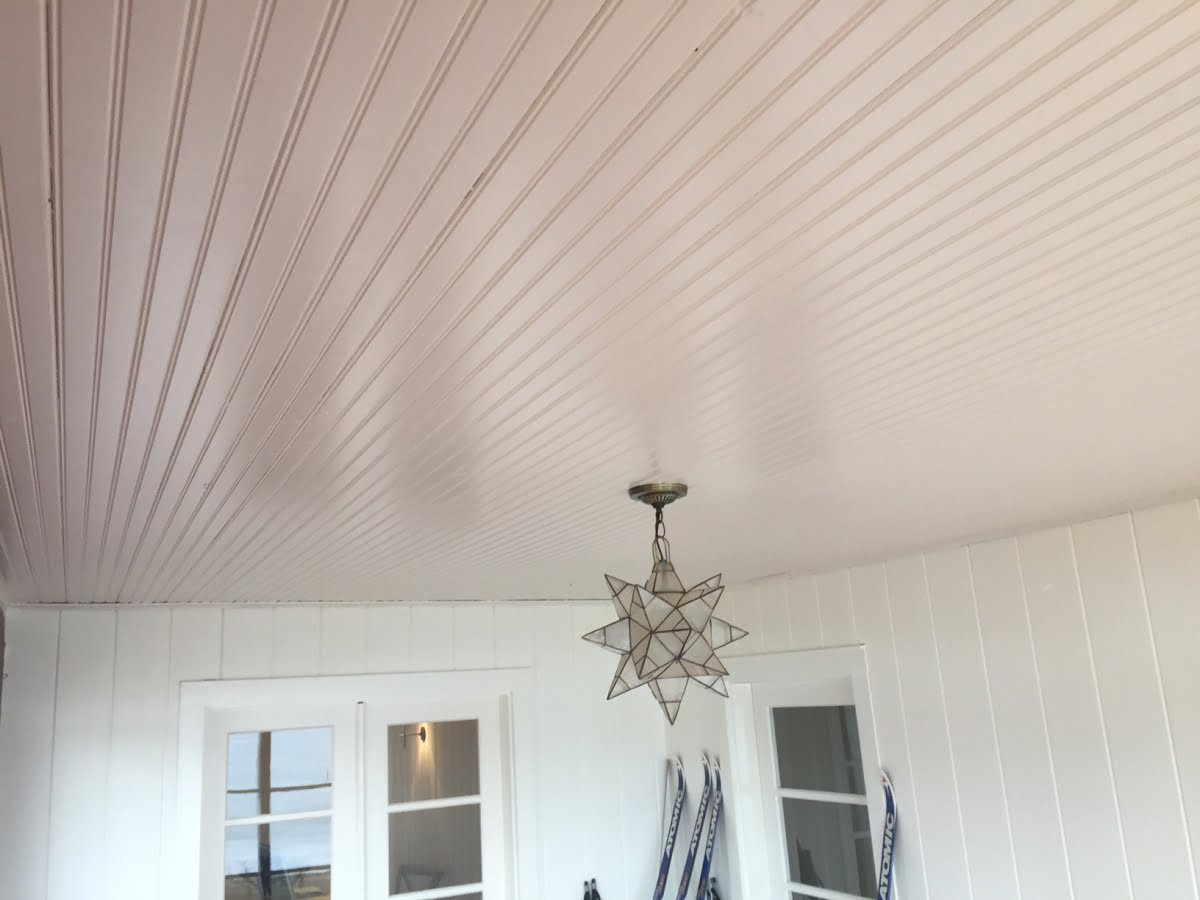
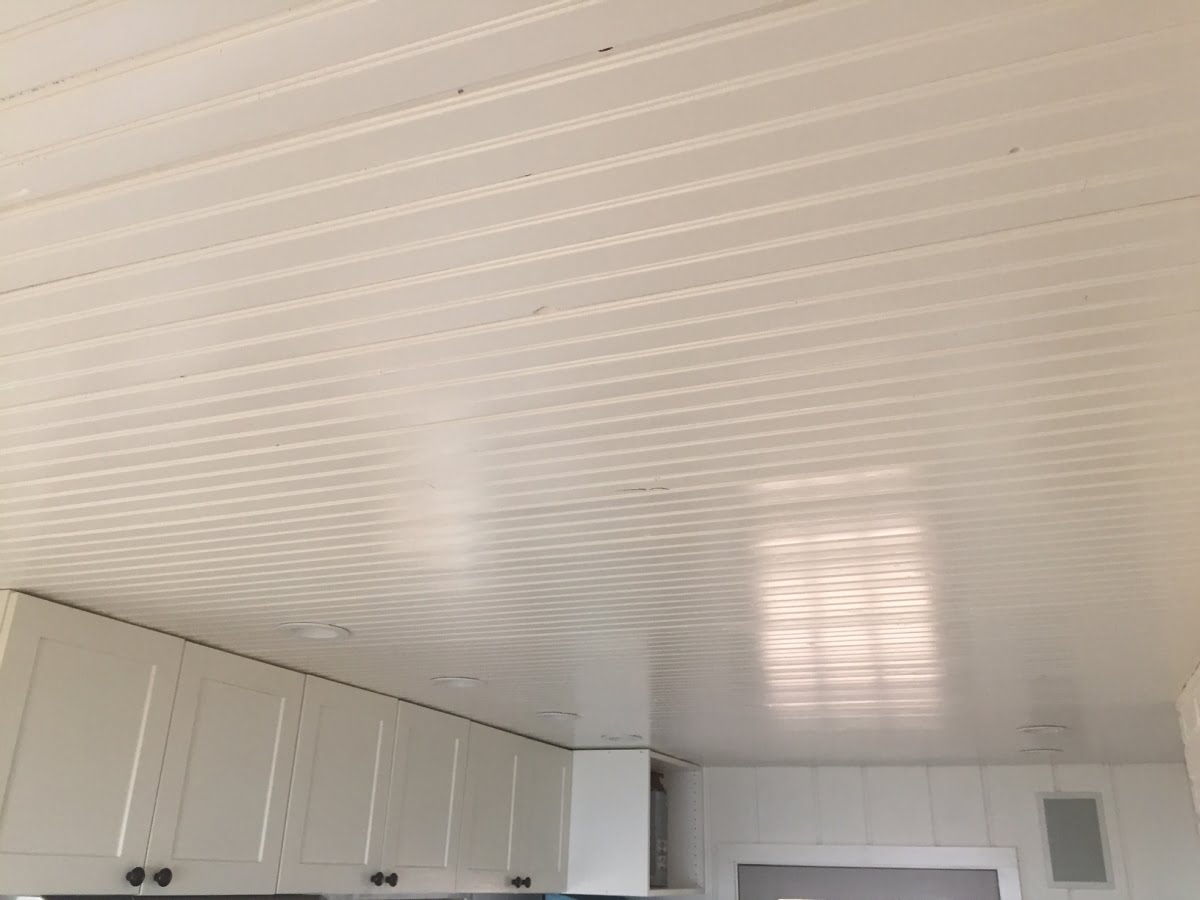
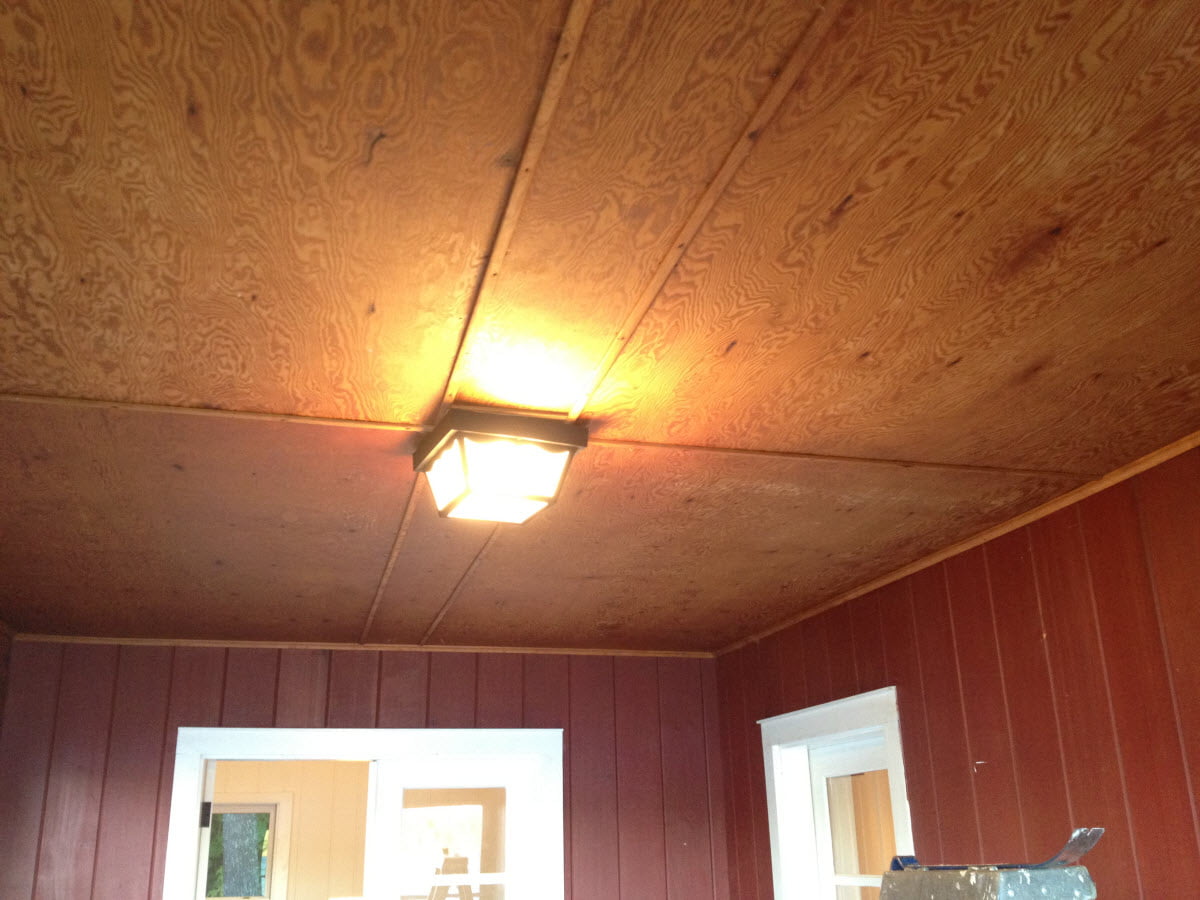
Beaded Ceilings Installed in Kitchen, Bedrooms and Porch
Initially, we wanted to install beadboard ceilings in our bedrooms. Once they were up, we couldn’t get enough, and we added them to our kitchen and porch ceilings as well.
Here are a few images of our mostly finished beadboard ceilings, with some before and after beadboard ceilings:
After Beadboard Ceilings
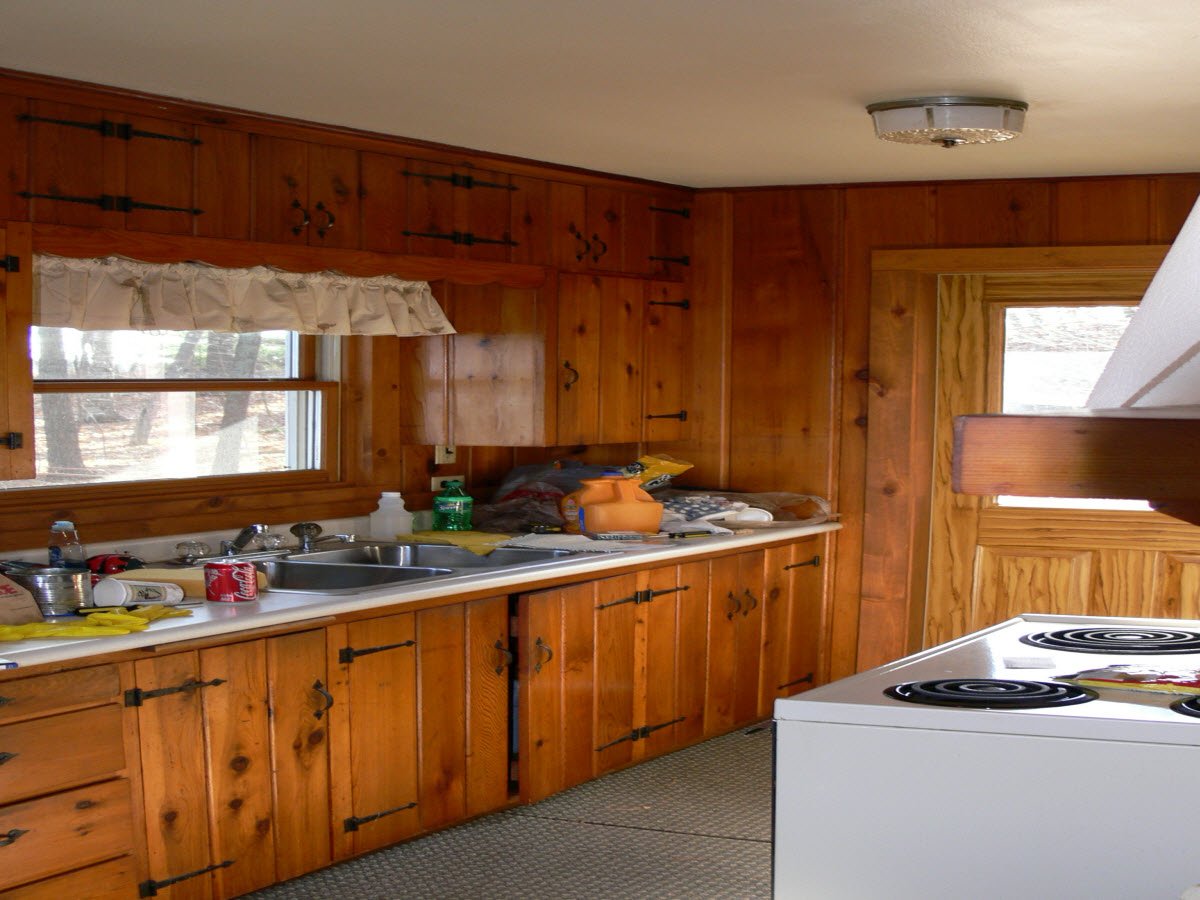
Before Beadboard Ceilings
Installing the tongue and groove beaded boards was fairly straightforward. I did it most of it myself, with the exception of the kitchen where my dad helped. I think the results were excellent and after many years, the ceilings look as good as they did immediately after they went up.
If you are looking for a easy way to add some charm and character to your ceilings, this is a good option. Here is the summary of our project and the steps we used.
OVERVIEW | Beadboard Ceiling
SUPPLIES LIST | Beadboard Ceiling


TOOLS LIST | Beadboard Ceiling


STEPS | Beadboard Ceiling
- Gather Materials and Tools
Obtain the material you plan to use for the beadboard. If using individual tongue and groove boards, consider painting all six sides of the material before installing. I primed the 3/4″ x 4″ pine beaded tongue and groove boards prior to installing them. This is important if using tongue and groove boards as they will respond to seasonal changes in humidity and temperature, possibly exposing unpainted portions of the board with movement.
If using individual tongue and groove boards, order material long enough to avoid end-to-end board seams if possible. Some material may have tongue and groove on the ends as well (“end-matched”) and allow for easier and more stable end-to-end joints. Tongue and groove beaded boards are typically available in lengths up to 16′ and are sold by most lumber retailers.
To calculate the amount of material to order, remember that 4″ beaded tongue and groove boards provide only 3 1/2″ of a finished surface due to the tongue and groove joint. Order a bit extra to cover for damaged boards and waste. You can always return unused boards.
To fasten the boards, I used a pneumatic Bostitch 16 gauge finish nailer with 2″ 16 gauge finishing nails. I highly recommend using a pneumatic nailer if installing individual tongue and groove boards, as it will set nails just below the board surface without the need to manually set the finishing nail head. The nailer saves a lot of time and work.


- Pre-Finish, Pre-Prime or Back-Prime the Boards Prior to Install if Possible
To preserve the appearance and life of your beadboard ceiling project, consider finishing or at least priming the boards prior to installing them. Sealed boards last longer and have better dimensional stability.
Its also often a lot easy to apply primer or finish to the boards prior to installing them. And boards that have been primed or prefinished are much easier and quicker to paint once installed. Painting bare wood ceiling boards after the install in not that fun. Having the boards pre-painted will also allow for expansion and contraction of the boards without revealing bare wood surfaces.


- Plan the Board Install
Determine the direction and location of the ceiling joists. The beadboard ceiling boards should be installed perpendicular (90-degree angle to) to the ceiling joists.
This orientation allows each ceiling board to be nailed to each of the ceiling joists. Using a stud finder or other method, locate and mark your ceiling joists prior to beginning board installation. Use a caulk line or straight edge to mark the location of all joists on the entire length of the ceiling.


- Install the Beadboard Tongue and Groove Boards
Beginning at the wall on one end of the ceiling, start installing the tongue and groove boards. Remember that you will be installing the boards perpendicular to the ceiling joists, so pick the starting wall accordingly.
Install the first board tongue out with the groove side of the board facing the wall. Leave a slight expansion gap (1/4″ or so) between the groove side of the board and the wall. An expansion gap at the finished tongue-end of the ceiling is less important because of the expansion between the tongue and groove joints of the installed boards.
To install the first board, center the board left to right, with equal expansion gap on either side of the board. Square the board with the side walls, and nail the board in place.
For the first board, face nail the starting edge of the board (groove side) next to the wall. These nails pass directly through the face of the board perpendicular to the board surface. Then blind nail the tongue, align your nailer (or nail if hand nailing) at a 45-degree angle through the base of the tongue directed back under the board.


- Install the Last Few Boards
When you get close to the end of the ceiling with the limited remaining space left, you will no longer be able to use a hammer and tap-board to tighten the boards. Instead, use a pry bar against the wall and the tapping board to draw the boards tight prior to nailing.
When you reach the end of the ceiling and the last board, you will likely need to rip (cut lengthwise) the board to fit the remaining space. To do so first measure the needed width to fill in the final gap minus any expansion gap you plan to leave (if any). Then, cut a piece of beaded board lengthwise after measuring and marking the proper width. Don’t forget to consider the tongue and groove joint when making and marking this width.
To make it easier to rip the final board, join the piece to be cut into another tongue and groove board. I then screw the stabilizing tongue and groove board to my saw horse using deck screws – just my way of doing it.
Now install this last board as you did the first, face-nailing the wall side. If the last piece is narrow, join the second to the last board to the final ripped board and install together. Use the wall to tighten the boards then face nail the final piece.


- Finish the Installed Beadboard Ceiling with Paint or Stain
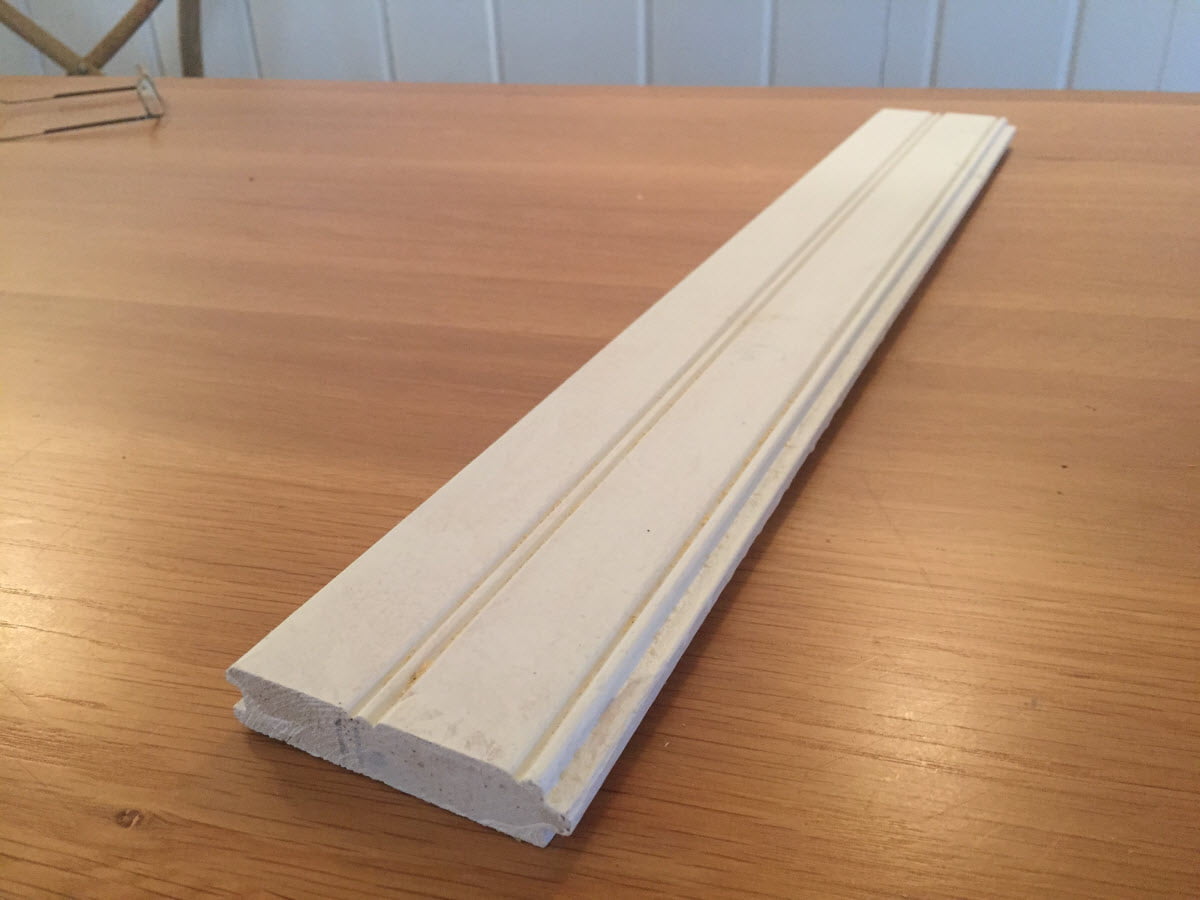
After the boards are installed, paint or finish as desired. We painted the beadboard ceilings with Benjamin Moore Advance waterborne alkyd indoor paint. With the boards already primed, the finish coats went on very easily. I added two coats of the above finish paint on top of the pre-primed installed beaded boards using a 6 1/2″ Wooster mini roller with a 3/8″ nap.


- Install Trim at the Wall-Ceiling Junctions
To cover the expansion gap between the ceiling and the walls and to finish the covers, add trim. There are many different trim options. We chose a simple 3/4″ quarter round trim.
Similar to the beaded boards, I primed the trim prior to installing it. Use finish nails or the same finish nailer set up to install the trim. Nails should be slightly countersunk and covered with a filler or caulk.


IMAGE GALLERY | Beadboard Ceiling


In your kitchen installation, did you intentionally eave a gap in between some of the individual boards ot give it an authentic vintage look? Im redoing a 1925 ceiling with v groove and the thing I like most is when the boards move slightly over time for uneven seams. Does this happen naturally or did you use a dime or nickel to leave spaces on purpose?
thanks!
Hi Brian,
No, I didn’t intentionally leave gaps between the boards. It does seem to happen on it’s own though, and highlights the importance of prefinishing the boards to avoid exposing unfinished surfaces with any movement.
G
Hi again,
I’m still struggling with this project and I can only assume it’s due to the poor quality of the wood I got from a big box DIY store. The first 5 boards went in very smoothly. However that was it. Every other board does just not want to cooperate. If I get one side of the groove over the tongue of the previous board, the other end of the board just pops out…the boards are just crooked it seems and I’m almost at the point of throwing in the towel. Did you encounter a lot of crooked boards as well or is this purely a result of getting them from a big box store and not a lumber yard?
Thanks,
Derek
Hi Derek,
My paneling was already installed and is thicker cedar. If you are having trouble with crooked boards not lining up well, I would recommend inserting and fastening one end of the board (top or bottom) first, then work your way down or up the board, progressively fastening as you go to straighten the boards as you install.
The moisture content of the paneling may also be an issue and the boards may benefit from a period of acclimation to your home prior to installing.
Sorry you are having difficulty. It may be worth finding some better quality paneling from a local lumber yard.
Gary
Hi there!
Great article! I’m in the process of installing T&G pine breadboard on our patio ceiling. I’m still in the very painful process of staining the pieces and have learnt a lot from your post. I live in FL and exterior walls are stucco on concrete block. Given that I’m using pine and it’s a humid climate, I know I need to leave some room for the wood to expand. My question is how/where to attach the trim pieces. Do I nail them into the ceiling boards or attach them with liquid nails to the walls? If the trim is made from wood…wouldn’t these pieces also expand and contract? So how do you avoid gaps if trim also “shifts”.
Thanks so much for your insights!
Hi Derek,
Congrats on the project and thanks for using our site. Regarding the trim (and I am assuming we are speaking about ceiling molding at the corner interface of the ceiling T&G boards and the wall – for example, ceiling cove molding), I would recommend nailing at the center of the molding with the nail aimed at a 45 degree angle back into the ceiling framing, avoiding the T&G boards. This way the T&G boards are free to move under the molding. This technique is probably most important when covering the ends of the T&G boards, since molding running parallel to and attached to a single T&G board should not influence movement across the ceiling as the boards are free to expand and contract within the tongue and groove intersections.
I would not glue the boards if possible, especially at the two sides covering the T&G board ends as it may also restrict board movement and likely pull the molding away from the walls. If you needed to use glue, I would use care just to glue the edge of the molding against the walls and leave the surface covering the ceiling T&G boards unglued to allow for board movement.
The T&G boards do move, but depending on the style of molding you plan to use, there should be sufficient coverage to avoid gaps with board movement.
The best advice I can give is to carefully prime all six surfaces of the T&G boards before installing them. I actually applied 2 coats of the excellent shellac primer, BIN Zinsser.
Not only will the primer greatly prolong the life of your Tongue and Groove ceiling, but it will also limit some of the movement of the boards due to moisture and temperature changes. And, if you plan to finish paint your ceiling white, it will hide the raw wood that otherwise might have shown with movement at the tongue and groove joints.
Good luck, and feel free to upload some images,
G@CDIY
Hi Gary!
Thanks for the quick feedback and additional insights!
I’m going to take you up on your offer to upload some pictures…because, while I do understand what you recommended, I’m just not sure I’m able to implement in my situation…so perhaps you have some other pointers 🙂
It’s dark out already…and I didn’t want to wait to send the images…so I mocked up the current situation.
The first image shows the patio ceiling I’m working with. The red dotted lines are the joists and the blue lines is my current placements of 1×2 pressure treated strips. These are screwed into the joists with 3 in deck screws at the intersections. I opted to do this because I needed the beadboards to run parallel to the joists….for aesthetics as I could fit a full 10′ board across shorter distance in one piece…rather than having to run multiple boards with miter cuts length-wise etc.
In any case, this isn’t the issue really, the issue is where you see the big exclamation mark. I wasn’t able to fit a furring strip right to the edge of the ceiling on the left side. Lord knows I tried…but I believe my efforts were in vain because the joists are attached with joist hangers/brackets (2nd pic is what I think I’m up against)…which meant I kept trying to screw my deck screws into metal brackets..which didn’t work out so well. So, I had to leave a 2-3 ” gap on that side. This also means that I won’t be able to use your advice (on that side) in terms of shooting a nail through molding into the furring strip while also avoiding the T&Gs…
That’s why I was wondering if gluing the molding to the side wall (not to the ceiling) right below the T&Gs would work best…?
As far as preparing the wood…I’ve given the boards 2 coats of semi-transparent deck stain on all sides…including inside the grooves and on the tongues….that’s why I said it has been very painful thus far. I plan to roll on a satin clear coat of some sort after they’re all up as well.
My ultimate goal is for it all to look like the 3rd pic…I’m not giving up just quite yet! 🙂
Thanks again for all your advice!
Best regards,
Derek
I live in a house built in 1906. The front and side porches are made with 4″ beadboard on the floor and ceilings. I have had to replace the floor pieces many times over the last 12 years because of rot. I have primed each board before application. Is this an incorrect use of this wood on the floor, and do you have any suggestions? Thanks in advance.
Hi Jim,
Thanks for the question. What you probably have is wood flooring (often douglas fir) with “V” grooves between board for water drainage.
Porches with flooring boards running perpendicular to the exterior wall of the home are often pitched away from the home with grooves to help facilitate water drainage.
If you continue to use this type of flooring, priming the boards on all 6 sides is important. You will also need to keep the the finish fresh, especially if your floors are exposed to the elements and sun.
If you are looking for additional options for your porch flooring, you could consider a different species of wood. There are many species that would likely last longer in this challenging environment. Teak, ipe, white oak, redwood and few others might give you better results. Ipe is an incredible wood from Central and South America that is fairly inexpensive, and will last for decades.
You may also consider using a synthetic material for the flooring. There are many products that are used for decks that may work well for your porch.
If you are planning to remove the existing flooring and start from scratch, I would consider treating the porch floor more like a deck and treat it accordingly with gapped floor boards that allow for air circulation and drying.
Good luck, upload a photo if you like.
Gary
As far as a recommendation for your porch flooring, I would attempt to figure out why the flooring is failing and proceed accordingly. If I had to guess, I would assume the flooring is exposed to moisture – either from below or exposure to the outside. To remedy moisture issues from below the flooring, I would consider adding some exterior grade sheathing and a moisture barrier.
If you were to remove all the current flooring to the flooring joists of the porch and start fresh
Thanks for this super-clear explanation. A question: Could I use brads rather finish nails? I’m thinking nailing through the tongue with narrow brads would likely lead to less splitting. But I’m not sure if they would secure the beadboard properly.
Can I install breadboard on the ceiling if I do not have drywall yet? I have the room roughed in with joists and insulation. That is all. Just didn’t know if I could nail it directly to the joists.
Hi April,
Yes, you can install a beadboard ceiling directly over the interior ceiling studs. You may or may not want to install a moisture retarder or barrier first, depending on your climate and the nature of the space above the ceiling you are finishing. If the space above the ceiling to be beadboarded is a conditioned living space (like an upstairs room), a moisture barrier is less important.
Even if you do not need a barrier to prevent moisture passage, installing a moisture barrier product will limit air movement through the ceiling. The importance of limiting air movement through your ceiling again depends on many factors, with the most important probably being the nature of the space above the ceiling. If this space is a ventilated unfinished attic, for example, then a barrier to help limit air movement between the attic and the room you are finishing is more important.
You noted that there is insulation in the ceiling, and if the insulation has a kraft paper backing, this will serve as a moisture retarder and will help limit air movement depending on the details of how it was installed.
When you install the beadboard, plan the installation of the boards to be perpendicular to the ceiling joists to allow fastening of each board or panel.
Enjoy the project and feel free to upload an image.
Gary
How long should it take to install 1800 square feet of beadboard on a ceiling
Hi Roly,
Thanks for visiting and thanks for the question.
The time required to install beadboard depends on so many variables it would be hard to guess. If you have the material ready to go and all the tools (nailer, compressor, a decent power miter saw, ladders, planks, etc) and someone helping, I would guess you could get it up in a few days. The biggest variable is the type of material you plan to use. If you do it like I did with individual boards, it will obviously take longer compared to larger panel material.
You can speed up your beadboard install by having your material finished prior to installing it. I primed all six sides of the material prior to installing it. This is especially important if you plan to paint the beadboard ceiling after the install. Remember that individual boards of your beadboard ceiling will expand and contract seasonally exposing more or less of the tongue and groove seems between boards. If you plan to paint the boards, it is a good idea to get at least one coat on prior to installing the boards. If you do paint the boards prior to installing them, use care not to obstruct the groove or build up the tongue too much as to interfere with the tongue and groove interface of the boards.
In addition to having the material pre-finished, you can cut the boards to width before installation day, saving trips to the saw between each board. Remember to gap the walls by 1/4″ – 3/8″ or more depending on the run of the material, your climate and the trim you plan to use to cover the perimeter. I recommend a power compound miter saw if you can get one — even a inexpensive 10″ model will save time and produce infinitely better results compared to a circular saw. Also, a pneumatic nailer and appropriate compressor is a huge time saver compared to hand nailing.
One more thing, a decent length plank, run between step ladders is another time saver. Finding a way to move the distance of the ceiling without having to move ladders will save a bunch of time and effort.
Enjoy the project. Feel free to upload some photos if you have time.
Gary
Nice explanation – took you a bit of time to explain it very well – and you did. Thank you.
Chuck