Like many cabins and homes built in the 1950s, our cabin has a dirt crawl space. And, like many dirt crawl spaces, ours is a damp, musty, fairly disgusting place. To fix our crawlspace water issues, I was going to need to install a sump basin and pump. This is how I did it in our dirt cabin crawl space.
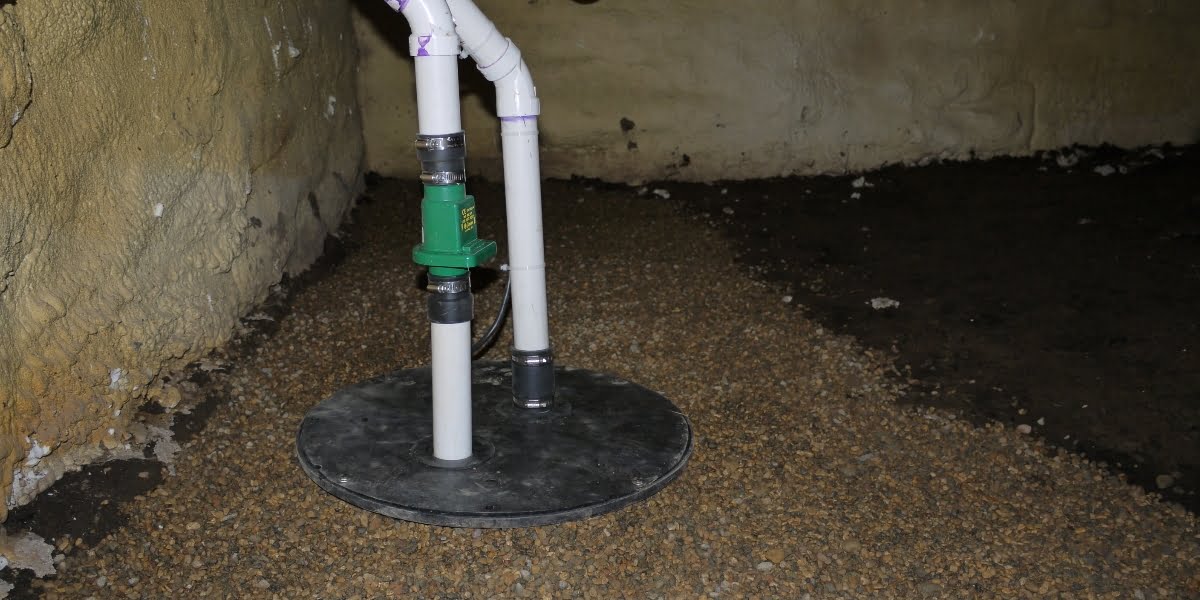
Crawl Space Sump Pump Install - How to install
The first time I ventured into our cabin crawl space, there was standing water in the space. Not good. Knowing that the ideal crawlspace mimics that of the conditioned living space of your home, I knew I had a lot of work to do, and that a sump pump install was just the beginning.
The perfect crawl space is clean, dry and sealed. Ours was not. To remedy our sick crawl space, I planned to first address the standing water and after, install a vapor barrier over the crawl space to further reduce moisture and soil gas transmission into our living space.
Crawl spaces often have several reasons for excess moisture. Our crawl space was no exception. The floor of the space was very close to the existing water level, we have no rain gutters on our cabin, and much of the yard slopes improperly toward the home. All of these issues need attention, but to start, I plan to add a sump pump to get the current water out of the space.
Common Causes of a Wet Crawl Space or Basement:
- Floor of space lower than ground water level
- Roof run-off and rain entering space (no gutters, blocked or leaking gutters, slope issues)
- Condensation of moisture from humid air in space (ventilated crawl spaces, condensation on cool surfaces or ducts)
- Lack of moisture barrier between soil and space
- Leaking plumbing
The above illustrates many of the issues contributing to our damp crawl space. Installation of a sump pump is a fairly straightforward project. Read on to see how I installed a sump pump in our cabin crawl space.
OVERVIEW | Crawl space sump pump install in a dirt crawlspace
SUPPLIES LIST | Crawl space sump pump install in a dirt crawlspace
TOOLS LIST | Crawl space sump pump install in a dirt crawlspace
STEPS | Crawl space sump pump install in a dirt crawlspace
- Organize tools and supplies
Gather sump basin, sump pump, sump check valve, drain tile, aggregate, tools, plumbing materials, and light source.
- Prepare your crawl space and choose a sump basin location
Access your crawl space and remove debris, old lumber, and trash.
Survey the crawl space to determine the best sump basin location. In general, locate the basin in the lowest portion of the crawl space where water tends to accumulate in the space.
In addition, consider a location that allows for easy access, unit servicing and drain tile connections. For this project, I located the sump at the lowest point in my crawl space, where I had previously found standing water.
- Plan drain tile layout (if using)
Drain tile pipe is not necessary for a sump pump system, but using it will allow water to drain quicker from a large area.
In order for your sump pump setup to move water out of the crawl space, water must have a way to enter the sump basin. A simple system could just use an open sump pit or basin installed below the desired water level that allowed water to flow into the top of the basin or pit and pumped out via the sump pump.
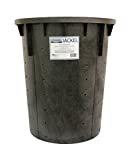
For practical purposes and safety, most sump pits are not open and use a lid to cover the basin. Holes can be drilled in the cover or sides of the basin to allow water to enter while still providing the benefits of a “covered” system. In this install I did drill holes in the lower portion of the sump basin to allow water next to the basin to enter.
Drain tile can be added to the system to help drain more distant areas and carry that water back to the sump basin. To set up drain tile, consider which areas of the space you would like drained and plan to install corrugated or solid drain tile from that area back to the sump basin.
For this project, most of the water was concentrated at one end of the crawl space, so I started with installing drain tile just in this area. The corrugated drain pipe tile system I used will easily allow expansion of the system later if I so choose.
- Dig sump basin hole and trench for drain tile (if using)
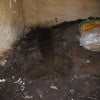
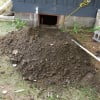
At the desired location of your sump basin, begin digging a hole large enough to accommodate the sump basin and with enough extra room to allow for rock aggregate placement under and around the sump basin.
If you are using drain tiles, create trenches for the tile in the same manner – allowing enough space under and around the tile for rock aggregate. Remember to slope drain tile trenches toward the basin location to help water movement into the basin. The aggregate allows for easier water passage into the drain tile and sump basin.
If the sump basin you are using does not come with penetrations, consider drilling holes in the side and bottom of the sump basin to allow for direct water drainage into (and out of during dry periods) the sump basin.
Trench drain tile parallel to the foundation wall, 12 – 18″ away from the foundation. Dirt should not be disturbed next to foundation walls or footings and do not dig under these structures.
Foundation wall forces are distributed in parallel and at angles to the wall and its footings and undermining foundation wall support can compromise your structure and risk structural collapse. Generally, you should stay the same distance away from the footing as the height of that footing.
Contact a structural engineer if you have any concerns when digging in your crawl space — this is important!
- Prepare the sump basin for use
Many sump basins are ready to use as purchased. If you plan to allow passive movement of water into the basin without the aid of drain tile, make sure you add holes to the sides of the basin if not already present. Drilling holes in the bottom is good idea as well as it allows the basin to drain if the water level falls below the level of the basin.
If using drain tile, check for drain tile access holes at the sides of the basin. If not present, cut the appropriate size hole in the sides of the basin to allow for passage of the drain tile pipes. A hole saw bit and a heavy duty 1/2″ drill works well for this.
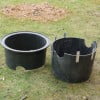
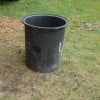
You should also check that you can get the sump basin into the crawl space through the access you have. In my case, the access was too small for a full size sump basin. I needed a way to get it into the crawl space, and decided to cut the basin into two halves and re-assembly once in the crawl space.
To allow for re-assembly of the sump basin, I attached 1/4″ aluminum stock and the waste discs from the tile access holes (they work perfectly as their profile matches the curve of the basin) with stainless sheet metal screws to one of the two halves prior to placing it in the crawl space.
- Install the sump basin and drain tile (if using)
Prior to placing the sump basin, place several inches of river rock or pea gravel as drainage aggregate at the bottom of the sump hole. Drainage aggregate can be anything from gravel to sand. Smaller aggregates are likely to be more stable, but tend to get into the drainage pipe and sump basin. Most find river rock or pea gravel work well.
Now place the sump basin in the hole on top of the aggregate layer. Next place and connect the drain tile pipe to the sides of the basin. Similar to the sump basin placement, place a layer of aggregate in the drain tile trenches prior to placing the drain tiles.
Once the drain tile is laid and passed into the sump basin, fill in the space around the sump basin and drain tile with additional aggregate. To help prevent aggregate passing into the drain tile, I covered my drain tile with aluminum screen. You can also purchase drain tile that comes covered with a fabric sock.
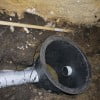
- Prepare and install sump pump in sump basin
Prepare the sump pump for use by attaching the first portion of the discharge PVC pipe. Cut a section of 1 1/2″ PVC (schedule 40) long enough to pass through the sump lid and allow for connection of the remainder of the discharge plumbing system.
Most pumps have a female threaded outlet and will require a male PVC threaded adapter on the pump side of the discharge plumbing. Also, most pump manufacturers recommend drilling a small hole in the side of the discharge pipe at a level just above the top of the pump to allow drainage of the discharge system after the pump cycle is complete.
With the attached discharge PVC, place the sump pump in the bottom of the sump basin. Make sure to clean out any debris and aggregate that might have collected in the sump basin during it’s placement.
The sump pump will sit in the bottom of the sump basin and discharge the accumulated water that enters the sump basin. Most pumps are activated by a float trigger and will not pump until the water level in the basin is high enough to trigger this float switch.

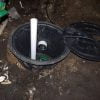
- Attach sump cover and connect sump discharge plumbing
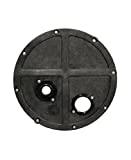
Pass the discharge plumbing stub through the sump basin cover.
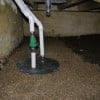
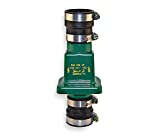
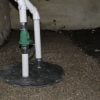
Attach this discharge pipe to a combination union and check valve (green valve in photo below) and plumb the remainder of plumbing for the discharge circuit. The rubber fitting of the union / check valve prevents back flow into the sump and provides a break point for the discharge plumbing.
Next, pass the power cord for the sump pump through the basin cover (use supplied rubber seals for the cord) for eventual connection to a suitable power supply. Secure the sump cover with supplied bolts /screws. (Many covers ship with a rubber seal that should be attached to the underside of the cover before attaching to basin top.)
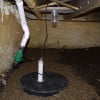
- Install vent plumbing and connect power cord
De-watering sump systems should be vented and venting may be required by state and local plumbing codes.
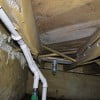
To vent the sump basin, I used the same 1.5″ pvc pipe and incorporated a rubber coupling to serve as a disconnect if needed. The vent pipe simply needs to pass through the sump cover and vent the basin to the outside air.
Once both the discharge and vent are in place, run them to the desired point to pass them through to the outside of the house. I ran the plumbing for this project allow the floor joist and through the rim joist to the outside of the craw space.
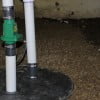
- Finish ground work around sump basin
Using aggregate, I used pea gravel for this topmost layer, leveled the ground over the drain tile and around the sump basin. The top aggregate will allow for easy passage of water through and down to the drain tile and sides of the sump basin.
- Complete discharge plumbing circuit by passing it outside the crawl space
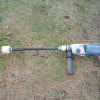
Plan for your desired discharge plumbing path. If passing the plumbing to the outside of the home, you may need to cut a hole through the wall of the home. I cut a hole through the rim joist. (*Warning* If unsure of a safe path for your plumbing, consult a structural engineer before cutting through foundation framing)
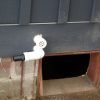
Once the plumbing was passed to the outside, I added a rodent screen (PVC drain guard) to the vent circuit and a right angle hose attachment fitting to the discharge circuit to temporarily direct discharge water away from the house.
Eventually, I will create a drain system for use with the rain gutters that I can direct this discharge water to as well. To finish, I sealed the passage holes with exterior caulk.
- Connect sump pump to a power supply and test
Find a suitable power supply for your sump pump. Most pumps will require a 20 amp circuit and should have ground fault circuit interruption (GFCI) protection. The GFCI protection can be at the receptacle or at the circuit breaker.
I wired mine with a GFCI circuit breaker to allow for easier re-setting of the circuit if needed. For the 1/2 HP pump I’m using, I wired a dedicated 20 amp GFCI circuit to use for the pump. I also added a utility light for the crawl space from this circuit.
Switch on your power circuit (if not already on). You can test the pump function by opening the cover of your sump basin and lifting the pump trigger. Be careful not to run the pump for any period of time without water as the pump may overheat. You can also add water to the basin to test.
The sump pump uses a water level trigger to activate and pump water out of the sump basin. After water accumulates in the sump basin and rises above the trigger level of the pump, the pump will start and move water out of the basin through the discharge plumbing. The water level will then drop and once the level of the water drops below the trigger height the pump stops.
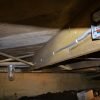
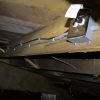
IMAGE GALLERY | Crawl space sump pump install in a dirt crawlspace
FOLLOW UP | Crawl space sump pump install in a dirt crawlspace
Exceeding expectations after heavy rains!
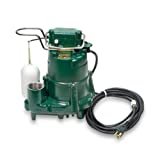
As a followup, this system was installed in the spring of 2012 and has far exceeded my expectations! This system pumped out hundreds of gallons of water throughout the spring and summer. I highly recommend the Zoeller M98 pump — it’s quiet, and more than powerful enough to quickly empty the system even during heavy rains.






Hi Graham,
HELP! We own a cabin in VT. We have an on demand electric water heater in the house. Our pressure tank is under the house. Our well water in put is also under the house. Our problem is we are not always at the house in the winter, we want to be able to drain the filtration system so it won’t freeze.1. What can we install in the house to filter our hard well water? 2. Can a filtration system be place directly on the on demand to filter whole house? 3. Can all these items be placed in the house so they don’t freeze? We can’t seem to get a good answer to these questions. Hope you can help.
Barb
Hi Barb,
The answers really depend on the details of your setup. It sounds like you keep the interior of the cabin heated year-round. If that is true, then any plumbing or appliance in the cabin should/could avoid freezing, depending on the location of the plumbing and/or appliance. Pipes installed in exterior walls have been known to freeze in very cold climates, especially if the walls are not well insulated or the plumbing is located on the exterior side of the insulation.
The other issue is the plumbing that is located under the cabin. I assume the under cabin space is not heated. If not, any plumbing in this space will need to be warmed and insulated to avoid freezing, including the pressure tank. If you have room, all of the under-the-cabin plumbing items should be able to be relocated within cabin. The supply plumbing line will obviously still need to pass from the ground into the cabin and this portion of the the water line will need treatment to avoid freezing – a heating wrap tape under pipe insulation should work (check the instructions of the heating tape you are using to ensure it is safe to use with pipe insulation as some may overheat).
Regarding the hard water, you can install a smaller water softener inline with the main water line from the well to soften all of your cabin water. It can be placed before the on-demand hot water heater to soften the hot water too. I would also add a whole house particle filter on the water main line before the water softener and the hot water heater. This is the set up I have in my cabin in Minnesota.
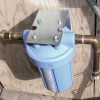
This is the plumbing flow for our cabin: Well water pump > whole house water filter > water softener > tankless water heater. I have a couple of articles that show some of this plumbing related to the whole house water filter and the tankless water heater which may help.
If you plan to move the plumbing inside, consider creating a utility room in a space closet or similar. If any of the walls are exterior walls, they should be well insulated and well sealed. Also, consider running the plumbing into the utility space in a fashion that will help prevent freezing, like in an interior wall or just within the interior of the space.
If you can supply a few more details I’d be more than happy to weigh in on your plans. Thanks for the question.
Gary
P.S. Here a few pictures of our utility room setup. This room is heated passively with the furnace located within the room too.
Jen’s question on Jan. 6, 2020, landed in my in-box (regular email, not part of this site). I’m not the author of this thread, though I’d asked a question back in 2015 that didn’t get answered. So, here’s my two cents’ worth, since it doesn’t look like the original poster is following the topic any more:
First of all, didn’t you mean to say “… where it can rain non-stop for WEEKS.” ? (I grew up in the NW )
Anyway, yes, a sump pump would work fine … and, yes, just run the hose out to your French drain.
The procedure described in this thread is kinda the Cadillac version. Me, I’d do it in quick and dirty fashion:
Find a bucket big enough to hold the pump (while not interfering w/ the float) that’s got holes punched in the bottom and on the sides around the base so that water can easily get in.
Then, make a hole in the ground about 6 inches deep that’s big enough to hold the bucket, and line the hole with gravel. Also add a few inches of gravel to the bottom of the bucket and put the pump on top of it. (Among other things, this will keep the pump where you want it.)
Finally, build a berm of gravel outside the bucket that’s deep enough to cover the holes that you punched around the sides. The reason for all this is to keep the water clean. Sump pumps aren’t designed to pump dirty water, and the gravel will filter it. When sump pumps are installed in new homes, the sides of the bucket holding the pump are encased in gravel (in fact, there should be gravel underneath the entire concrete pad) for the same reason.
And unless your crawl space is sealed — literally — as tight as a drum (unlikely), no need to worry about venting. Install a reverse “U” above the pump, which will prevent water from the drain line draining back into the pump when it turns itself off. You could install an anti-drainback valve, but the U will do the same thing for much less $$.
I suggest trying to install the pump at the lowest place in the crawl space, simply because that will keep things the dryest. But if it’s all about the same elevation, no reason not to install near the access panel.
Have fun!
Graham
Hi… Not sure if you’e still monitoring this, but thought I’d try.
I live in the NW where sometimes it can rain non-stop for days. I recently ripped down my old detached garage that used to flood all the time and I built a new one. Unfortunately, now that water is going under my house. I can get up to 4″ of water under my home. Considering I only have about 12″ from dirt to floor beams it’s a major issue. (It’s difficult to rollover when you’re under the house). Any suggestions on what to do?
Can I install the sump basin & then just run that hose out to my french drain? Do I still need to do the vent plumbing? Can I install it right by entrance
Thank you!
Hey Jen,
Yes, these threads are still monitored and active. Thanks to Graham for the insightful reply and sorry I missed your previous question!
To add to the conversation regarding your water issue, I would like to mention a few considerations.
1. First, if possible you should consider landscape and slope issues with your property. If much of the water under your home is run-off there are likely landscape issues you could address. Things like surface drains, french drains, proper land grading around the home, etc., are all issues that can significantly affect the conditions under and in your home.
2. The sump should probably just be a first step. Sump pump systems can remove bulk water and greatly improve conditions under your home. But, homes build over soil crawlspaces tend to have ongoing water/moisture problems unless significant change is made to address that underlying issues with unsealed crawlspace foundations.
A home build over a dirt crawlspace is essentially a home built directly over the soil. Imagine pitching a tent directly over your yard without a barrier cover tarp underneath it. The ground releases enormous amounts of moisture vapor depending on your geography. In addition, moisture vapor in the air tends to release within vented crawlspaces as water moisture-rich air cools within the crawlspace. Here is an excellent article discussing moisture issues and crawlspaces from Building Science
So, if you are to significantly fix the moisture issues in your home, you will likely need to address landscape and crawlspace problems that you likely have.
As far as a sump pump goes, as Graham explained, the function of a sump is to simply collect and mechanically remove excess water under your home. Place the sump basin where the water tends to collect. Water can be then directed out of the crawl space via PVC pipe, discharged away from the home and foundation. Many municipalities have regulations regarding sump pump discharge, so check with your local agencies to ensure you are in compliance. Also, if you live in an area with sub-freezing temps, you will need to consider the best method of sump use during the winter to avoid discharge line freeze-up.
Thanks for the questions Jen and thanks Graham for the contributions.
Gary
Thanks for your quick response!
Unfortunately, the spot I was considering digging is not the most convenient. There are no considerable slopes or low points, but during heavy rains you can see small amounts standing water. Would it be a bad idea to just dig the sump pump in a convenient location near the entrance, then run drain tile in the spots that sometimes show water?
Thanks for the great tutorial! I just bought a home as an investment property, and it has a crawl space in pretty rough condition. Unfortunate for the crawl only has about a 2 foot clearance from the floor to the ceiling. I’d like to install a sump pump, but have no idea how I am going to be able to dig while laying on my stomach. It looks like your crawl had a low clearance as well. Any tips to make the process easier?
Hi Bruce,
Your welcome.
Yes, our crawl space has very low ceiling clearance as well. Luckily, the low spot in the crawl was close to the entrance and had the best clearance of around three feet, making the job a bit easier. I suspect that in most crawl spaces the same is true – the lowest (water dependent) spot in the crawl space will be the area with the best clearance, if not flat.
If you can I would choose a spot for your sump pit that is close to an entry, allowing easier dirt removal and service later. I used a short-handled shovel, which for me worked quite well. You may need to be a bit more creative, like maybe using a garden or grub hoe. Hopefully you can at least sit or knee while digging.
Taking a clue from commercial vacuum excavators, If the dirt is loose and dry, maybe a shop vac could help? Another option is to hire the digging out.
No matter the method used to remove the soil, you certainly could plan for a smaller, shallower sump pit basin to limit the amount of soil to be removed.
Good luck!
G@CDIY
First, thanks for an excellent write-up. Exceptionally clear instructions.
I own a house that I bought three years ago after flash flooding (approx 18 inches of water above-ground) caused substantial damage to many houses in the area. In my house, the crawl space completely filled with water (through the vents and below-grade access opening). After the flooding eased (within a few hours), some water drained out through the foundation vents, but the crawl space below the vents was still full of water (I’m estimating about two feet deep).
The then-owner managed to drain the crawl space (not sure exactly how, but not that important). What I would like to do is install a system that could be used to drain the crawl space in case of another flood. This is fairly unlikely — such an event seems to come along approx once every 20-30 years, but with climate change, who knows? So I’d like to be prepared, instead of trying to buy a pump or hire a remediation service after the flood, when thousands of other people are trying to do the same thing.
I’m NOT expecting to prevent the crawl space from filling up with water if the flood level comes higher than the vents. But after the flooding eases, I’d like to be able to flip a switch and have a pump go to work.
Normally, I don’t need even a sump pump — the crawl space stays dry as a bone.
So my question is, which would be better — a sump pump or a “dirty water” pump? Should I go to the trouble of installing a proper drain sump (like you did), or just make sure I have a pump that I can toss in after a flood and start pumping? Or, would I be better off encapsulating the crawl space to prevent flooding in the first place?
Thanks for any advice.
Can you use that dirt to cover other holes in the basement ? What is the reason that you have to remove it?,thanks
(Sorry I meant to say why does it have to be removed from basement)
Hi Chris,
Good point. You do not need to remove the dirt from the sump pump basin hole.
I did remove the dirt because I planned to encapsulate the crawl space after I installed the sump. My crawl space is very tight, and it seemed to make sense to remove the dirt rather than keep it in the space. Also, the dirt from my digging was very mucky and stinky.
Thanks for the comments.
CDIY
It looked like you had foam insulation on your walls. Do you still have open venting? Also, do you have a vapor/moisture barrier on the floor?
Hi WT,
I do have spray foam insulated walls. I closed the venting by replacing the block and using urethane caulk to seal around the block (instead of masonry mix in case I wanted to remove the block in the future for access or other). I talk a bit about it in my article on installing a crawlspace vapor barrier.
Any tips on getting the rock into and getting the dirt out of the crawlspace without killing yourself?
Thanks
Hi John,
As for the rock, I used bagged rock from the Home Depot. Each bag weighted somewhere around 40 lbs (guess). I think the bags made it easier, but I think I used a total of 10 bags (a few of the coarse rock and more of the pea gravel). You could consider building a simple slide to deliver the rock through your access.
Getting the dirt out is always a pain. If you have the access, a small dirt coveyor would be great. Many used 5 gallon buckets. Hiring young strong help may be worth it.
I used a small shovel and pitched it out of the space as I dug. I had the advantage of digging very close to my access that I could pitch the dirt out through.
Good luck. You could post a photo of your space and maybe some of our readers would have some ideas for you to consider.
CDIY
Hi there,
I’m using the same M98 pump to replace an older one that failed in our basement during heavy rains in Seattle this week. Only question is whether or not you glued the threaded end of the drain pipe into the NPT port on the sump pump, or just “dry” screwed it into place with a threaded-male 1 1/2″ PVC adapter? I imagine just screwing it in will be fine, as the other connections above the basin are all glued or clamped to remain watertight. Thanks!
Hey Bryan –
As this connection is on the discharge side and does not necessarily need to be air or water tight. Any “leaked” water around this connection will just spill into the sump basin, re-enter the pump and eventually be pumped out. Also, this connection is typically under the water level in the sump basin and leaks would be difficult to notice unless they were quite large.
When I connected my pump I did not glue the connection but did use several wraps of Teflon thread tape mainly to ease the connection and potential later disconnection if needed.
This connection is PVC to steel (the housing of the pump) and not typically glue appropriate anyway.
Thanks for the comments and good luck with the replacement. I love Zoeller pumps!