Many cabins have water issues in their basement or crawl spaces. Our cabin is no exception – especially in the spring or after heavy rains. To fight the water, I figured we could install a French drain system adjacent to the foundation to improve the drainage of water away from the cabin. After some consideration, I thought it might also be a good idea to add a surface drain since we had no gutters on our cabin. Here is what I did.
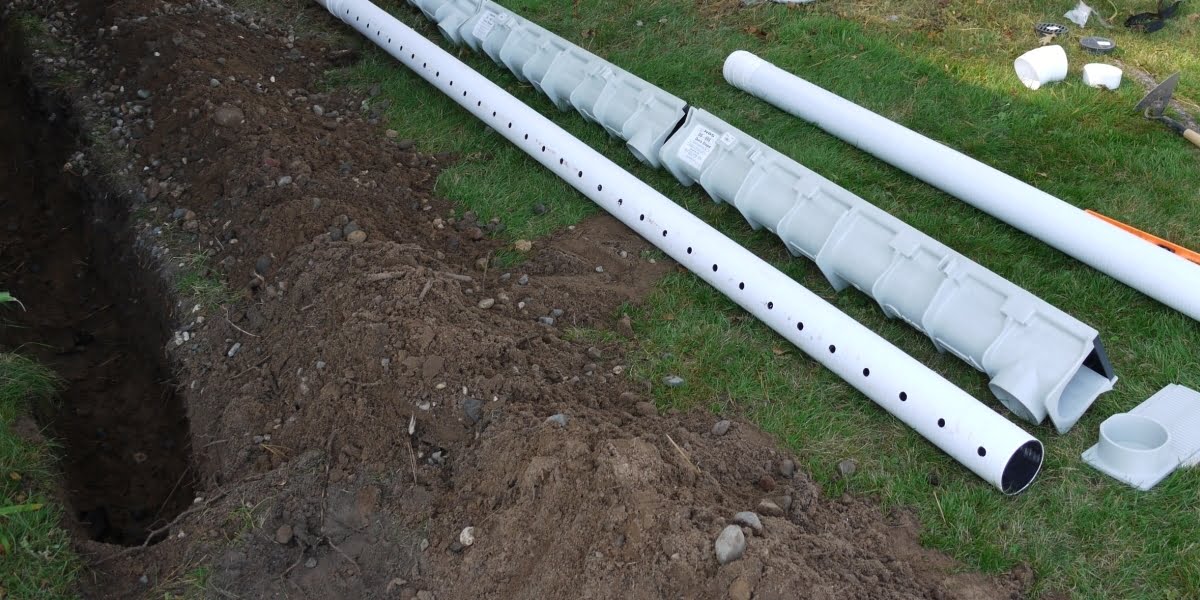
Combo Drain to help redirect roof rain water without gutters
If you’ve read some of my other articles, you probably know I’ve put some time and effort into mitigating my crawl space moisture issues. Dirt crawlspaces may be the worst building design ever conceived and they lead to all sorts of the worst home problems – moisture, mold, insects, rodents, etc. To try and tackle the water issues of the crawl space I’ve installed a sump pump and encapsulated the crawlspace adding a radon pump to continuously evacuate the space under the membrane.
I’m not sure if I’ve seen such a hybrid drain before, but it doesn’t seem too crazy as the surface drain can handle any surface ground water and the deeper French drain should keep sub-surface water under control.
This effort just adds to the war on water and hopefully helps reduce the water load on the home and crawl space. Would it have been more efficient and effective just to install rain gutters on the cabin? Probably, but for some reason I thought digging trenches for a few days was a good idea. Time may tell.
With that here is a bit my reasoning for the project and a bit of French drain history.
Water In Basements And Crawl Spaces Often Comes From Outside Of The Home
Most crawl space or basement water enters from the outside (barring a plumbing leak or similar) and typically by one of three routes:
- humid air entering through foundation vents
- sub-surface ground water via hydro-static forces
- surface ground water passing through foundation walls
Each of the above are unique problems and should be addressed separately.
Issues with humid exterior air ventilation are fixed by sealing your crawl space to outside air. I have already done this by sealing the foundation vents in my foundation walls with block (more details above sealing your crawl space here).
Fixing problems related to ground and sub-surface ground water (problems #2 and #3 above) can be accomplished with drains that divert water sources before they can pass into your crawl space or basement.
For sub-surface water, install buried drains (French drains) to de-water deeper soil and reduce hydro-static forces and for surface water, install surface drains to divert water before it reaches your foundation walls.
What Is A French Drain?
French drains are trenched drains lined with aggregate (gravel, sand, etc.) with or without buried drainage pipe or tile used to divert sub-surface water.
French drains are named after an early American farmer, Henry French, who described and popularized them in his book, Farm Drainage.
Many different types of French drains are in use today and are often named for the drain location and or function. Examples include; curtain drains, perimeter drains, interceptor drains, and foundation drains.
Curtain drains are French drains used to protect areas adjacent to elevated or perched water tables (like at the base of wet hill). Perimeter drains are French drains that surround the area to be protected. Foundation drains are placed near the base of a building or home to protect the foundation.
Although there are many types of French drains, all share the purpose of controlling sub-surface water.
French drains should not be used to control surface water that should be diverted from the surface before reaching deeper soils and potentially contributing to sub-surface water that the drain is attempting to remove.
Use Surface Drains (Channel Drains, Trench Drains And Catch Basins) To Drain Surface Water
Surface water from roof runoff, snow melt, and other landscape run-off should be controlled using surface drains. Surface drains simply catch and redirect surface water.
There are many varies of drain types, often named for style and location. Channel drains provide a narrow channel to divert water.
Trench drains are surface drains that interrupt the movement of water across a surface. Catch basins are reservoirs placed at a specific location in need of drainage.
Controlling Surface And Sub-Surface Water To Dry Our Cabin Crawl Space
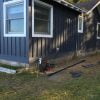
Our cabin lacks roof gutters and has a rather flat, poorly sloped yard. Rainwater, roof run-off, and snow-melt create fairly regular surface and sub-surface water assaults to our cabin’s crawl space.
With both surface and sub-surface water issues, I will need a plan that addresses both the surface and sub-surface water keep our crawl space dry.
According to the EPA:
The two most frequent causes of wet basements or crawl spaces (according to the EPA):
- The lack of proper grading
- Gutters discharging water too close to the home’s foundation.
Suggestions from the EPA related to roof water discharge:
- Gutter and downspout systems with lateral discharge at least 5 feet away from the home foundation
- At-grade drainage systems with lateral discharge at least 5 feet away from the home foundation
- Dry wells, water gardens and other underground catchment systems can be used for water discharge, but should be located at least 10 feet away from the home foundation
(source: EPA Technical Guide to the Indoor airPLUS Construction Specifications, 8-28-12)
My Two Main Water Problems
- Surface water from roof run-off.Our cabin is gutter-less, which leads to an enormous amount of water dumped next to our cabin every time it rains. (each inch of rainfall a 1,000 sq ft roof will shed just over 623 gallons of water!
- Sub-surface water from saturated soil. Seasonal changes in soil water plus excess ground water charge from surface water, snow melt and slope issues can all lead to excess soil moisture.
Two Drains To Solve Two Different Problems
The fix the above two water issues, I plan to add two different drains – one to solve the surface water run-off issue and one to solve the sub-surface water issue:
- Surface channel drains to divert surface water and act as in-ground gutters.
- Sub-surface (French) drains to control sub-surface water and de-water wet soil.
A Combined, Single-Trench Approach For Both Drains
To limit the amount of trenching for the project, I plan to place both drains in the same trench.
At the base of the trench, I will install a French drain. At the top surface of the trench, I will install a channel drain. Each drain will perform its particular job and empty into a shared discharge circuit.
OVERVIEW | French/Channel Drain Install
SUPPLIES LIST | French/Channel Drain Install
TOOLS LIST | French/Channel Drain Install
STEPS | French/Channel Drain Install
- Gather tools and supplies
Assemble the necessary tools and materials for the drain and discharge circuit construction. You will need several shovels at the very least to dig the trench. I found the use of a mini rototiller helped get through the top layer of the ground when digging the trench. Rent power trenchers for larger projects.
Many different types and styles of drainage pipe are available. I choose 4″ triple wall smooth HDPE bell end drain pipe – perforated for the drain field and solid for the discharge circuit.
Black corrugated ADS drain pipe is cheap and readily available, but I would not use it. The pipe crushes easily, and the corrugations can trap sediment eventually block the pipe.
Various fittings and accessories are available to use with the 4″ drain pipe. DWV (thin wall) 4″ PVC pipe fittings will fit the HDPE pipe and are readily available.
Catch basins, drain fittings, pop-up emitters, and other accessories are available from several manufacturers (NDS is a quality manufacturer and easy to find).
- Plan the type of drain, the location for drain and the path of the discharge circuit
Consider the goal of the drain system and plan your system accordingly. French drains should be used to remedy sub-surface water issues. Place the drain at or below the desired de-watering level. For a foundation, this typically means placing the drain pipe at a depth at or below the bottom edge of the foundation wall.
When planning your drain system, consider the discharge circuit path and eventual location.
The water collected by the perforated pipe in the drain trench will need to empty somewhere. And for most systems, this means a drain and discharge circuit that can drain to gravity.
The specifics of your landscape and desired system size may limit the practical depth of the French drain system. For my system, I chose to send this water to a downhill, lateral daylight yard location approximately 15 feet away from the house.
My discharge target was a bit more than a foot lower than the elevation of the drain, and I plan to trench solid pipe to this spot and cap the pipe with an elbow and pop-up discharge emitter.
Both the French drain and the discharge circuit should slope at least 1% – 2% (~ 1/8 – 1/4 inch per foot) toward the discharge location.
Other discharge options include; submerged dry wells, water gardens, storm sewers or other options. Check local codes to ensure compliance with storm water regulations.
French drain systems should be sized to accommodate expected water flow and span the problem area you intend to drain. Trenched drains should typically be at least the width of a standard shovel (9″) and wider for wetter areas.
The depth of the trench depends on the goal of the drain. The drain depth should be deeper than the crawl space surface you are attempting to dry. Other considerations include the slope need for the discharge circuit and the building foundation depth.

- Dig the drain trench
To dig the French drain trench, I started with my Honda Harmony mini tiller. The rototiller made the first layer of digging much easier (I did not use the tiller on the discharge trench, as I wanted to keep the sod intact to replace over the trench).
Continue the trench to obtain sufficient depth for your project. When digging, you will also need to allow for proper pipe sloping toward the drainage circuit. Use stakes and string to help track slope and proper depth.
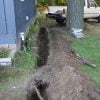
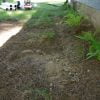
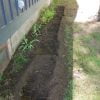
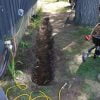
For my project, the 9″ mini rototiller combined with hand digging, produced a trench that was between 12″ and 14″ wide at the surface. The depth of my trench varied between 16″ and 20″ and was dug with an approximate 2% slope to accommodate a 1/4″ of drop per foot of pipe run.



- Build the French drain
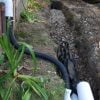
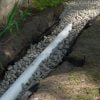
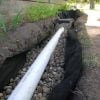
Prior to installing the drain, assemble the French drain system next to the foundation of the building I plan to drain.
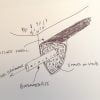
The build of the French drain is simple; surround a buried, sloped drain (perforated 4″ HDPE triple wall drain pipe) with water permeable aggregate (gravel) in a trench at the depth of the desired de-watering level. Then connected the French drain to a sloped discharge pipe circuit to drain collected water.
When constructing your French drain, orient the pipe with the drain perforations down. Water will enter these holes at the bottom of the pipe and flow downhill at the base of the pipe between these two rows of holes.
The drain pipe can be covered with fabric (sock) to help reduce sediment entry into the system and help avoid plugging.
Alternatively, the trench can be lined with fabric (landscaping fabric) and wrapped around the aggregate surrounding the pipe. Make sure to cover the top of the pipe as much of the sediment enters from the area above the drain pipe from the soil.
Once the pipe is surrounded with aggregate (stone or gravel), the top of the trench can be closed as you like.
Once the French drain is installed, close the trench and finish the surface of the drain.
Because the French drain is draining water below the surface, there is no need to fill the entire trench with gravel. Refill the top of the trench with dirt and finish the surface as you wish. Cover the top with grass or other vegetation if you like.
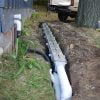
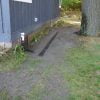
I plan to install a surface drain at the top of this trench and, therefore, will not fill in the top of the trench just yet. See below for the addition of a surface channel drain to the top of this trench above the buried French drain.
Once the drain is built, connect the drain to a discharge pipe to divert the water to its eventual destination.
For this system, I connected the French drain (and the surface drain I will install next) to a buried 4″ solid triple wall HDPE drain discharge pipe.
This discharge pipe will carry the water to a low, sloped area of the yard about 15 feet away from the cabin. Continue reading below for a complete discussion of the discharge circuit creation.
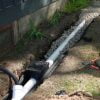
- Plan the surface channel drain install
For me, I was interested in catching roof run-off from our gutter-less roof. I measured the length of surface drain I would need to cover the drip line from the draining section of the cabin roof and ordered a channel drain system from NDS.
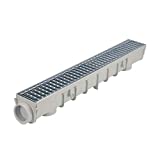
The system I purchased is the Dura Slope trench drain system from NDS. This system is a modular, snap-together system of pre-sloped 6″ wide drain trenches. The system is built for commercial use and is very durable. This system should provide more than enough capacity for most residential projects.
The beauty of the Dura Slope system is the built-in slope that allows it to be installed flush with the ground and still drain toward a desired discharge. The system offers a variety of finish options with a variety of grates and colors.
The Dura Slope Channel drain system is designed to be installed within a bed of concrete. While this is an option for installation, I chose to install the channel sections in a bed of small stones, sand and topsoil.
If you will be installing the system in an area of foot traffic or vehicle traffic, consider mounting the system within a concrete bed as recommended by the manufacturer.
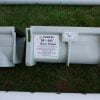
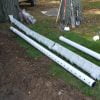
- Install the surface channel drain
Install the system to match the desired water path. If the system will be catching water from the roof and run-off away from the home, it should be installed on the down slope of the water path.
As mentioned above, I did not install the system in concrete but rather used a mix of rock, sand first and then black dirt for the top most several inches to bury the drain.
When filling in the sand and rock mixture around the drain, take the time to pack the fill to provide a secure install for the drain.
With this surface drain, the goal of the system should be to capture as much water as possible from the immediate and surround ground area before it passing into the ground.
With this in mind, the surface of the surrounding ground will be finished with grass and slope to the drain on both sides.
Once the surface of the ground is level, packed and sloped to your liking (typically away from the home and toward the drain system) finish the ground as desired.
When deciding on a finish for the top surface around the drain, consider the main goal of moving the water into the drain before it passes into the ground.
An ideal finish would be a non-porous, flat, sloped surface like finished concrete or tile. Other considerations include the potential for splash from the roof run-off staining the lower portion of siding on your home.
I chose to finish the area around the drain with grass to help conceal the drain grates and to limit splash from roof run-off.
To finish the surface channel drain, I installed black plastic grates from NDS made for the Dura Slope product. One caution – you will need two grates for each section of the drain (grates are 2′ and drain sections are 4′ — learned the hard way).
I also plan to leave the grates exposed (at least at first). I may decide to cover the grates with rock or over landscaping fabric or similar if I find the grates to difficult to keep clean and free of leaves, etc.
Prior to completing the above drain system, the surface channel drain, and the deep French drain were connected to a discharge pipe. This discharge circuit will carry the water away from the home and discharge it in the yard.
Continue reading below for more information regarding the discharge circuit construction.
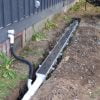
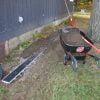
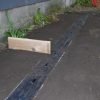
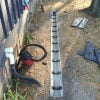
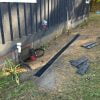
- Plan and install discharge circuit and drain pipe
Pick a termination point for the discharge trench. Typically this would be a location with natural drainage, a submerged dry well, water garden or similar discharge location.
For this project, I chose a sloped, low position in the yard ~ 15 feet away from the cabin. Then, plan a path from the drain(s) to this discharge destination. If possible, choose a straight path and use smooth wall pipe (I used 4″ triple wall HDPE) instead of a corrugated plastic pipe.
If not already done, dig the discharge circuit trench. Keep in mind the recommended 1% – 2% slope (1% minimum for smooth wall pipe and 2% minimum for corrugated pipe) needed to move water from the drain to the discharge area.
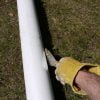
When digging the discharge trench, take the time to cut the sod for reuse. Use a shovel to under-cut the sod at a depth deep enough to preserve the roots of the grass.
Once free, flip the sections of sod over to re-use after the trench is closed and to help keep the sod from drying out.






- Add discharge pop-up emitter cap and close trench
Once the trench is the proper depth with the proper slope, connect the discharge pipe and install in the discharge trench.
If using bell end triple wall HDPE drain pipe be sure to use the solid pipe. Do not use the perforated pipe with the two rows of drainage holes used for French drains. Install the pipe so the bell-end connectors are uphill.
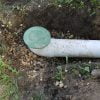
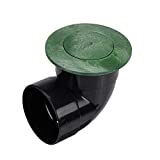
At the discharge end of the discharge pipe, I used a 4″ pop-up emitter (from NDS) that will open with water flow and keep the system closed when empty. Install the emitter flush to the ground to avoid tripping on the cap or causing problems when mowing the lawn.






















The perforated French drain pipe collects sub-surface water near the house. Then I switch to solid to carry it further away? And this can be tied to my surface water discharge? Draining my downspouts w/ 4″ PVC and considering adding a French drain (or basin) at a low spot and just not sure wether or where my perforated pipe can tie into the solid pipe w/ the surface discharge.
Hi Greg,
You bring up a good point about the system I installed – could the surface drain water pass back into the Fench drain, essentially moving the water from the top surface drain to empty into the underlying French drain perforated pipe?
I think the answer is maybe. Surface drain water would have to move backwards and uphill to exit in the French drain field. I’ll attach an image that shows the discharge plumbing.
In retrospect, with the surface drain, I probably don’t really need the French drain underneath. I added surface drain to catch rainfall off our gutter-less roof in this area.
Regarding your last question about adding a drain field/basin or French drain, the answer, I think, depends on what you plan to do with the perforated drain portion of the circuit.
If the goal is to empty the water coming from your downspouts in a basin or drain field, then yes it makes sense, depending on the distance from the home and amount of water, etc.
If you are considering adding perforated pipe in the middle of the circuit to help drain a wet area “in-line” in addition to moving downspout water away from your home, this may not work as intended depending on the dynamics of the water flow and design of the circuit. As I’m sure you are considering, I suspect the risk would be the downspout water would empty out at the perforated pipe section or basin section and just add more water to this problem spot.
To make this work, I think you would have to design a system with a surface drain at the low spot and the connected solid pvc circuit would need to run some depth below to prevent the downspout water from exiting the drain. The problem with this circuit is where does the solid drain line eventually end and drain? The line would need to slope away from the house and would end up being fairly deep any distance from the home.
One other option may be a one-way valve if someone makes one. With a one-way valve, a collection circuit (French drain, surface drain, basin, etc) could drain into the main solid pvc downspout drain if set up properly.
Interesting problem. I’m sure those that work on these systems would have ideas and answer for this issue – you may want to consult a few of the drain manufactures.
Good luck!
Gary
This is exactly what I had in mind for my cabin! I’m curious to know how it worked out for you?