Proper floor tile installation requires a flat, stable subfloor and underlayment surface. Floor tile installations on uneven surfaces can result in high tile edges and corners (known as lippage), which may lead to annoying catch spots between tile or even trip hazards. Uneven tile installations may also lead to tile stability issues like cracks and breakage.
According to ANSI (American National Standards Institute) standards, subfloors must have less than 1/16″ flatness variation per 1′ span and less than 1/4″ per 10′ spand for tiles less than 15″ wide or long. For tiles longer or wider than 15″ the specs are less than 1/16″ variation per 2′ and 1/8″ per 10′ span.
Bottom line, floor tiles should be installed on suitable flat surfaces.

I’m just starting a renovation of our cabin porch, including adding tile with in floor electric heat. I put this project off for a long, long time. In fact, one of my earliest posts covers the beginning process of getting the extremely uneven and un-level floor closer to flat: How To Level A Concrete Floor.
Finally ready to finish the porch, I was thinking all I needed to do was order the tile, in-floor heat supplies and get started. Then I checked the flatness and level of the porch floor surface. Ouch!
Despite our earlier work on leveling the porch floor slab, it was still super uneven and not very level.
So, despite my eagerness to get started, the tile install will need to wait for some additional floor leveling.
Installing Tile on a Flat, Level Surface is Better and More Fun
I could have proceeded and tried to level the underlayment and decoupling membrane I planned to install for the in-floor heat, but I knew that would be a serious pain in the butt. Installing materials on uneven floors is no fun. And, if you can’t get them close to flat prior to installing tile, installing tile on marginally flat underlayment is no fun either.
The delay and extra step of additional floor leveling is a bummer, but the right choice. So, off to Home Depot to buy some self-leveling underlayment (SLU) material.
LevelQuik RS by Custom Building Products Works Well For Many Smaller DIY Projects
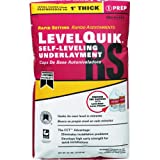
The SLU product I used is LevelQuik RS by Custom Building Products. It is a Portland cement based, rapid set product that produces a high-strength concrete like surface ideal for laying tile over. It is also stocked at most Home Depot stores in the flooring area of the store.
There are few considerations of using this product. First, it sets really fast, with a pot life of only 15 minutes. If you have a large area to cover, and don’t have a lot of extra help, this might not be enough work time, especially if working alone. They do offer an extended work time product LevelQuik ES.
The product is also fairly heavy and the extra weight should be considered. There is also a lighter version of the product called LevelLite for projects with weight limitations.
And while to product can be placed over many different subfloor surfaces, there are some special considerations for plywood, OSB and other wood subfloors. If you plan to use LevelQuik RS over these surfaces addtional surface prep (sealing and priming) and wire lath is required for proper bonding. They do make a SLU product for wood subflooring that does not require the addition of wire lath to the wood surface called LevelQuik Advance.
For this project, I was placing the floor leveler over a concrete slab that had been treated with an paint-on elastomeric waterproofing membrane (RedGard), and used the off-the-shelf LevelQuik RS offered at my local Home Depot.

OVERVIEW | QuikLevel RS Self-Leveling Underlayment Placement
SUPPLIES LIST | QuikLevel RS Self-Leveling Underlayment Placement
-
 LevelQuik RS
LevelQuik ES is an extended work time version of this product.
LevelQuik RS
LevelQuik ES is an extended work time version of this product.
TOOLS LIST | QuikLevel RS Self-Leveling Underlayment Placement
-
 5 Gallon Buckets
Multiple buckets help workflow
5 Gallon Buckets
Multiple buckets help workflow

-
 Heavy Duty 1/2" Drill
or dedicated mortar mixer
Heavy Duty 1/2" Drill
or dedicated mortar mixer


STEPS | QuikLevel RS Self-Leveling Underlayment Placement
- Review Self-Leveling Product Installation Instructions, Prep Surface.
Review the substrate requirements and prep recommendations for the self-leveling underlayment product you plan to use. I used LevelQuik RS from Custom Building Products and sold locally at HomeDepot stores.
For LevelQuik RS, the product generally may be placed over cured concrete and gypsum compounds, plywood and OSB subflooring, existing tile, paint-on waterproofing membranes (RedGard, Hydrobarrier, etc.), and properly installed plastic decoupling and heat element membranes.
Some substrates require/benefit from additional surface prep like abrasion, and primers (concrete, gypsum, plywood, OSB, others), and may benefit from or require metal lath attachment prior to placing the underlayment. Check with the product instructions for the material you plan to use. Metal lath is required over wood subflooring for the LevelQuik products.
My project is a floor tile installation for our cabin porch. The substrate is a well-cured concrete slab with a previously applied RedGard waterproof membrane with exterior deck paint finished surface. Although the paint layer over the RedGard is not the idea substrate surface, the paint is well-adhered and has a mate surface.
If I was installing tile directly over the self-leveling underlayment, I probably would have removed the paint layer and re-applied RedGard and a coat of latex bonding primer.
Since I planned to install a layer of GoBoard backer board, and a layer of the SunTouch HeatMatrix over the GoBoard, on the floor before the tile, I decided my existing painted concrete surface would be a sufficient surface after applying a latex bonding primer.
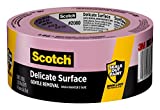
To start the surface prep, clean the surface of debris and dirt with a vaccum or by sweeping the surface. Use painter’s tape to protect walls, trim, doors and other surfaces that may be in contact with the underlayment. I like using Scotch delicate surface tape, it comes off easy even after a few wekks.
Once clean, apply a coat of latex bonding primer if appropriate for you surface (many surface types will benefit). Follow the directions for the product you are using, but in general, apply with roller, painting pad or push broom and allow to dry for an hour or so prior to placing the leveling compound. Do not wait too long (more than 4 – 6 hours) after applying the primer as the bonding performance may decline.


- Set Up Mixing Station and Prepare Placing Tools for Self-Leveling Underlayment.
Once the floor is clean and prepped, prepare an area to efficiently mix the self-leveling underlayment (SLU) compound and get everything organized that you may need to place and level the compound once mixed.
These compounds, especially the rapid setting varieties (the “RS” in LevelQuik RS), begin to stiffen in 20 minutes or so. You will need to be efficient and organized to place these compounds. Larger areas require extra planning and likely extra help.
The size of your mixing station and need for help obviously depends on the number of underlayment bags you plan to mix. Each bag covers around 10 sq. ft. of area per 1/2″ thickness and has a working time of 15 – 20 minutes depending on the temperature and conditions.
In general, projects of 10 or fewer bags can be completed by yourself depending on the amount of manipulation the compound needs once in place.
Even though the compounds are designed to be self-leveling, they do generally require or at least benefit from some spreading and leveling. They also greatly benefit from a continuous wet edge, making it important to have multiple batches mixed and ready to place at a time. I mixed two batches at a time for this 6 bag project.
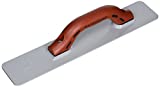
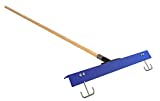
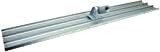
Once placed, use a gauge rake or screed board to spread to a uniform thickness, then smooth with hand or bull float. A spiked may also help to spread the material and remove any trapped air.
For projects of 4 to 10 or so bags of underlayment, you should be able to mix, dump, spread and smooth all of the material if mixing 2 – 3 batches at a time in 20 minutes or so. Larger project will probably need a few extra bodies with one person dedicated to mixing.
Set up a mixing station for the compound and gather enough buckets and all the supplies you will need including; a heavy-duty 1/2″ drill and paddle mixer attachment, ample clean, cool water for mixing, and the compound bags opened, lined up and ready to mix.
Gather the tools for placing and leveling the compound including; a straight screed board, a hand float, a bull float (if needed), a gauge rake (if using) and a spiked roller and handle.

- Mix the First Bags of Underlayment.
Mix the compound following the directions from the manufacturer. For the LevelQuik RS, start with 5.5 quarts of cool, clean water in a 5 gallon or similar bucket. To the water, incrementally add the LevelQuik powder while mixing at or above the recommended 650 rpm speed for 2 minutes, until smooth. Avoid excessive up and down movements with the mixer to avoid introducing excess air into the mix.
To help with mixing efficiency, have all buckets clean and ready for mixing. Have ample fresh, cool water ready and nearby. I like to have a separate smaller water measuring bucket ready (marked to the level I need (5.5 quarts)) for one step water measuring.
If working alone, I’ll mix 2 or 3 batches of the underlayment compound at a time, then dump them together and level, then repeat the mix and dump as needed.
I find the one gallon (actually 6 quart) hardware store paint bucket generally works well and this particular one (red-orange in color in the picture below) has a ridge at the 5.5 quart level that works great to measure the needed water for the mix.
Another trick is to drill a larger hole at the level of the correct volume (5.5 quarts in my case) just above the proper level in the bucket which will indicate and “self level” to the correct water volume.

- Place the First Batch of Mixed Underlayment Compound.
With your first batch of underlayment mixed, walk the buckets to the far corner of your desired leveling area and dump the bucket(s). Pour the bucket to spread the material.
Once dumped, use a gauge rake or screed board or spiked roller to spread the material. Smooth the material as needed with a float.
If you project will need more than a single dump of underlayment, return to the mixing station (or have someone else already mixing the additional batches) and efficiently mix the next batch to dump at the edge of the first batch.
Keep adding material while maintaining a wet near edge of the material. Continue smoothing to this wet “front” edge until you have covered the desired surface. Avoid returning to the initial areas to attempt further smoothing or spreading of the material as it will likely result in voids in material that will be too stiff to settle and level.


- Allow The Placed Underlayment Material to Cure Prior to FInishing.
Once the material is placed and leveled, allow it to cure and dry. If you need to add a second layer over any of the first layer, you may need to prime the surface of the first underlayment depending on the amount of time the first has dried for. For LevelQuik RS, they recommend applying primer if the first layer is more than 12 hours old.
Depending on the product, you can generally walk on the surface after 4 – 8 hours and lay tile the following day. For LevelQuik RS, foot traffic is OK after 4 hours and tile in 16 hours. Some non-porous tile like ceramic tile you can tile after 4 hours.


GIPHY App Key not set. Please check settings