With our cabin bathroom remodel, we were looking for ways to improve the usability of the small 8′ x 5′ bathroom and decided moving the toilet off the floor and on the wall would open the room and save valuable floor space. Here is a step by step DIY how-to for wall mounted toilets.
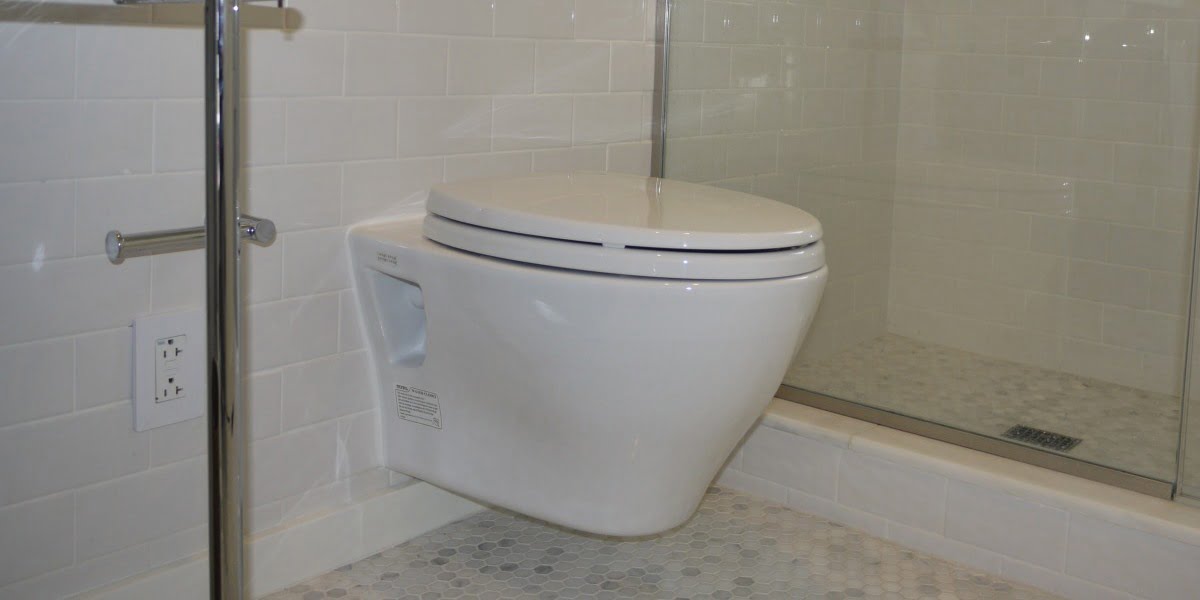
Wall Hung Toilets: Awesome To Use and Fairly Easy to Install
When considering a wall mounted toilet for our cabin bathroom, I was hesitant. I had never installed a wall-mounted toilet before or knew anyone that had. I knew they are popular in Europe, and I love the concept, but unsure if we should proceed. We did proceed and, as it turns out, it was one of the best remodeling decisions we made for the cabin.
Wall-mounted, floating toilets are amazing! It would be hard for me to say enough about the Geberit / Toto wall mounted toilet system we installed. It’s really that good.
Installing a wall mount toilet with a concealed tank requires a fair amount of work, and it’s also expensive. Expect to spend close to $1,000 for the components alone. If you’re not planning on doing the plumbing and installation yourself, expect to spend at least double that with the installation and plumbing costs.
That said, and after using our wall hung toilet for several years, I am fairly sure I will never install a standard floor mounted toilet again!
Not only is it the best toilet we have ever had (It has never clogged in two years of use — in fact, we have never had to use a plunger on it!), it saves a ton of floor space and allows for easier cleaning of the bowl and the floor under it.
So, if you are still with me and as excited as I am about a floating toilet on the wall, read on for a step by step guide to installing a wall hung toilet.
This article will walk you through the installation of a residential Geberit in-wall toilet tank and frame system with a TOTO wall-mounted toilet bowl.
To install a wall-mounted toilet from scratch you will need four main components:
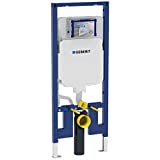
- Wall mounted carrier/ concealed wash down tank for wall hung toilets (Geberit© 111.728.00.1)
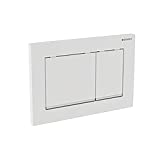
- Flush actuator kit and wall plate to fit the carrier (Geberit© 115.777)
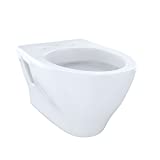
- Wall hung toilet bowl that fits the frame / tank unit you are using (Toto© Aquia CT418FG)
- Toilet seat to fit the toilet bowl you are using (Toto© elongated soft close SS164)
For the in-wall toilet rough-in you will also need:
- A well framed 2×4 or 2×6 wall capable of supporting 800 lbs (we beefed ours up for this)
- Water supply run in wall to top of unit (1/2″ min)
- Waste plumbing (3″) from below to base of the unit
- Wall finished with tile, tile backer board, cement board or gypsum board
In addition to the above, you will need access to the waste and supply plumbing and will need to open the wall cavity in the area you plan to install the unit. For us, access for the install was no problem — we had the floor and walls open to the frame for our bathroom remodel.
OVERVIEW | Wall Mounted Toilet
SUPPLIES LIST | Wall Mounted Toilet
TOOLS LIST | Wall Mounted Toilet
-
 Torch Kit
Bernzomatic TS8000BZKC
may be much cheaper to buy locally
STEPS | Wall Mounted Toilet
- Open the bathroom wall where the toilet is to be mounted
Plan the location of your wall-mounted toilet. Consider the paths of supply and waste plumbing and the wall stud location and spacing when considering the location for the toilet wall carrier frame. Demo the wall structure in this area to expose the wall framing and plumbing.
For your future plumbing, you will need a 1/2″ cold water supply line to the unit and a 3″ waste line below the unit.
- Modify the wall framing for the in-wall toilet carrier frame and tank unit
Depending on the wall framing in your bathroom, Geberit offers several in-wall tank frame units to fit most traditional wall framing. Our cabin bathroom has standard 2 x 4 wood stud construction which matches the Geberit 111.728.00.1 unit for standard 2″x4″ stud wall construction. This unit is designed for 2″x4″ framed walls, but requires a wider, 23 1/2″ stud spread to make room for the water tank in this 2×4 “shallow” unit. This wider (23 1/2″) than traditional 2 x 4 stud spacing (15 1/2″) unit will typically require stud modification to accommodate the width.
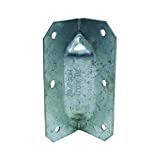
For us, modifying the wall framing was not a big deal as we were in the middle of a total bathroom renovation and could easily revise the framing for the 23 1/2″ wide unit. In addition it’s the width, the unit calls for wall framing load bearing capacity of 880 lbs., prompting us to double up the studs framing the cavity where the in-wall toilet frame would be mounted. We also reinforced the studs with Simpson Strong Tie GA2 gusset plates and structural grade fasteners to help manage the added load on the wall framing.
- Plan and run supply and waste plumbing
The in-wall toilet system will require a supply water line and a waste discharge pipe within the footprint of the wall cavity. With the walls and floors of the bathroom open for our renovation, it was easy for us to add the exact plumbing we needed for the unit.
For the toilet waste line, we ran a long sweep (indicated for all drains, especially toilets) 4″ to 3″ Sanitary Tee just under the unit. A short section of 3″ PVC was passed from this tee through the floor plate leaving a few inches of pipe directly under the framing unit to connect the discharge plumbing from the toilet bowl.
To pass through the floor plate of the wall framing, we didn’t cut through the floor plate, but just removed a short section of it (3″ PVC pipe has the same width (3 1/2″) as the floor plate 2 x 4). To support the cut ends of the floor plate, I added additional blocking between the floor joists. This extra support under this portion of the wall framing will help the floor support the weight of the unit in use.
This centered waste pipe location is required for the Geberit unit designed for 3 1/2″ wall depth (2″ x 4″ stud wall). Geberit also has units designed for deeper walls (2″ x 6″ framing) that allow for a side as well as a vertical waste pipe path.
For the water supply, I ran 1/2″ copper from the crawl space. I pass this line through the floor plate, along the left rear of the wall cavity to accommodate the front-mounted toilet carrier frame.
- Install the toilet carrier concealed tank unit in the wall cavity
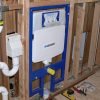
Mount the wall frame and concealed toilet tank unit in the wall cavity. I used the Geberit 111.728.00.1 unit designed for 2 x 4 framed walls. The unit is 23 1/2″ wide.
To start, I revised the stud cavity width where I planned to mount the unit to accommodate the 23 1/2″ width. When framing this cavity, I used double studs reinforced with Simpson Strong-Tie gusset plates to help meet the load bearing requirements of the unit.
Prior mounting the unit, adjust the frame for your desired future toilet bowl and seat height. The Geberit unit allows for seat height adjustments of 15″ – 19″. ADA toilet seat compliance is between 17″ – 19″ (often called comfort seat height). We set our toilet seat height at 17″.
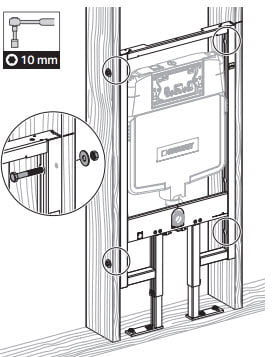
Secure the Geberit In-Wall toilet carrier frame to the wall studs using nuts and bolts or lags bolts.
With this adjustment made, temporarily install the frame into the wall cavity. The frame should fit snugly in the wall cavity with the sides of the frame touching the bordering studs. Use a level to ensure the unit is level and plumb within the wall cavity.
Then, check to make sure the carrier frame is flush with the front face of the studs. Then, mark the top height of the frame on the bordering studs to indicate the location of to-be-added horizontal framing.
Next, install a piece of horizontal 2 x 4 blocking within the wall framing just above the top of the unit. Although not required, this horizontal blocking is a good idea, as it will strengthen the framing around the unit.
With the horizontal blocking installed, mark the frame mounting hole locations on the top and bordering studs. Mark the bolt hole locations at the base of the unit as well.
Remove the unit and drill holes in the framing at the marked mounting locations. Use the proper size drill for the fasteners you are using (check the installation documents). Typically, wood framing will require lag bolts at the base and standard bolts with nuts at the sides (and top if using).
For my install, I used lag bolts on the sides (I had double studs to bite into) and base of the frame and standard bolts with nuts at the top of the frame. If using lag bolts be sure to drill the proper size hole into the wood framing prior to installing the bolts. If the holes are too small, you can crack the framing. If the holes are too big, the bolts may lack holding power.
If you have access to both sides of the studs, using bolts may provide a stronger mount.
- Install the discharge plumbing rough-in
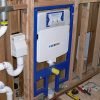
Once the frame is secure within the wall cavity, install and connect the outlet (waste) pipe fittings and connections.
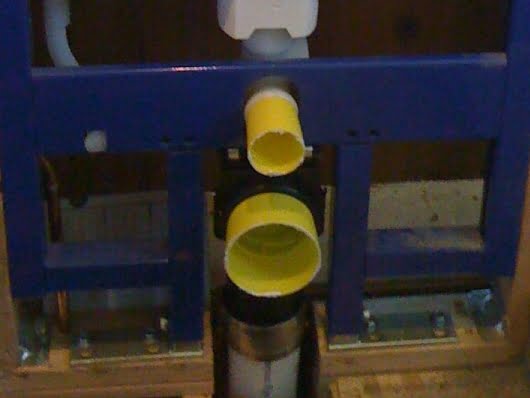
Begin by connecting the supplied 90-degree outlet pipe fitting (black in color) to the carrier frame using the supplied, two-piece clamp bracket. Then connect the discharge of this fitting to the stubbed out 3″ PVC waste line using the supplied hubless connector. You may have to trim the 3″ PVC waste line prior to connecting.
Once the connection is complete, protect the plumbing connection opening by capping them with the supplied yellow plaster caps. These covers will keep debris out and protect the ends of these connections. Use painters tape if the pre-made covers are not available.
Next, connect the toilet bowl mounting threaded rods to the carrier frame. You will not need to set a particular depth for these mounting rods yet, just screw them into the frame far enough, so they are not in the way during the remaining construction. Once installed, pass the clear plastic tubing thread protectors over the installed threaded rods.

- Install and connect the supply plumbing
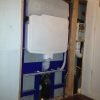
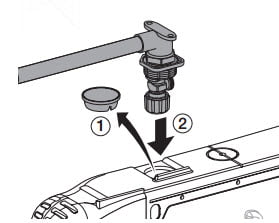
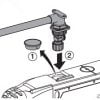
Run cold water supply plumbing to the top of the concealed wall carrier unit and connect to the supplied valve. Plan the valve location to allow for the passage of the valve into the carrier unit through capped access hole at the top left of the unit. Use drop ear elbow fitting at the end of the supply line to allow for a secure connection for the supply plumbing (see photo to the right).
Connect supplied shut off valve to 1/2″ supply plumbing then mount so valve is accessible within carrier unit.
Connect the Geberit supplied supply water valve to the drop ear elbow (after applying several wraps of Teflon tape in a clockwise direction when looking at the distal end of the fitting). Then pass the valve into the carrier through the access hole (remove the cap first) at the top left of the unit.
Next, secure the drop ear elbow to the wall framing using a block of wood located above the elbow (see above rear view of the unit in step 5). Before mounting the elbow, make sure the passed supply valve outlet is oriented to the right front of the unit to allow for easy connection to the water line inside the unit.
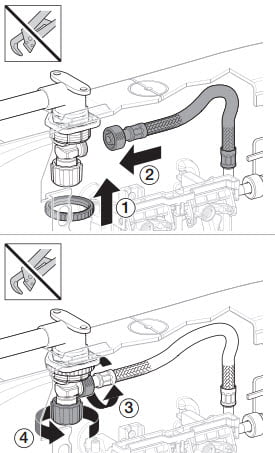
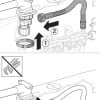
With the supply line securely mounted and the supply valve passed into the carrier and properly align, connect the supply valve to the water tank within the unit using the supplied braided stainless steel water line.
After connecting the valve end of the water line, purge the line and supply plumbing of air by opening the valve at the end of the connected supply line in a small pail or container.
When connecting the braided water line use only hand tightening. These connections use small o-rings seals that can be torn easily with too much force. Do not use a wrench on these connections!
Prior to connecting the line, take a moment to apply a bit of o-ring lubricant to the seals prior to tightening.
- Install the actuator access splash cover and mud guard
Prior to finishing the wall in front of the concealed tank unit, protect the tank and actuator by installing the supplied splash guard and mud covers.
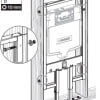
Both connect to the unit with snapping tabs and notches on the unit face plate. Install the splash guard first by inserting the lower tabs then swinging the top in until the top tabs lock.
With the splash guard in place, install the mud cover. The mud cover locks onto slots on the front of the front plastic face plate (see diagram to the right).
- Finish the wall overlying the in-wall unit
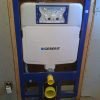
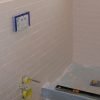
With the unit securely fastened in the wall cavity and the supply and waste plumbing connected, complete the construction and finishing of the wall over the concealed carrier unit. Geberit recommends sheathing the wall over a concealed toilet tank wall unit with cement board or similar moisture-resistant sheathing. We used cement board and finished with the same white subway tiles we used for the shower.

- Install the plumbing connections and mount the toilet bowl
With the wall finished, the next job is to connect the toilet bowl to the wall and plumbing.
Before we can hang the toilet, we need to insert the plumbing adaptors and seals that will attach to the toilet bowl.
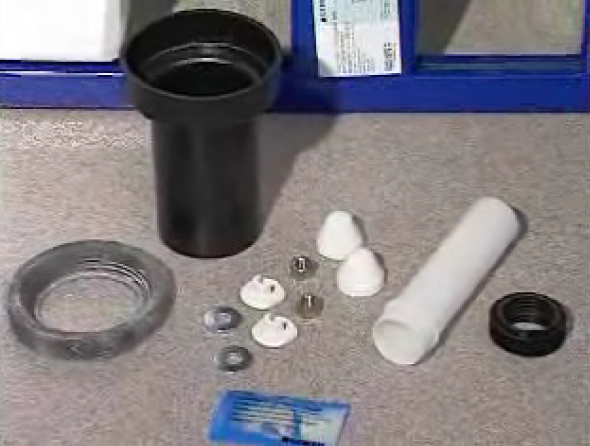
Using the Geberit supplied plumbing connector set, we will install fittings for the flush water and waste connections. These fittings will need to be cut to the proper length depending on the toilet bowl you are using. Once cut, rubber seals connect to the fittings to form a seal with the toilet bowl.
To measure the fittings correctly, follow the instructions provided by the in-wall unit you are using. I found this installation video useful for accurately determining the proper fitting lengths. The toilet bowl install begins at the 4:10 mark of the video.
Measuring and cutting the plumbing connections is critical. Take your time with this step and make sure the tubing lengths are correct.
Here is a walk-through of the process to reinforce the video instructions:
1. Find the supplied plumbing connector set with inlet and outlet seals and connection hardware. Remove the protective yellow covers from the upper supply pipe (smaller) and the lower (larger) waste pipe. Apply the supplied lubricant to the inner seals of both pipes.
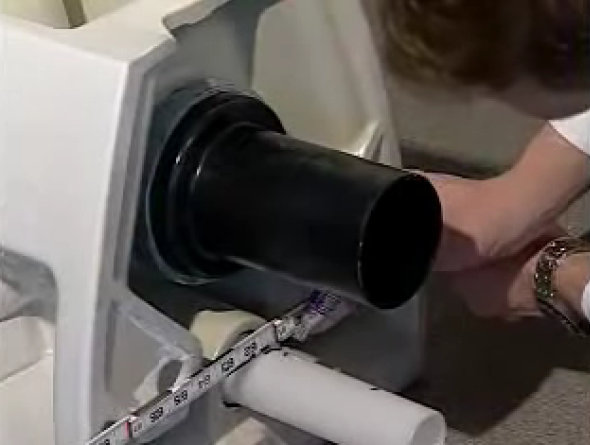
2. Attach the supplied rubber seals to the ends of both the smaller white flush connector and the larger black waste connector. Then, insert both connectors into the pipe openings in the wall with the seal ends out. Gently push them in as far as they will go. Mark both connectors at the level of the wall face with the marker. Remove both of the connectors.
3. Lubricate the porcelain connection ends at the back of the toilet. Spread the lubricant around the inside of the flush inlet (smaller opening) and the outside of the waste outlet (the larger opening).
4. Install the connectors to the toilet bowl for marking. Push the seal ends of the connectors into the toilet bowl. The flush inlet (smaller) connector should fit inside the toilet flush opening, and the waste outlet (larger) connector should fit over the toilet waste outlet.
5. After both fittings are fully engaged with the toilet bowl, mark both connector pipes at the level of the base of the back of the toilet bowl using a straight edge and marker. Then, remove both of the connector pipes.
6. Now you will have the two connector pipes with two marks on them. Use these marks to determine the cut-off point on the end (non-seal end) of the connector pipes.
Do this by:
1) Measuring the distance between the two marks on the pipe.
2) Add 1/8″ to this measured distance.
3) Mark the location of the above length measured from the non-seal end of the connector pipes.
4) Cut the pipes at this mark.Example: You pipe has two marks that are 3″ between. Add 1/8″ to get 3 1/8″. Measure 3 1/8″ from the non-seal end of the pipe and cut there.
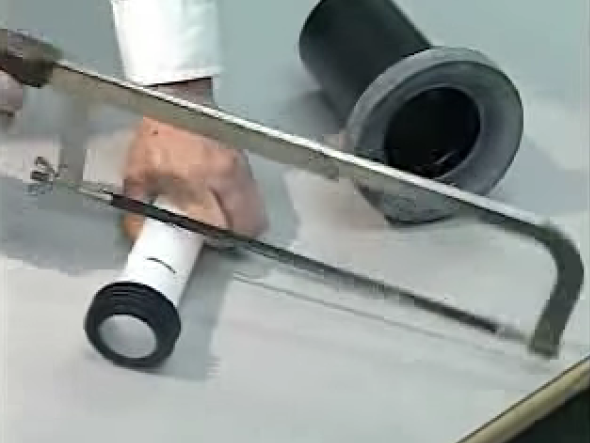
7. Cut the supply and waste pipes as outlined above. Consider using a method of cutting the pipes that will create a square, flat, cut end. If using a hand saw, consider using a miter box. Once cut, smooth the cut edge of the pipe at a 45-degree angle with a file or sanding block. Be sure to remove burrs from the cut pipe as they can damage the rubber seals the pipes will pass through when installing them.
8. Lubricated and install both connector pipes into the wall unit, gently pushing them in as far as they will go.
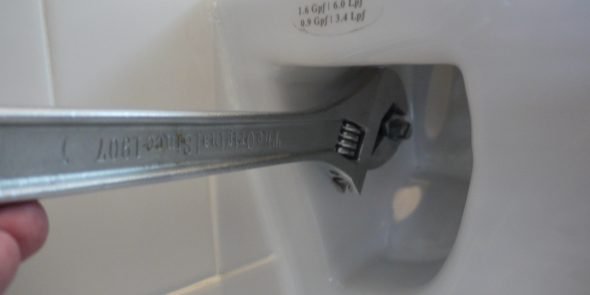
9. Prepare to install the toilet bowl. Adjust the mounting threaded rods to the proper depth by measuring the thickness of the toilet mounting flange and adding 7/8″ – 1″ to the flange thickness. If using the foam pad (sound guard) behind the toilet, install it now.
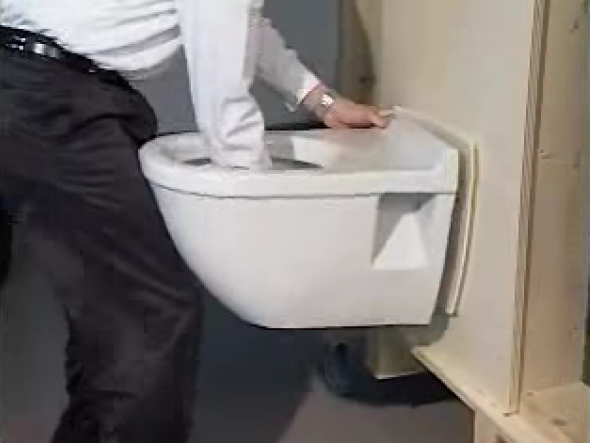
10. Install the toilet by lifting it to align the toilet openings with the connector pipes from the carrier and then pushing the toilet into the connectors. When the toilet is seated and to the wall, install the leveling washers, the steel washers and then the nuts over the mounting rods. Before tightening the mounting bolts fully, check the level of the toilet bowl and make adjustments as necessary using the leveling washers. Once level, tighten the mounting nuts and cap with the supplied plastic covers.
- Caulk toilet bowl and mount toilet seat
After the toilet bowl is securely mounted to the wall, caulk the interface between the bowl and wall with silicone or elastomeric sealant (Lexel).
If using an elastomeric sealant (like Lexel), working very quickly to smooth, as this product sets up very quickly and has a very short working time before the surface becomes tacky and difficult to smooth.
For a clean caulk line, first apply painters tape, leaving a gap to apply the caulk. Apply caulk and smooth with finger or tool, and then remove the tape. Next mount a toilet seat designed to fit the toilet bowl you are using. I chose the soft-closing Toto SS204 toilet seat with cover which I highly recommend. Mount the toilet seat using supplied nuts and bolts (nylon in the case of the Toto seat) after aligning the seat with the bowl.
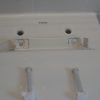
- Assemble actuator components and cover
Remove the plaster cover from the actuator access. Snap the walls of the mudguard so they are flush with the finished bathroom wall face. Do this by first using a utility knife to cut the edges of the mud guard walls back to the desired breaking depth.
Next flush the flexible water supply line to remove air in the supply plumbing (if not already done). Do so by disconnecting the distal end of the supply line (connected the tank) and opening the supply valve to purge air. Use a small cup to flush to catch any water coming out.
Once flushed, connect the flexible water supply tubing to the tank connection. Remember to tighten these connections only as they rely on a relatively small o-ring to seal. With the line connected and flushed, open the supply valve.
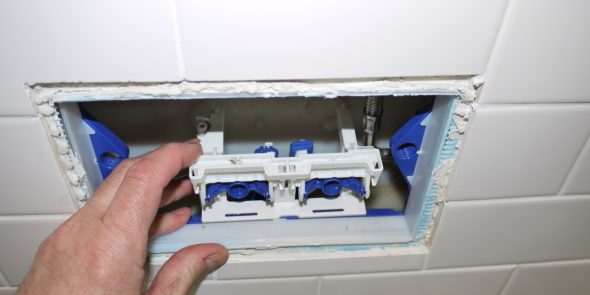
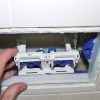
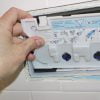
Then, install the flush components. First, install the actuator cam lever unit by snapping it into the access base edge lip and resting it on molded ridges on tank.
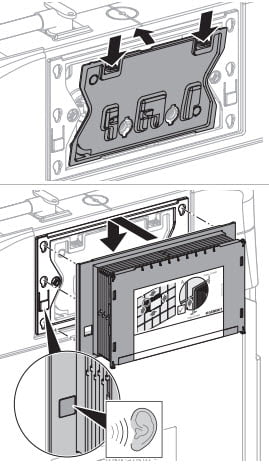
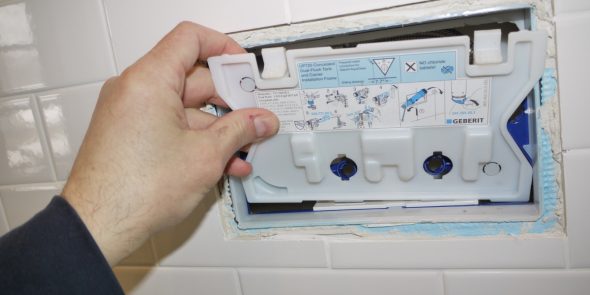
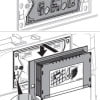
After the cam level unit is in place, install the white plastic actuator cover plate by inserting the tabs at the bottom and snapping the top tabs in place.
Next, install the black cover frame using the locking key pins located at the sides of the cover. Insert the key pins and turn to lock as illustrated on the frame.
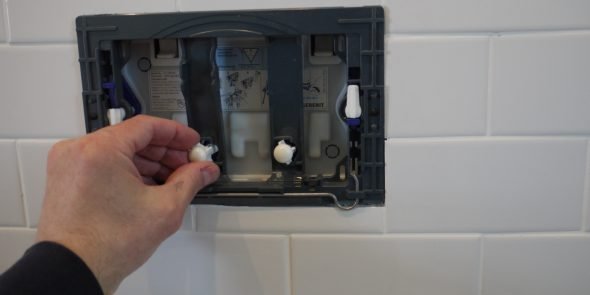
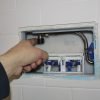
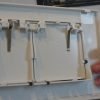
With the cover frame installed, insert the flush control push rods into the access hole in the cam lever unit. Install one push rod for each flush controller. These rods are notched to allow sizing to match the wall depth. To change the length of these rods, simply break the rod at the appropriate notch for the size you need to match your wall depth.
With the control rods properly sized, install them by passing them through the holes in the actuator frame and dust cover and into the actuator “gear box” cams. Some control rods are sized and colored differently for each flush actuator (check with your install literature). Once passed into the actuator gearbox, turn the control rods to lock in place.
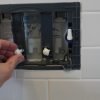
Test the flushing function by pushing on each control rod – it should initiate a flush cycle. With the actuator control rods assembled, locked and working properly, finish the actuator assembly by installing the actuator cover.
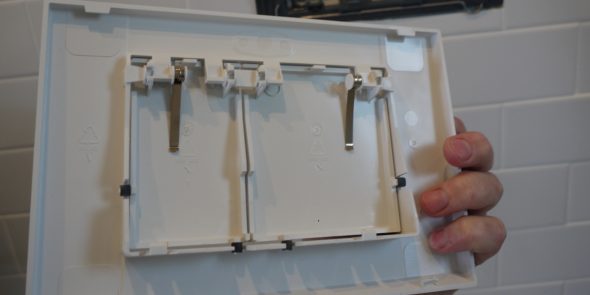
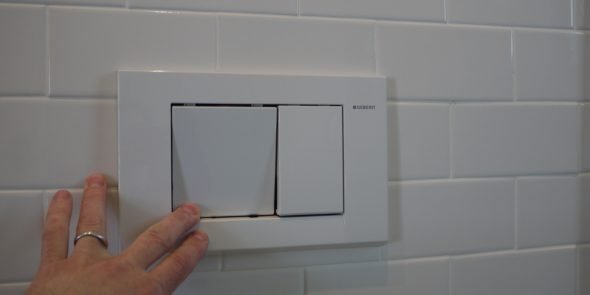
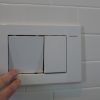
For the Geberit unit, the cover is installed by first pushing the base of the cover against the wall and sliding up to engage the two plastic tabs with the rounded metal springs at the base of the black actuator frame. Once both of the bottom cover tabs are engaged with the frame spring, push the cover up and over the top of the frame edge to lock in place.
IMAGE GALLERY | Wall Mounted Toilet














Just tell
Me the measurements of that wc 4″ pipe weste from the the floor to that 4″ pipe
Hi Paschal,
I’m not sure which dimension you are referring to.
Hi –
I’m wondering whether you use the dual flush feature of the toilet. I think it can be set to flush between 0.9 and 1.28 or 1.6 gallons per flush. I’d love to just set it to one flush though and prefer to be on the lower side. Is it pretty efficient at flushing solid waste even set to the 0.9 or 1.28 flush rate?
Thank you!
Hi Viktoria,
I do use both flush buttons. It does seem, however, that you can trigger a larger flush with either button by holding the button in. I tend to use the lower flush most of the time. The Toto bowl and Gaberit wall unit combo is outstanding together and I’ve never had a clog.
G
Hi Gary,
I’ve been reading this thread and have found great relief knowing that I am not the only one perplexed with this situation.
I have a Gerberit wall mounted carrier ( https://www.geberitnorthamerica.com/products/installation-systems/system-for-floor-mount-toilets/index.html) with a Nameek floor mounted toilet (http://www.nameeks.com/product/Toilet/Scarabeo-5522.html). The manufacturer specifically recommended this carrier. However, they provided very poor information on how to install the external trap to connect to the waste outlet. We now have a 4 inch PVC elbow. We were unsure how to connect the trap-(white) . We can attach a 4 inch piece of PVC pipe, but unsure how to secure the trap to the pipe. They are also not the same thickness in wall diameter.
Do we need to use the black portion of the piping? Its about 3.5 ” diameter- not sure how it will fit to the waste either.
Like the previous blogger- we are at the Jersey Shore and I have showed more than 10 plumbers this – no one understands how to do this. They never even heard of Geberit!
Kindly advise. We are totally stuck here!
Thank you !
Hi Viv,
I think you will be OK with your setup. As long as the toilet in and out openings match the Geberit’s carrier plumbing the system will work.
I haven’t looked into the Nameek toilet, but I would assume if they recommend the Geberit carrier, the two are compatible. As an overview, the Geberit carrier gets installed in the wall and the legs are adjusted to match the height of the floor mounted Nameek toilet. This might require a bit of calculation if the floor is not yet finished. The in and out plumbing connections of the Geberit unit must match the height of the in and out openings of the Nameek toilet once it is mounted on the finished floor.
The Geberit unit will come with a black 3″ 90 degree discharge fitting that mounts to the carrier and connects to your rough-in drain waste PVC plumbing (typically coming up through the floor framing bottom plate). This connection is made with a PVC shielded rubber transition coupling (I think it is included, or just search for “Fernco Proflex pvc coupling”) – you can get these at any home improvement store and they are sized depending on the pipe connections (i.e. PVC d/w/v to PVC or PVC d/w/v to cast iron, etc). PVC drain/waste/vent pipe is thinner than PVC supply pipe, that might be what your are describing when you are talking about the different internal diameters. The internal diameter doesn’t matter as the connection is made on the outside with the coupling. So, to connect this waste fitting, once it is installed in the Geberit unit, just cut it or the rough-in drain pvc pipe to allow for the coupling, then slip on the coupling and tighten the clamp screws. Here is an image (sorry, not a very good picture)
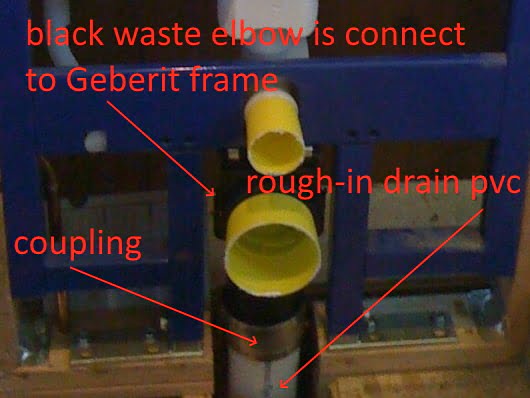
There is no waste trap to connect. The toilet design incorporates a trap in the waste discharge path. You just have to connect the toilet bowl discharge opening with the above black discharge elbow from the Geberit unit. This is done using the supplied black connector that comes with the Geberit connection plumbing fittings. See Installation step #9 in the article above and watch the video.
The supply water connectors are made in a similar fashion using the supplied (white) inlet connection fitting. Watch the video in my article or check this one out:
https://www.youtube.com/watch?v=Lp6aeoHPkcY
https://www.youtube.com/watch?v=g3NdHUA2RhI
Let me know if I can help further.
Gary
Hi Gary,
I have a Durait toilet connected to the Gerberit tank. Because of a terrible mistake, the toilet was installed 4 inches too high.
Unfortunately a very expensive large mirror was installed over the entire actuator. It covers the actuator and extends 5 inches below the actuator. All of the area below the actuator is drywall that can be easily removed. Is there any way to lower the toilet without moving the actuator ? I understand that the waste line will have to be lowered. My only concern is whether the main water line can be lengthened by 4 inches so that the actuator will not have to be disturbed.
Thank you.
Joe
Hi Joe,
Sorry to hear about your trouble. I don’t know of any easy way to lower the frame yet keep the actuator at the same level. There are several different wall frame/carrier manufacturers, but a quick look at the common ones, doesn’t seem to offer a solution.
You could consider a different bowl – some manufacturers may offer a lower seat height at the same waste mount point. Likewise a lower profile seat may help a bit. You could also add a “platform” under the bowl as a temporary solution or somehow change the floor height under the toilet. Another option, but likely expensive, would be to convert to an on-the-wall carrier/tank system that would cover the old actuator cutout and allow height adjustments like the Geberit Monolith system wall mount toilet system.
Good luck, let us know what you end up doing…
Gary
I am currently in the process of finishing the second story of my home (story and a half actually) My decision to use a wall mounted toilet was actually made for me. The builder of my home stubbed a single soil and supply lines to the second floor (see picture). Unfortunately it was stubbed up on the wrong side of a load bearing beam. Since the bathroom had already been framed when we bought the house (we’re the second owners), we decided not to spend the money of running a second soil line from the second floor, through the first floor, to the craw space under the house. After much anguish and gnashing of teeth, I discovered a viable solution and purchased a Geberit DUOFIX IN-WALL system (model 111.335.00.5) This required a 2×6 frame construction, which was easily built to accommodate the device. I found the installation video on Geberit’s website to be helpful with most of the process. I just wish they had been as thorough and detailed about running the supply line. That took a little more usage of my brain (LOL). The process has been rewarding to say the least. I will try to take pictures and post those as the process moves along.
Hey Dave!
Thanks for sharing your project. Someone was very smart to discover the wall-mounted side discharge option of the 2×6 Gerberit in-wall system. Here is a diagram:
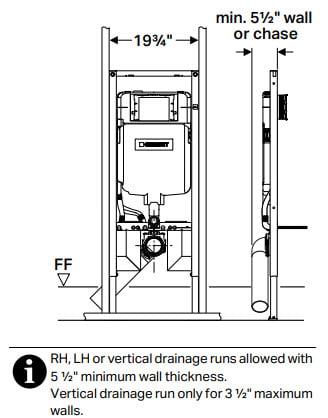
The good news is you will likely love your wall-mounted toilet – I have nothing but praise for the system after using it for 7 years!
Gary
Dave,
I found a list of discharge plumbing accessories for Geberit wall-mounted toilet tank frames. The chart is a bit confusing as the chart has check marks for the RH and LH offset discharge pipes under the 2×4 frames (111.798) but in the fitting comments notes, “for 5.5″ minimum walls” only. Maybe you can use the offset with the 2×4 frame you just need the equivalent of 2×6 wall clearance behind the wall face (which you appear to have). Here is the chart:
Gary,
Thanks for posting the chart showing additional waste fittings available. I was originally going to have to use three 90’s to get the waste from the toilet to the soil stub up. With the straight pipe replacement I am able to eliminate 2 of those 90’s! I think this will provide a better drain for the toilet since there will be fewer bends to go through. It cost $31.00 and will be worth every penny.
Update: We ended up going with two American Standard with external tank for the walls facing the outside of the house and then two Gerbit for interior walls. As Mark, above, has experienced there are few contractors or plumbers who have experience installing wall hung toliets. We had holes showing too and I had to have the work corrected by another plumber. Before hiring a plumber, I would ask how much experience they have with these. They must end up taking more time than the standard so the plumbers get sloppy. BUt, back to the toliets, at first I was disappointed that we had to have the American Standard toliets with the external tanks for the exterior walls, but, now, I love them. They have a strong, pressure assisted flush – so they work great. The Gerbit, however, is a very weak flush which does not clear out the bowl for #1 or #2! They are horrible and I am thinking of tearing them out and replacing them
Hi Gary,
What a great site! So thorough and detailed.
Even though I’m not installing it myself, my contractor is doing it – I have a question about being able to have the toilet right against the porcelain wall tiles without caulk/grout. I’m thinking easier to clean.
I have the Toto/Geberit combo.
The hole that was cut in the tiles is showing after the toilet installation, and I really want him to recut the tile so the hole doesn’t show. I’m not a fan of cleaning around the toilet anyway, and my fear is that pee will search out grout or caulking like a heat seeking missile, and I will feel the need to clean it more.
Did I mention I’m not a fan of cleaning around the bowl – or re-caulking for that matter?
Is it reasonable to ask him to recut the tile?
It is not lost on me that you have caulked around the toilet in your instructions, so I really appreciate your input.
Thanks,
Mark
Hey Mark,
Thanks for the question and using the site.
I agree with you – I would have the tile re-cut. Even with a generous caulk line, the opening from the over-sized hole will always be a weak spot in the wall, potentially allowing water into the wall assembly. I would have it fixed now.
The project looks great.
Gary
Gary,
Can you set the carrier frame component “back” from the wall a bit? My install requires plumbing coming up along the foundation wall through the floor of a bedroom, and placing the toilet in the mudroom (which the foundation is separate because it was a covered porch which has been enclosed). Can we run the plumbing up the foundation wall, and wall of bedroom, and then place toilet in mudroom?
Thank you for all the great information!
Kim
HI Gary –
Not sure if my first message went through. I found your site to be so informative. We are building a new home at the Jersey Shore and had the architect draw in wall mounted toliets. This has become a major problem for our builders. There are all kinds of questions about getting the right plumber, expense etc. First, we chose an American Standard wall hung with an external tank – now they are saying the wall won’t take it and we need an in-wall carrier with a 2×4 carrier, They are suggesting an in-wall tank by DXV. They say the toliets are $195 each – actuator plate $60 and the Gerber toliets are $350. I don’t want an in-wall because I worry about how to get the toliet fixed if it overflows etc. Also, it will be expensive to install etc. They really don’t want to do this. I’m disappointed that this has caused so much angst etc with us and the builders. Are the in-wall tanks really worth it? This is so much trouble and finding someone to help us is impossible!
Hi Maryanne,
In wall toilets are worth it!
I am traveling but will reply with a more substantial reply to your questions in a few days.
Gary
Hi Gary,
It’s the same Nick who contacted you almost 3 years ago but never really found time to go ahead with this project. Well, recently I did and a shiny new Toto Aquia now awaits to be mounted onto the fully installed Geberit 2×4 wall carrier. Of course, to make sure it’s installed correctly I checked your instructions, but also every other info I could find on the procedure on the net. I would like to mention, and hopefully to get your confirmation, there is a lot of confusing information about one very important issue mentioned in more or less all wall mount toilet installation manuals and videos.
It’s about how to measure and cut the inlet and discharge pipes.
Let’s see – the goal is to get exact final length of these two pipes and the measuring procedure described in all the manuals is more or less clear. However, the problems start when manuals start explaining what to do with these two measurements (actually four for two pipes) . All instructions mention cutting additional 3mm (1/8″), but some give wrong impression that the final length of the inlet and discharge pipes should be 3mm longer than exact measured and calculated length. Quite contrary, the idea is to make the pipe 3mm shorter than exact lenght, just as safety factor for possibly inaccurate measuring technique. In fact, if the pipe is made 3mm longer, instead of 3mm shorter, it may even bend the pipe behind the wall which can only be fixed by replacement of the whole tank as this pipe is integral part of it (probably easier to replace the whole wall carrier).
In case acoustic foam is added between the wall and the toilet, I’m not even sure if these 3 mm should be subtracted from the final pipe length. The foam is close to 5mm thick which will take care of pipes which are measured 1-2 mm too long. But, let’s say, again just for future safety when we can forget to reinstall the foam after toilet removal and re-installation, instead of making the pipes shorter by 3mm, they can be shortened by 1-2mm. This should do the job.
One of worse examples of the confusion I’m talking about is Toto video on this subject: https://www.youtube.com/watch?v=q0T6hTTvpgA&t=588s. At 9:27, the video clearly shows the measured distance of 123mm. However, once this distance is transferred to the pipe end, at 9:33, although the voice says that 3mm should be added they are subtracted and the pipe is cut at 120mm, leaving it at least 3mm too long (probably much more due to very rough measuring technique).
Even this Geberit manual can be very misleading with their drawing of distances C and 1/8″ which is drawn so it looks like pipe should be cut longer – http://www.chicagofaucets.com/images/bulletins/attachments/ri111.336.00.1.pdf) .
This is much better Geberit version of the same procedure: https://www.geberitnorthamerica.com/media/local_media/_imported/instructions/997006000.pdf
I think that by giving your 3″ -> 3 1/8″ example, your web site gives by far the clearest info on this issue and the one applicable for any brand of wall mount toilet. Most importantly, the one which will save somebody a lot of headache, frustration and money.
Cheers and thanks for that,
Nick
We have a wall mounted toilet with in-wall tank. Honestly, it makes me nervous. So much so that I’ve begged my contractor to remove it and replace it with a standard toilet. He refuses. Anyway, my big fear with this is if there’s a leak with the tank we would need to demo the wall to get to the tank. Also, the access to the shut off valve is not easy to get to (I have a Toto system). In fact, it’s almost impossible to get to. As far as it saving space….well, i’m not sure about that. It does look nice but give me a standard toilet and tank anytime. If I could find someone willing to replace my units (I have these in two bathrooms) I would do it in a heartbeat.
Hope you don’t mind it’s not a cabin or DIY – just wanted to show it could be installed without access from the back. And again, your experience and expertise led us to make a great decision on the Toto/Geberit combo. We also ordered all the fixtures online to save $. Got a great price on the tank from PoshHaus with free two-day delivery and toilet, seat and actuator from Supply.com. Thanks again!
Ha. Not sure how that got sideways! Here’s a different one.
Wow! Thanks Steve for sharing your beautiful project and the kind words.
Gary
Finished. Thanks again for all the great information!
Almost done
Another
More
A few more pics
It can be done. This installation was just done in a NYC co-op in front of a solid concrete shear wall. The space was previously a kitchen. We put a shower, separate tub, double basin vanity and the wall hung Toto with Geberit tank in the wall. Appreciate this board, Gary, which influenced our decision to go with the tank and toilet combo. Can’t thank you enough for your suggestions and for sharing all your knowledge and experience.
Hi Gary – Great post! I am wondering if you know if you can mount one of these wall-hung toilets on a wall for which you do not have access to the backside of the wall, just the front side – I’m thinking of a shared wall in a townhouse. My client’s master bath toilet is on the wall that shares the neighbor’s unit so we have easy access under it, above it, the face & guts of the wall, but not behind it. My plumbing house at first said you could access the tank from the flush pedals, but then retracted & said you need to have access from behind the unit. I’m thinking I have used plenty of wall-hung toilets in Europe wherein the company might not have access to the other side…
Let me know your thoughts or knowledge on this!
Thanks much,
Paula
Hey Paula,
I would call the Geberit hotline at 1800 GEBERIT (1800 4323 748) with your question.
I don’t think access to the rear wall of the unit is required. The flush panel would give you access to the supply valve (I actually replaced my supply valve this way recently) and worse case scenario you could open the wall from the front if you needed more access to the unit. You certainly should be able to install it with just front access.
The other option is to consider the Generit Monolith system that mounts to the front of the wall instead of in the wall. Not quite as streamline but still very slim.
You might need a different plumber to look at it.
Gary
Hi Gary,
We are building a house at the Jersey Shore and I have always wanted wall-mounted toliets. This has confounded our builders and they can’t figure out how to install them! It honestly has been so much trouble – I’m ready to give up and just get standard toliets. Are there contractors/builders/plumbers who specialize in wall-mounted toliets?
On another note: What happens if we do get the toliets installed and there is a problem with the toliet getting backed up etc. How do you get to the tank to fix things? I don;t want to have to take out the wall. Not sure what step to take next as the builders want to talk me out of these toliets.
I too live at the Jersey Shore and have the same issue. 15 plumbers ran away when I showed them the tank. Did you find anyone who can install?
Vivian
Hi Vivian,
Yes, the builder did get a plumber to install the toliets. We have 2 types in our home – the Geberit Concealed Toliet Carrier downstairs and then, we chose the Glenwall Pressure Assisted Wall-mounted toliets because we were told that Geberit could not be installed on an exterior wall due to freezing issues.
I would suggest that you not buy the Geberit. Their Customer Service does not stand behind their products. I called last December that the toliet does not completely flush – leaves toliet paper floating on top and has a sewer smell that gets into the house. Our downstairs smells like a disgusting sewer if the toliets go unused for a few weeks. Geberit told me on Dec. 4, that they were too busy to come to the house and would come after Christmas. It is now end of July and they still haven’t come. Their Customer Service is abyssal and unconcerned about their customers. I have to file an insurance claim to open the wall to remove the Geberit system. Stay away from them. We love the Glenwall toliets upstairs – They are still off the wall for the cleaning advantages but the tank is there. At first I was disappointed that I couldn’t have the Geberit, now we are thrilled. It pushes everything down the pipes instantly – including toliet paper-and has not smell. When I called the company, they were completely accomodating and helpful. Whereas, Geberit has the attitude”You bought it. It’s yours”. Don’t be another foolish company thinking they care.
Hi Maryanne,
Sorry to hear about your trouble with the Geberit unit. To me, it sounds like an installation or an issue with your waste plumbing or venting for that downstairs toilet drain. My experience with the Geberit wall unit has been nothing but positive, although I haven’t had to contact their customer service. Our unit, which I installed (as above), with a toto toilet has been the best toilet I have ever owned/used. My Geberit/Toto unit has excellent flushing power (I have never needed a plunger!) and I have had no issues with leaks or sewer gas. To me it sounds like your downstairs unit is connected to drain plumbing with inadequate venting or improper drain plumbing connections or even leaks. (quick article on improper venting).
To compare the two units, isn’t a fair test unless they are both connected to the same plumbing, etc., and they are totally different toilet set-ups – functionally and aesthetically.
Sorry for your trouble, but I would guess the problem lies with your rough-in plumbing or the installation of the Geberit unit. It is concerning to hear about the indifference of the customer service department though.
Thanks for the feedback and your continued contributions to the discussion.
Gary
Gary, Thank you so much for your response. This is a newly built house. The builder did have the plumber return and he said it was “perfectly installed” I think he just doesn’t have the experience with wall mounted toilets. I agree I think it is installation but until Geberit actually examines everything , the builder and the plumber are blaming Geberit. As the homeowner , I am forced to make an insurance claim to have the toilets torn out of the wall because of the sewer smell
Hey Maryanne,
Hmmm… tough situation. The sewer smell just means there is sewer gas escaping somewhere – and not necessarily the toilet. Improper drain plumbing can siphon drain traps dry, even (as sometimes especially) those drain traps not being used. If you have a washer drain, a floor drain or even a sink drain in the basement, I would check those as the source of the sewer gas. If one of these other drains seems to be the source of the sewer gas, you might have a drain plumbing circuit that is pulling drain trap water from these drains and allowing sewer gas to enter your living space.
It could also be the sewer gas is getting pushed back up and out your basement toilet (you may notice bubbles if someone upstairs drains water or flushes a toilet – maybe a good test to do…). That might explain the poor flushing as well.
Other causes of the sewer smell are plumbing leaks behind the wall or under the slab.
Just because the house is new, doesn’t mean the work was done correctly or there isn’t a leak. The installing plumber is probably not the most objective person to help figure the problem out.
I’m fairly certain this has nothing to do with the toilet unit itself, but either an improper install or some other problem with your drain plumbing.
I would hire a third party plumbing inspector to figure it out. It is a potentially huge problem if it doesn’t get fixed, and will potentially require ripping walls/ceilings apart later if its not remedied now.
Good luck, I would be firm with the builder/plumber, this isn’t the toilet’s fault. Get someone else to inspect the home and plumbing.
G
Hi All,
This is a great site with full of information related to the Wall Mount toilet.
I have a wall mount toilet installed at my home, but currently facing a leaking issue at the base.
The leaking seems to be only at the base and the near by area.
No idea what could be the problem.
It would be great if you any provide any suggestions on what could be the exact problem.
Hi Mahesh,
Sorry to hear about your issues.
My first impression after seeing your photo is that it might be condensation forming on the bottom of your bowl. Obviously it could be a number of problems.
To help narrow it down you may want to add some food coloring to your bowl water. If the drips are colored, you could assume a bowl leak – either a seal or the bowl itself could be cracked.
If the leak is temporally related to flushing the toilet it may be the seal between the bowl and the holding tank.
If the leak is constant it could be a leak in your holding tank.
I would also consider any work or changes that may have caused a leak – recent wall work, screws, etc.
Unless this is condensation, you will likely need to remove the unit from the wall and investigate.
Gary
Hi,
Thanks for the valuable comments.
I must say your inputs where on the spot and after trying the procedure mentioned, I was able to identify the root cause of the issue, and the problem was condensation.
I took few precautions and I dont face any issues now.
I tried to keep my bathroom temperature normal, and make sure there is no sudden increase in temperature.
Great site full of information and thanks again for the reply.
Thank you very much for the information you posted. This blog was instrumental in my selection of the Geberit 111.798.00.1 and the Toto CT418FGNo.01 Aquia Wall-Hung Dual-Flush Toilet bowl. Installation in conjunction with a bathroom remodel went well, and I am extremely pleased with the result. My former conventional Toto toilet needed a plunger about 1/3 of the time but this in-wall and wall-hung combination has been 100% effective in getting the job done.
Thanks for the comments and photo Gordon. We love ours and I don’t think it ever clogged!
G
I want to mount two wall mounted toilets Back to back. The bathrooms are also back to back.
The wall is framed 2×6, I am going to move the 3″ drain from one part of the bathroom to the other. The floor is concrete. I want to use a geberit wall carrier with a toto bowl. I understand that if I frame the wall 10.75″ that I can mount two carriers back to back, if this is correct than what size carrier do I use a 2×4 or 2×6 carrier? Geberit gave me this part # to connect both carriers together part#367.923..16.1 is this correct? Lastly is there anything special that I need to know such as framing or? Thanks Dennis
Gary:
I really appreciate the work that you put into this DIY guide. It helped me tremendously with the prep-work for the unit. I did run into a problem with the Geberit wall unit. But before I get into that, here is a tip for those that have an adjacent opposite bedroom wall to the toilet tank unit -and- are concerned about someone nailing something on the wall and piercing the tank in the bedroom. I did have a 2×6 wall frame for the tank, but I decided to buy the Geberit (111.798.00.1) Toilet Carrier Frame for a 2X4 Wall. This way, there is a fair amount of space between the tank and the wall so if someone does nail something on the opposite room, it will not reach the tank.
Ok, so as far as the problem I encountered, the Geberit steel frame unit is not squared. I built out my wall frame from scratch and perfectly leveled the vertical 2×6 studs. However, when I got ready to install the unit, I could not get leveled. I put a level where the bolts hold the toilet unit and it was not leveled. I then ran a square against it, and found that it was not perfectly squared. From top of the unit to the bottom there was a left lean that caused it to have about a 1/4 inch offset at the bottom. Once I extend the legs to ADA height (17″), this offset will increase even more. I had already returned one unit with this problem. I’ve contacted Geberit and sent them pictures to include one showing vertical studs both leveled. I’ve gotten the standard answer, “We will have our engineers look at this”. Not sure what I am going to do since I already built the structure for this unit. I’ll update when I resolve this.
Hi Juan,
Thanks for the tip – good idea!
Regarding the out-of-square frame, as you already know, you probably have three options; 1) Straighten the frame 2) Shim the frame between the studs or 3) trim the studs to fit the frame.
Of the options, straightening the frame seems like the most difficult option and the one with the most potential for problems. So, depending if the frame fits into the stud space, I would either shim the unit and use the legs to correct for level or trim one of the studs to match the out-of-square frame.
I’m sure you are working on it – let us know what you do.
Gary
Hi Gary,
I am so happy to have found all of this information. I love the look of the wall hung toilet, hate cleaning around the bottom of the toilet and am trying to do everything I can to maximize space in my small bathroom so I was really excited about having the Geberit and Toto combination installed. I am on a slab which I understand can complicate the installation.
I started calling plumbers. I don’t know why they seem to hate these things but every one that I have talked to has tried to talk me out of it. They say they don’t save space, are a pain to install and it is not worth. Obviously I am disappointed. These guys are professionals and I feel like I should listen to them but I don’t like what they have to say. Why do you think plumbers give these toilets thumbs down? And I can’t do it myself.
Did I understand in one of these posts that you could run the waste line to the side and meet up with the waste line for the sink or tub and thereby eliminate the need to have to open up the slab and relocate the existing toilet drain?
Jamie
Hi Jamie,
Thanks for the kind words.
I’m not sure why the plumbers you have talked to don’t seem to like wall mounted toilets – we absolutely love ours and have had no problems. I suspect the plumbers you have talked to have not installed many of these and that these installations take more time.
When looking for a suitable plumber, it might help to contact Geberit directly. You could start with finding a local showroom and asking if they could recommend any plumbers who use the products. Here is a link to a show room located for Gebert: Gebert plumbing showroom locations.
You might also search for commercial plumbers as they tend to install wall mounted toilets more often then residential plumbers would.
Gary
Awesome post, GREAT work, will use this as a reference as we install
Thanks Mike! Good luck with the project. We still love our wall mounted toilet. Let me know if anything comes up.
Gary
How high must the invert of the 110mm outlet pipe of the pan be. Or what height is the top of the pan without the toilet seat?
Thanks
Hi Gary,
Great site with lots of helpful information. I’m in Europe and dealing with a leaking waste drain pipe on a Geberit Combifix. The photo shows the pipe after three plumbers attempted a fix. I don’t know how the Geberit was originally installed but I think that the installer used a generic pipe and not one specific to Geberit. It’s also possible the pipe was not affixed to the Geberit frame.
Is it necessary to use the specific Geberit pipe? Is it imperative that the pipe be fastened to the metal Geberit frame? This structure is a bit different than yours because it’s meant for solid, concrete walls. Even so, all the info I can find seems to indicate that the pipe needs to be fastened to the Geberit frame.
Is the distance between the water inlet and waste exit a universal standard? I’m wondering if every bowl has the same specs.
Thanks for any tips you can provide!
Paul
Wow. Great write up. Thanks for this information. I am in the opposite of a cabin — NYC co-op apt. Well not reall. they are both small spaces! We are installing two of the Toto Aquia with Gerberit 768 carriers. Thanks for taking all the time to post and respond. Great stuff!
Gary,
Thank you for your superb website. I am still deciding whether to go for an in-wall tank. My main concern is long-term maintenance. You mentioned no problems in the first two years or so, but at some future time a seal will start leaking or the flushing mechanism will get stuck. Would you need to open the wall again or are some key components accessible? Thank very much,
Stan
Hi Stan,
Thanks for the visiting and the kind words.
Regarding the in-wall carrier tank, it is true that accessibility is an issue and a potential maintenance concern. I did mount may wall tank in a wall with access from behind via a closet. It would still be a huge project if the carrier body were to leak. The tank does allow easy access to the flushing components via the front activation panel.
In addition, there may be issues with access to the rubber gaskets used to seal the carrier and toilet bowl connections. If you do go in-wall, make sure to use sufficient silicone plumbers lubricant (like Dow Corning Molykote o-ring lubricant) on the rubber gaskets to help prevent drying.
Despite the concerns, the Geberit in-wall tanks have been very popular in Europe for decades and popular with commercial installs, which gives some piece of mind regarding reliability. Geberit leak tests each unit in the factory after manufacture.
Here is some additional information regarding the Geberit in-wall concealed toilet tank carrier from the Geberit website.
Another option is the slim, against the wall Monolith tanks by Geberit.
As a followup, our in-wall unit has been is service over 4 years without a single issue. It has never leaked, and the flushing power is very impressive. We have never had a clog nor used a plunger on this toilet!
Thanks for the question and let me know what you decide.
Gary
Sirs,
I’ve encountered a problem wall mounted toilet(Mirabelle) that continues to leak/drip at the bottom of the toilet. I have been called on to repair the leak. Seems the drain connection(boot) is not standard…..has been bastardized by previous installer….any suggestions will greatly appreciated….. Also; are there additional drain repair kits available for the geberit system? Thank You,
Roger
Roger,
I’ve been dealing with a bastardized wall mount installation as well. I’ve learned a lot trying to resolve this. I would recommend buying the official Geberit connection kit. See the photo. The kit is available for both a 3 and 4 inch (90mm and 110mm) waste exit on the toilet.
It’s important to know that the diameter of the water inlet pipe from the Geberit carrier to the toilet is 45mm. It’s a special pipe- it’s not your standard 1.5 or 2 inch pipe. A seal in the Geberit kit goes on the toilet end of the inlet pipe making it seal nicely with the standard 55mm water inlet.
In my case I was convinced the problem was with the waste drain connection. It turned out the real problem was that the installer had used a 40mm (1.5 inch) water entrance pipe instead of the official 45mm pipe. Water was leaking past the seal and also the seal could easily get out of position when the toilet was mounted to the wall.
Let me know if I can help further.
Hi,
Question on installing this in a slab construction. Can the rear (discharge) elbow be turned to a slight angle, or does it have to go straight down? If it can be done on an angle, what would the maximum be?
Corinne
Hi Corinne,
Thanks for the question and thanks for using our site. Yes, the Geberit concealed toilet wall units allow for up to a 45 degree angle on the discharge pipe. See page 9 of the installation instructions – here is the link: Gerebit Wall Hung Toilet Install Instrutions
Good Luck!
G @ CDIY
Gary,
Your post is excellent, thank you. I am also considering Geberit concealed tank, model #111.798.00.1), which is for 2×4 construction, along with the Toto Maris wall-mount toilet. I am wondering why you chose the Geberit tank instead of the Toto tank? You mentioned that you installed yours with seat height of 17″. I would like my with a seat of height of 15.5″-16″, however should I be concerned with this Amazon review?:
https://www.amazon.com/Geberit-111-798-00-1-Concealed-Carrier-Dual-Flush/dp/B01C7FL4PK
I usually dismiss the majority of Amazon reviews as being inaccurate and biased. However, this person has a lot of supporting data. Is his criticism of the Geberit tank accurate? It seems that you installed yours lower than his, although your Geberit tank is the standard 2×6 model.
I could go the easy route and just get the matching Toto concealed tank (they have a kit that allows you to use it in 2×4 construction), however I have heard nothing but rave reviews for Geberit (except that Amazon review), and Geberit I read was the first in-wall tank, and they have been at it a mighty long time.
Any feedback is much appreciated, thanks!
Hi KB,
Thanks for the question – sorry for the delay, I missed your question initially.
I used the Geberit wall tank after reading many reviews. I too used the unit designed for 2×4 wall studs (model 111.728.00.1, which has been replaced with model 111.798.00.1) and could not be happier. Regarding the height, you can set the height by adjusting the “foot” height of the chrome base foot that slides into the blue frame. If you look closely at some of my pictures, you will notice about 1/2 inch of the chrome foot frame still available if I were to adjust the frame as low as it would go. With that 1/2″ extension, I believe that puts our seat height at 17″ – so if you used the extra 1/2″ that you get you down to a low of 16 1/2″. This height maybe not ideal for children, but ours seems just right at 17″. I will be at the cabin this weekend and will measure the height and update this thread.
Regarding the other reviews that have questions regarding the discharge plumbing, I had absolutely no problems and connected to my 3″ PVC waste line using the included Fernco coupling. Fernco couplings are readily available in a wide variety of sizes and even if the included coupling did not fit your plumbing, it should be very easy to find one that does fit.
If you haven’t moved forward yet, I highly recommend the Geberit tank. We have had nothing but high praise for it and after several years of use, never once had a issue or clog.
G@CDIY
I have to admit i didn’t read everything on the wall mounted toilets, but can they be installed on external walls? I’m thinking of using it in my future THOW (tiny house on wheels) build!
I mounted mine on the exterior wall. you just have to be careful and insulate all the piping.
Hi Gary,
In my home, there is a customized wall-mount water tank with a sit on floor toliet. The water tank mimic the normal water tank but hanging inside the wall and it is plastic made box so we can see it. Right now, I want to add a Flush Actuator on the wall to replace its normal pulling string flush actuator. Would you please give me some idea? Can I add this actuator between the water tank and the toilet ?
Right now, I do not have a photo for the toilet. But it is easy to imagine. Just lift the normal toilet tank into 5 feet high and use a pipe to connect it to the toilet.
Thank you,
Frank
Is it possible to have the waste line run sideways (down) vs straight down? I’m looking into this unit for a finished basement 1/2 bath vs digging a well thru my concrete floor. Any insight is appreciated!
Hi Mark,
Thanks for the question. Yes, Geberit does make optional horizontal 3″ discharge pipes that can be connected for right or left horizontal discharge. The part numbers are: 366.914.16.1 and 366.913.16.1. If you do an internet search for Geberit 366.914.16.1, you should find the part.
You can also install the standard discharge pipe at up to a 45 degree angle left or right without the above horizontal discharge pipes.
Good luck!
Gary
Gary — first off I just wanted to say thank you for this posting — it has been invaluable to me as I’ve been planning and installing my Geberit. This has been a long-term project for me and having your post handy has made it a lot easier.
So I just finished a horizontal installation a couple of months ago and it seems to work well. I’m remodeling a second floor bathroom to include a new shower. In order to accommodate the shower, I had to move the toilet from it’s original location. To avoid having to bore holes through what are already undersized floor joists, I decided to run the toilet waste horizontally through the wall, then dropped down into the floor to tie into the original waste line. As Gary suggested, I used part 366.914.16.1 to do this — I’ve attached front and back photos below. One issue I had to contend with was that, despite using 2×6 framing in the wall, I had to bore a 3.5″ hole in the doubled up stud framing on the left side of the toilet frame (facing the toilet) to accommodate the waste line. I felt like this undermined a lot of structure that supports the toilet frame, so I attached a 2×6 on face right next to the compromised 2×6 that the toilet waste runs through (see photos) — I just used framing nails and liquid nails to really tie it together with the compromised studs. Keeping this stud on face leaves just enough room to sneak the 3″ waste behind. The extra framing feels very sturdy — we’ve been using the toilet for a couple of months and it really doesn’t budge.
The only other issue I’ve had is with the volume of water related to the half flush function on the Geberit. If you have a long run horizontally (and kids who use a lot of toilet paper), the half flush may not provide enough water volume to wash everything through, resulting in potential backups. This seems to have been solved by using only the full flush function — just something to keep in mind if you have a long, horizontal run.
Thanks again,
Sean
Sean,
Thanks for the great post and nice work!
Gary
Sean,
After looking at your photos, your soil line seems to have a lot of turns and what appears to be at least one or more standard 90 degree fitting.
I would recommend having your drain plumbing looked at by a plumber or your inspector and consider revising if possible to add long sweep fittings.
Take a peak at this: http://www.finehomebuilding.com/how-to/departments/how-it-works/drain-waste-vent-systems.aspx
Gary
Hi,
I am wondering how you vented the toilet. Does the carrier feed into the sanitary tee and then is vented with your old vent stack that picks up at the bottom below your washer drain? My plumber is a bit puzzled since he his comparing it to a regular toilet where the vent picks up ABOVE the toilet drain and not below it.
Any suggestions you may have would be great. My setup is very similar to yours.
Cheers.
Martin
Look a few replies above for a venting example with pics. Someone asked a similar question.
Thanks for providing a detailed example to follow 🙂
Lastly, here are a couple videos of my installation:
Part 1: https://youtu.be/HF9NpSha2UU
Part 2: https://youtu.be/JvFINthiCOE
Ben,
Thanks for sharing your impressive and well thought out work!
Pic of continuation of the venting on the second floor. The vent pipe in the stud bay to the right goes through the attic and roof.
Thanks Ben!
how can be connect vent with wall hung water closet
Hi Ata,
The venting of you toilet plumbing should be no different compared to a traditional toilet.
Gary
Here’s a pic of my venting below the carrier. I had a city inspector review my plan diagram. I’ll post a pic of the venting around the carrier on the second floor and possibly a pic of the diagram if I can find it.
Cabin DIY
Wall mount helped me get a roomier bathroom out of a 5×7 room. Your site was a big help. Especially the suggestion doubling up the 2x4s (although likely not necessary) but there Is absolutely no movement.
Msh
Wow MSH, it looks great. Nice work and enjoy. Thanks for sharing the image.
I see you went with just drywall over your tank, rather than cement board and tile. The manual I have says that the minimum wall thickness is 3/4″, which sounds like 1/2″ backer board and 1/4″ tile on top. Did you have to use multiple layers of drywall, or did it work fine over standard 1/2″ drywall?
Hi all..
I would like to find out something about the WALL HUNG TOILET. I bought a GROHE toilet but now the problem is it does not have the bracket that I see on all the youtube videos, now am worried if they did not give me all the components when they were selling this toilet to me. Any advises will be appreciated..Thank you
Hello, thank you for sharing all this wonderful info. I have two questions and hope you can help me with.
Based on what criteria you picked the toilet bowl – Toto? Do you know anything about the Gerberit toilet bowls?
I’m definitely going with the Gerberit tank but having difficulty deciding on the bowl.
I’m trying to convert a 1/2 bath to a full bath. How would I know which set to use 2×4 or 2×6? I’m changing the position of the new toilet and putting it on its current side wall. I’m not sure what is the space/studs in that wall between the two bathrooms? What is the easiest way to find? Cut the wall? thank you!
Hello Thedork (nice),
I picked the toto based on their toilet’s reputation for high function and reliability. I also likely the aesthetics. I don’t know anything about Gerberit bowls, but I do like their tank / carrier systems.
If you have the option of using a 2 x 6 wall, its probably better – stronger and more room for plumbing. To check the depth of your wall cavity, I would either open a fixture cover or electrical box (turn off the power) if I thought it would allow me access to the wall cavity or drill a very small hole in a hidden spot and pass a wire to determine the depth. You likely could use measurements from a connected room to do this as well.
G – CDIY
Really nice writeup. The Gerberit “mime” style instructions are a bit vague for my taste. This has been infinitely valuable in assisting me with my installation. Thank you, really, for taking the time to put this together.
Hey Martin,
Thanks for the kind words. Feel free to upload an image of your work if you like.
Gary
This has been so informative…thank you so much!
I am in the beginning stages of a kitchen and master bath remodel. I really want a wall hung toilet, and gave my plumber the information on the Toto Aquia with the Gerberit wall carrier to review and research. I currently have a standard floor model situated over a concrete slab which is on an exterior wall with 2×4 framing. There is a very small window above the toilet that measures 45 1/2″ from the floor. I am not concerned with freezing as I live in Florida. The plumber briefly explained it was too difficult to install on the exterior wall. I am not sure why. Perhaps too much involved in moving the current waste plumbing? In reading the Gerberit website, they specifically state it can be done for a new build or renovation with 2×4 framing. My design is minimalistic and ease of cleaning, both of which fit this wall hung criteria. Can you share your thoughts if you feel this is viable project? The reason I ask is because we have already jackhammered the concrete floor to reroute plumbing for the shower and vanity locations and I figured this would just be one more area to retrofit new plumbing?
Hi AB –
Thanks for the question and thanks for visiting the site.
From my reading and experience, it is a bad idea to run plumbing and mount fixtures in exterior walls. Most building codes require access to drain plumbing, and you would want to have access to the backside of the Gerberit unit if needed. If you mount the wall carrier on an inside wall, you can access the unit much more easily if needed.
In addition to access issues, you may be more likely to have moisture condensation issues with exterior wall mounted plumbing, especially if the wall is 2 x 4 and would not allow for insulation where the unit would be mounted in the wall. You will also not be able to insulate this portion of the wall.
I would also worry about future penetration of the unit by a nail or similar originating from the outside of the house (sliding repairs, etc.).
As an alternative, you and your plumber could consider a floor mounted unit with a slender tank that is mounted against the wall and not in it. Gerberit makes a Monolith line of against the wall carriers that might work. They are expensive, however.
Good luck. I would try and find an interior wall that would work or consider something like the Gerberit Monolith.
Gary
Gary,
Great overview! I haven’t received my Geberit carrier yet but I’d like to start my framing. You posted the width at 23 1/2 yet a spec sheet online states 23 1/4. I’m now uncomfortable starting until the unit comes in. Suggestions? Thanks.
Hi Msh,
Just checking how the install went. What was the true carrier width – 23 1/2″ or 23 1/4″?
Hope all went well.
Gary
This is an excellent post. I’m very greatfull you posted this project in such detail & extremely well isustrated too. Only 2×4 installation I’ve found online. Your post is 100x better then the manufacturer instructions. Just received notification from amazon the my toto & Geberit 111.728.00 was shipped today. The only concern I have is procecting the back side of the tank and waste pipe from puncture. Any thouths on this? Is it a valid concern? The back side of my tank will be facing a bedroom. What if someone decided to nail into the wall?
Hey Das,
Thanks for the kind words and thanks for using the site.
You make a good point regarding the potential for damage to the unit from punctures. Both sides of the unit are potentially at risk for tank and / or pipe puncture. I did take care when installing wall trim to avoid fasteners in the area of the waste pipe as it passes through the floor plate of the wall framing. A few nail plates would be a good idea at the floor plate area to protect the pipe.
As you point out, the tank is vulnerable too. The tank is plastic and could easily be punctured at the back or front of the unit. I doubt there is an easy to obtain product made to protect the unit, but you certainly could make your own “shield” for the tank out of thin metal plate. The only issue might be the added thickness, as the water tank is, I believe, flush with the front and back of the carrier.
Good luck with the install. I think you’ll be glad you went with these products, we have had absolutely zero problems with Geberit carrier and Toto bowl. Upload a photo of your project when done if you like. Thanks for the excellent points regarding tank protection.
Gary
So… i’ve decided to go with a walmount but ended up saving a lot of money by NOT having an in-wall tank. I instead went the flush-o-meter route and discovered there’s nothing wrong with having a 5 gallon pressure tank to feed it in order to get your 25gpm flow for a few seconds so long as that tank has a back flow prevention fitting so it only supplies the toilet.
My question: Since I don’t need the carrier for the in-wall tank, is it ok to just beaf up my wall with pressure treated wood and mount the toilet on that? Or, do I need to make something out of steel? Or, is this all such a huge code violation that i’m out of my mind?
Hi Jack,
Hmmm… good questions. Boy, if have access to your wall cavity, I would really encourage you to use one of the tried and true in-wall tank carrier units. For a few hundred bucks you can get the Geberit frame I used above. The unit is built from heavy duty steel tubing and it would be hard to replicate the support provided by the unit. And, if you factor in the tank I strongly believe it is a no brainer to use a carrier.
Almost any problem that you could have from not using the carrier would be a total mess and likely end up costing you much more in the long run. I wouldn’t mess with homemade plumbing for a toilet! Not only do you have potential structural issues for the wall, I can imagine the many ways the plumbing could fail — seal issues with the waste connections, issues with the supply control, etc., etc.
And, if you ever wanted to sell your home… I would use an approved in-wall carrier tank. Too much at stake.
I’m going to respond as I found this whole thing frustrating due to bad info everywhere. There’s a reason commercial builders don’t buy the in-wall tank setups referenced on 99% of the forums (including here) for home-owners: It’s expensive, problem prone and difficult to install, and has 10x the moving parts and maint requirements. Ignoring everyone’s advice, I learned the hard way how to do it commercial style. If you’re interested, here’s what I found:
Got a used Crane commercial bowl for $25 (They are $250 new, used available everywhere) and new flushOmeters to go with it for $110. I could not find the “few hundred dollar” wall carriers you reference because they don’t actually exist. It’s important to keep in mind: The commercial versions of these toilets with the flushOmeters aren’t meant to have wall carriers with builtin tanks. They are meant for applications where the static water pressure is at least 75 PSI and 18 – 20 GPM and there is no tank. The carrier I was looking for was only $150 and had no tank option. Like most home-owners, I had the pressure but lacked the GPM. This is an easy / common fix to install a standard water pressure tank for $40 – $50 and reverse flow preventer which makes up for the missing GPM. It’s also important to note that the “home made plumbing” you reference for commercial applications is nothing more than a 4 inch pipe in the wall with support on the back of it. Some carriers have the supports built in, some don’t. It’s pretty sensical either way. You have a wall carrier, and a 4” pipe. The pipe can’t move. The wall carrier does nothing but hold the toilet. There’s no flange. That’s about it. Nothing jerry rigged or “homemade” about it and the pressure tank is standard as well because few buildings have 20+ GPM. Every commercial app is this way. And they use waxless insert seals like the Ferco ones, which are 10x easier to use and never fail.
As for the carrier I built my own simply out of frustration trying to find a wall mount carrier that was NOT $500+ and was NOT meant to have a tank in it. Only to find out later these expensive home application in-wall-tank carriers are just that “home application.” No one uses these commercially for reasons I already mentioned. The commercial carriers are available, I just wasn’t looking in the right place. In larger commercial buildings with lots of toilets, they don’t use these either. They build their own out of steel which span the whole length of the bathroom instead of installing dozens of single carriers. Too late either way. Already built one out of pressure treat. All hard lessons learned. In the end I have a very nice install for half the cost that will last a lot longer. Only regret is building my own carrier. The toilet uses hardly any water, has no in-wall tank and is impossible to plug. 🙂 I’m happy and starting my own blog since no one talks about this. I don’t know why anyone would use the toilets you’re talking about here, except maybe the wall button looks nicer than the flushometer and you can order it from Home Depot. That’s the main issue I ran into. You can’t get this stuff anywhere you’re used to going. Have to think commercial supplier.
Hi Jack,
Thanks for sharing your findings and the info regarding commercial installs – interesting stuff. I would be glad to publish a link to your blog once your site is ready.
Jack:
I am interested in your approach. The other side of my bathroom wall is in the dining room so I want to avoid an access panel there. When I read your post, I thought I could put the pressure tank in the basement – close to the toilet supply of course. Can you tell me where you put the pressure tank? Do you have pictures?
I’ve been browsing through your website and I am very impressed with your detailed description of DIY projects.
I really like the look of your bathroom. Where did you get your sink and legs hardware that support the sink?
Hi Tim,
Thanks for the kind feedback. The bathroom sink is from the “Happy D” line of console sinks by Duravit. Unfortunately, I think this model is now discontinued. The legs and hardware where sold as an add-on with the sink and also from Duravit.
Gary
Nice job on the toilet installation. My lower floor’s bathroom was constructed with 7′ ceilings because of the toilet drain from the upper floor’s bathroom – looks cave-like. Since, I’m remodeling the lower floor’s bathroom, I’ve decided to take the opportunity to install a wall-hung toilet upstairs so I can raise the ceiling height about 7″. I thought about going with the Grohe Rapid SL carrier, since it’s a few inches shorter than the Geberit. I like the looks of the Toto Aquia – very sleek. Thanks for the tips.
The toilet installation is complete. I ended up installing the Kohler K6284 carrier and K6299 toilet. It took me a week to complete the installation, which is somewhat temporary until I complete a remodel later this year. I had to make significant plumbing modifications downstairs, upstairs, and in the attic to meet code for venting. The ceiling in the downstairs bathroom I’m remodeling is MUCH roomier and more normal now. I still need to temporarily patch the hole in the floor and finish off a couple other minor details.
Thank you very much for finding time and energy to document your projects. When it comes to the wall mount toilet installation, apart form Geberit videos, your site is by far the most informative one.
Since I’m planing to do one myself, I would like to ask you whether you think that 2×4 framing is really sufficient for the job of fully supporting the weight. I’m trying to decide whether to re-frame to 2×6 or not. Do you see or feel any wall movement when you load the toilet?
Thank you in advance and I wish you all the luck with your coming projects.
Nick
Hi Nick!
Thank you for the nice comments and for using the site.
So, about the 2×4 framing for our wall mounted toilet; I have no reservations. I have not noticed any flex in the wall and I am totally confident that the unit and wall could support 500 lbs or more. That said, I did double the studs bordering the unit and did use steel reinforcement plates to install the studs.
One advantage of using 2×6 vs. 2×4 construction for the tankless toilet unit install is the extra space and width to accommodate the waste and supply plumbing. With the 2×4 wall, you will have to cut out the entire 2×4 floor plate to pass the 3″ waste plumbing.
As I am sure you know, if you use 2×6 wall constitution, you will need to order the correct Geberit unit designed for 2×6 walls.
Good luck and let us know how it goes. Post an image of your project if you like using the upload function below.
Gary
Hi Gary,
Thank you very much for your prompt response and for the nice words or encouragement. I haven’t decided yet whether to go with 2×4 or 2×6 but your information will certainly help me make that decision.
I’ll let you know how the installation goes and I’ll post some pictures once I start the job.
All the best,
Nick
So the Geberit in-wall toilet tank frame system is compatible with any toilet bowl manufacture it seems. I’m looking to use this in-wall system but with a floorstanding toilet. I’m kind of scare of family members cracking a wall-hung so i’m looking at something that will rest on the floor; I have pretty heavy family members that quite often visit my house. Any thoughts or insight would be helpful. Beautiful bathroom by the way.
Hi Mathew,
Thanks for visiting and kind words.
I was a bit worried about the strength of a wall mounted unit as well, but they are rated for 800 lbs! Much of that depends on the framing you have in your wall.
As far as floor mounted toilets for the Geberit system, Geberit offers a tank specifically for floor mounted toilets (109.304.00.5). Looks like there are a few domestic toilets available for this tank, but they might be hard to find. The Duravit 2139090000 is such a model and its reasonably priced (you can see it here). You can always contact Geberit by email, I’ve found them very helpful and customer friendly.
Geberit also offers the Monolith series that uses their concealed tank mounted within a narrow housing that mounts to the wall (vs. in the wall cavity) and can be used with a “wall” mounted toilet or floor mounted toilet.
The Monolith system allows you to use Gerberits tank without opening the wall cavity and allows you to still use your existing floor waste pipe.
More info: Geberit Monolith Toilet system
Thanks for your response and insight.I didnt’ get a notification on your reply so sorry for the late follow-up.
I bought this floor mounted toilet, http://www.qualitybath.com/691311-nameeks-traccia-floor-mount-ceramic-toilet-product-187903.htm. It actually gave me the option to purchase the Geberit tank you suggested. So I have just a couple of questions for you if you mind helping. 1. Did you leave an access panel on the rear of the tank? Just thinking if it would be a good idea to have an access panel to see if water has been seeping out of the tank. 2. Did you perform a trial run on the tank to make sure there weren’t any leaks before closing up the walls? The manual that came with the tank doesn’t make any mention of this however I just wanted to check with your install experience.
I’ve looked around for DYI installs for my type of setup but can’t find anything on the web. Your setup is by far the most thorough I have found on the web though. Great job!
Thank for you help.
Hey Mathew,
I did leave access to the tank via a panel behind the tank (within a closet). I used the stud frame around the tank unit as a frame to screw the access panel to. One of the images above in the article shows the rear of the unit where I created the access panel. (the last image in step 5)
I did not specifically test the unit prior to closing the wall, but I did leave the access behind the unit open to check for leaks after install. I then closed the access once I was satisfied there were no leaks. If you haven’t installed the tank yet, you could fill it and check for leaks before putting it in your wall.
Thanks for the kind words and good luck with the project. I would love to see a few images of the finished product! (you could upload them here if you wanted)
Gary, I forgot to upload the pictures of my finish project. Thanks to your site, you inspired me to do two bathrooms with the geberit tank system. Came out looking good!
Picture of the other bathroom. I added this whole bathroom to my remodel.
Wow Mathew! The bathrooms and toilet installs look amazing! Nice work.
Thanks for sharing the images, it is great to see a finished floor mounted toilet with the wall carrier – saves a ton of space and offers the benefits we talked about before.