When remodeling our cabin, we wanted to install hardwood flooring. We were excited to rip out the old, dirty carpet and replace it with a rustic, dark, wide plank hardwood flooring. We did, and the results were fantastic. Adding hardwood floors to our cabin was one of the best remodeling decisions we’ve made. This is what we did.
How to Install Wood Flooring Yourself
If you are thinking of hardwood flooring, as Nike says, just do it. Harwood flooring adds character, appeal and function to your living spaces. It can add value. Hardwood is also a very durable flooring, typically outliving carpeting and most other flooring surfaces.
Once you decide to install hardwood flooring, you will need to make many decisions regarding the product you choose and how you will install and finish it. Some of these decisions will be aesthetic only, but some will influence the durability and performance of your floor and will require some consideration.
Like any project, if you do a bit of research, take your time and use the proper tools you can do it yourself. Read on for an outline and step-by-step discussion on how to install hardwood flooring yourself. Enjoy!
The main decisions you will face when installing a hardwood floor:
- Solid hardwood flooring vs engineered hardwood flooring
- Factory prefinished vs site finished
- Wood species
- Wood grade & cut & board width
- Install technique – nail, staple, glue, floating
- Finish type and sheen level
1. Solid vs. Engineered Hardwood Flooring
Traditional hardwood flooring is cut directly from logs, producing solid boards, appropriately known as “solid” wood flooring.
Newer techniques combine a solid top layer of wood to a base layer creating a composite flooring board known as “engineered” wood flooring.
Both types of hardwood flooring have advantages and disadvantages.
One advantage of solid hardwood flooring is that it is typically thicker and has a thicker wear layer compared to engineered hardwood flooring. Most solid wood flooring is 3/4″ thick compared to 1/2″ or 5/8″ for engineered wood flooring. With a thicker wear layer, solid hardwood flooring typically allows for more refinishing opportunities and potentially a longer life.
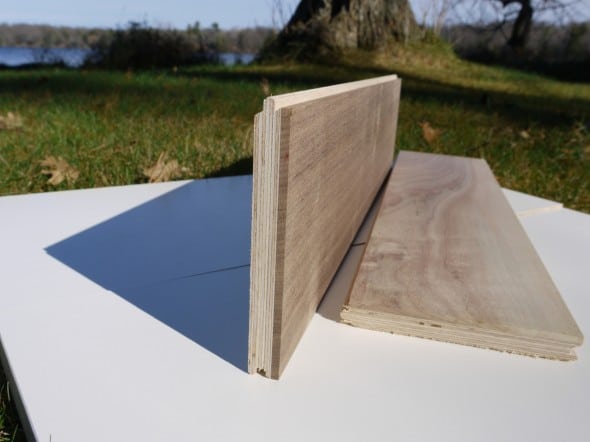
Engineered hardwood flooring has the big advantage of improved dimensional stability. Combining a top hardwood layer to a separate base layer (often high quality plywood), greatly improves the dimensional stability of the flooring.
These engineered products provide the look and feel of solid wood flooring, but expand and contract less when installed in temperature or humidity dynamic environments. Improved dimensional stability makes engineered flooring more suitable in challenging installations like basements, lake homes, entryways, over radiant heating and other environments typically not suited to solid hardwood flooring.
No matter what type of flooring product you decide to use, buy the highest quality product you can afford. Quality wood floors will outlive the installer. Do it right and use the best products you can.
If you decide to find and order you flooring online (like I did) use care to find and use a reputable seller. Do a bit of looking around to search for customer complaints and use resources like the Better Business Bureau’s website (bbb.org) to research before you buy.
I did buy my hardwood flooring online and found a company I would highly recommend; Hurst Hardwoods.
Hurst sells a large variety of unfinished, pre-finished solid and engineered hardwood flooring and trim. I used them for this project and would not hesitate to use them again and I could not be happier with their products or service.
They are a family run business and act the part. When I ordered from Hurst, I got an order confirmation from the owner, Craig Hurst himself. They also have an A+ rating from the Better Business Bureau. If you are considering ordering wood flooring online, I highly recommend you consider them.
Hurst Hardwoods, LLC
1-888-704-8778
105 Douglas Rd. E.
Oldsmar, FL 34677
2. Factory Prefinished Wood Flooring vs. Unfinished Wood Flooring
Traditional hardwood flooring is installed unfinished, sanded flat and finished on-site. The downside of traditional hardwood installations is the added time required to sand and finish the floor once installed.
Today, most wood floor installations bypass this timely, traditional method of on-site sanding and finishing and instead install prefinished hardwood flooring products.
Both techniques have advantages and disadvantages. The main, obvious advantage of installing prefinished flooring is the time savings. If you are a builder, the time advantage is important.
On the other hand, if you are a homeowner, understand that prefinished flooring is, in some ways, shortcut product. Similar to prefinished trim and other off the shelf building products, prefinished, ready-to-install products are designed for builders. They save time and money but at the cost of old fashioned craftsmanship.
Floors sanded flat and finished on site represent craftsmanship. It takes time, effort and attention to detail to hand finish flooring. It takes time. But, the reward is a custom product that is crafted for your home. The floors will be flat and not simply follow the contour of the subflooring. Site finished floors will be sealed with one continuous layer of finish, without cracks and grooves that trap debris and grim.
Here is a brief comparison of prefinished vs. site finished hardwood flooring:
Prefinished hardwood flooring – prefinished flooring offers the advantages of a factory applied finish:
- Speed – there is no on site sanding, sealing and finishing when installing prefinished flooring – install the flooring and you are done! Not only does traditional site sanding and finishing take days to weeks to complete, most site applied finishes need additional days or weeks to completely cure.
- Finish quality – factory finishes are typically very high quality and applied in ideal conditions. Most finishes offer 25, 50 or lifetime finish warranties.
- Lower cost – although more expensive at the time of purchase, prefinished flooring installs save time and money compared to traditional on site floor finishing.
Unfinished hardwood flooring – unfinished traditional wood flooring offers the advantages of customized onsite sanding and finishing after installation:
- Smooth, flat, sealed floor with no grooves – prefinished floors have slightly beveled edges to ease transitions between boards. These bevels produce visible grooves between boards after installation giving a tell-tale “prefinished flooring” look that is somewhat off the shelf feeling. Grooves also tend to trap dirt and debris. Site sanded and finished floors are flat and sealed providing a continuous whole floor seal and finish.
- Finish variety – although prefinished flooring typically offers a wide variety of factory finishes, finishing on site offers more options. White and color washes, oils, wax, and many other options are available when finishing on site.
- Matching of existing wood flooring – most original wood flooring in homes was install unfinished and unfinished flooring will typically match better for repair or expansion work.
- Lower cost for DIYers – unfinished flooring material will be initially cheaper to purchase and if you choose to finish it yourself you may save money overall.
3. Wood Species
Choosing a wood species for your flooring provides opportunities to make aesthetic as well as functional choices. Different wood species not only look different, but many have unique structural properties that can affect the performance of your flooring.
Wood density or hardness differs among wood species. Harder floors tend to be more durable. A measure of wood hardness is the Janka hardness test, a standard test which determines the amount of force required to embed a steel ball halfway into the surface of a wood. Differences in wood hardness may correlate with the suitability of a particular wood species for a particular use, harder woods (higher Janka scores) tends to be more durable and more resistant to dents and scratches.
Janka Hardness of Some Common Woods
| Wood | Janka (Pound-force) | |
| Ipe (Brazilian Walnut) | 3684 | |
| Ebony | 3220 | |
| Mesquite | 2345 | |
| Hickory | 1820 | |
| Maple (hard) | 1450 | |
| White Oak | 1360 | |
| Ash | 1320 | |
| Beech | 1300 | |
| Red Oak | 1290 | |
| Black Walnut | 1010 | |
| Teak | 1000 | |
| Birch | 910 | |
| Cedar | 900 | |
| Sycamore | 770 | |
| Yellow Pine | 660 | |
| Douglas Fir | 620 | |
| White Pine | 420 |
Rain forest exotic species such as Ipe, tend to be much harder than domestic woods. Of the domestic woods, Mesquite and Hickory are 4 – 6 times harder than soft pines and firs. Traditionally, Red Oak has been used as a standard for wood floor hardness.
4. Wood Flooring Wood Grade, Saw Angle & Flooring Width
Wood Flooring Wood Grade
Wood grade is a measure of the quality and uniformity of a piece of wood. Imperfections like knots, worm holes, mineral streaks and ratios of hardwood to sapwood determine grade. Typically all grades of wood flooring should be considered serviceable, higher grades of wood provide a more refined, uniform appearance while lower grades of wood will have much more variation in color and contain increasing amounts of wood imperfections.
Higher grades of wood are more expensive and typically provide a more formal look. Lower grades of flooring have much more character and typically have a more rustic, dynamic feel.
Here are some commonly used Wood Grades and their characteristics
| Grade | Characteristics | Cost | |
| Clear | uniform appearance, few if any knots or character inclusions | $$$$ | |
| Select or Better | characteristic color for species, sound knots, small streaks | $$$ | |
| #1 Common | light and dark wood of species, knots, streaks, small holes | $$ | |
| #2 Common | more wood color variation, larger knots, streaks, worm holes | $ | |
| Character, Utility, Cabin, Natural | varied, rustic, wide color variation, large knots, streaks, holes, character marks | $ |
Wood Flooring Saw (Grain) Angle
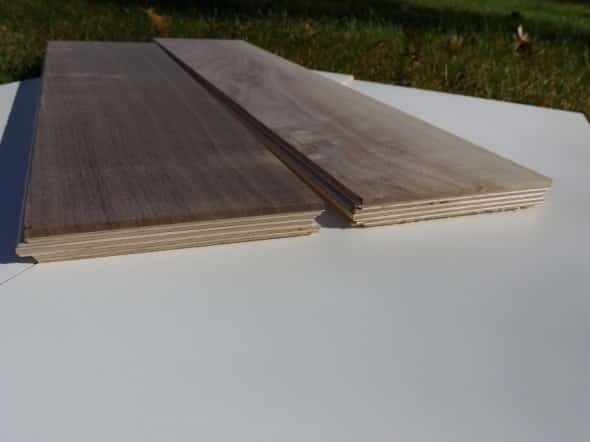
Saw angle refers to the alignment of a mill saw to a log. Boards cut at an angle or perpendicular to annular rings are called quartersawn or riftsawn boards. These boards have tight, straight grain patterns parallel to the long axis of the board resulting from saw angles of 30 degrees to 90 degrees. These tight grain boards are less prone to warping and twisting and have more deminsional stability compared to standard cut lumber. But, because quarter-sawn or rift-sawn boards are more difficult to cut and create more waste, they are more expensive to mill.
Traditionally milled boards are cut flat (flatsawn or planesawn) top to bottom across a log resulting in boards with typically flat, variable surface wood grains with broad, curving (cathedral) grain patterns. Plane-sawn boards are more prone to warping, twisting and have less dimensional stability, but produce less waste and are cheaper to produce. Most wood is milled in this flat-sawn manner.
| Grain Angle | Characteristics | Cost | |
| Rift-sawn | most dimensionally stable, straight grain pattern (cut angle of 30° – 60°) | $$$$ | |
| Quarter-sawn | dimensionally stable, characteristic flecks in oak (cut angle of 60° – 90°) | $$$ | |
| Flat-sawn (Plane-sawn) | varied grain pattern, most sensitive to moisture changes (flat, variable cut angle) | $ |
Wood Flooring Board Width
When choosing your hardwood flooring, consider how the board width (and length) of your flooring will affect the look and feel of the finished floor. Traditional hardwood floors were constructed from narrow (2 1/2″ -3 1/2″) boards, and many older home floors were built with narrow boards. Wider plank flooring, boards 4″ to 10″ inches wide, and gained popularity recently and typically provides a more contemporary, country feel.
The board width of your flooring will influence the finished look and feel of the floor. Floors built with wider planks tend to provide a more rustic, country feel, while narrowing boards gives a more traditional, formal feel.
In addition to feel, flooring board width will determine the number of seems in your finished floor. Floors constructed from wider and longer flooring boards will have fewer seams and a more uniform appearance compared to floor built from narrower, shorter boards.
The grade of the wood used for flooring will also influence the finished appearance of a wood floor. Higher grade flooring, with more uniform appearance, will provide a more formal or modern look. Lower grade flooring with more color variation and natural imperfections tends to look more rustic and less formal.
No matter what width of flooring boards you choose, in general, wider flooring boards should be longer in length, while narrows boards can be shorter in length. Manufacturers will often supply longer flooring board lengths for an additional cost.
5. Install Technique (Fastener Style)
Depending on the surface you will be installing your hardwood to, you may have several choices regarding how you install your flooring. Most hardwood floors, both engineered and solid are installed with nails (cleats) or flooring staples. You may also have the option to glue or float your flooring.
No matter what type of fastener system you use, you will need a flat, solid, clean, appropriate surface to attach your hardwood flooring to. For staples or nails, this typically means at least 5/8″ plywood or 23/32″ OSB subflooring. Thicker subflooring is better and remember plywood will hold fasteners better than OSB. Particle board is not acceptable as a subfloor for installation of hardwood using penetrating fasteners due to lack of fastener hold.
If you have a concrete slab and plan to install hardwood flooring over the slab you will have the option of glue-down or floating flooring if laying the flooring directly on the concrete slab. Slab subfloors must be cured (typically 60 days or more) and have minimum moisture content and / or a moisture barrier placed depending on the product you are using. You may also glue down a plywood sub-layer on top of the slab and then use penetrating fasteners to install your flooring on top of this sub-layer.
In general using staples or nails is easier than using adhesives – this is especially true for do-it-yourselfers. Adhesives tend to be messy, difficult to clean up and harder to achieve acceptable results. If you need to glue down your floor, consider contacting a flooring professional for help. In addition, flooring adhesives are expensive. Expect to spend $.50 – $.75 or moer per square foot of flooring for high quality flooring adhesives.
6. Wood Flooring Finish
No matter the type or style of your wood flooring, you will typically have options regarding the finish applied to your floor.
Factory prefinished flooring will likely offer the fewest finish options, but most manufacturers will have several levels of finish luster or sheen to choose from.
Site finished wood flooring installs will offer the most finish options. You will have a virtually unlimited variety of finish types and sheen to choose from.
That said, most floors are finished with oil-based polyurethanes or water-based polyurethanes. Urethane finishes are by far the most common wood flooring finishes and provide a durable, low-maintenance finish. Oil based urethanes have slightly different characteristics compared to water-based urethanes as highlighted here:
| Oil Polyurethane | Water Polyurethane | |
| durability | ++++ | +++ |
| finish color | amber with age | clear |
| drying time | 8 – 24 hrs | 4 – 8 hrs |
| VOC / Odor | +++ | + |
| application | china bristle, lamb’s wool | painting pad, synthetic wool |
| cost | $25 – $50 / gal (500 sq ft) | $40 – $50 / gal (500 sq ft) |
| application | easy, forgiving | dries quick, less forgiving |
In addition to polyurethane floor finishes there are several other finishes you can use on your floor. Several of the more esoteric finishes (acid-cured Swedish, moisture-cured urethane) typically require professional application. Shellac floor finishes were once very popular, but do not have the durability or performance of modern polyurethanes. Penetrating oils and waxes can be used and provide a very warm, soft, matte finish, but lack durability and must be re-applied every few years.
Finally, when deciding on a finish, you will need to pick a sheen level of the finish. Sheen is the level of light reflection from the finish measured at 60 degrees and graded on a luster index from 0% to 100% luster. Commonly available finishes are typically available in Matte (less than 25% luster), satin (~ 30 – 40% luster), semi-gloss (~ 60% luster) and gloss (more than 70% luster).
Higher luster (gloss and semi-gloss) finishes tend to look more formal and traditional. Lower luster finishes are more popular today and tend to give a softer, more natural look to the floor. A few comparisons for high vs. low luster floor finishes:
| High Luster Floor Finish | Low Luster Floor Finish | |
| appearance | Formal, traditional, high-end | natural, warm, modern, rustic |
| maintenance | shows dust, scratches, imperfections | hides dust, scratches, wear |
| surface | hard, smooth, can be slippery | softer, quiet, more grip |
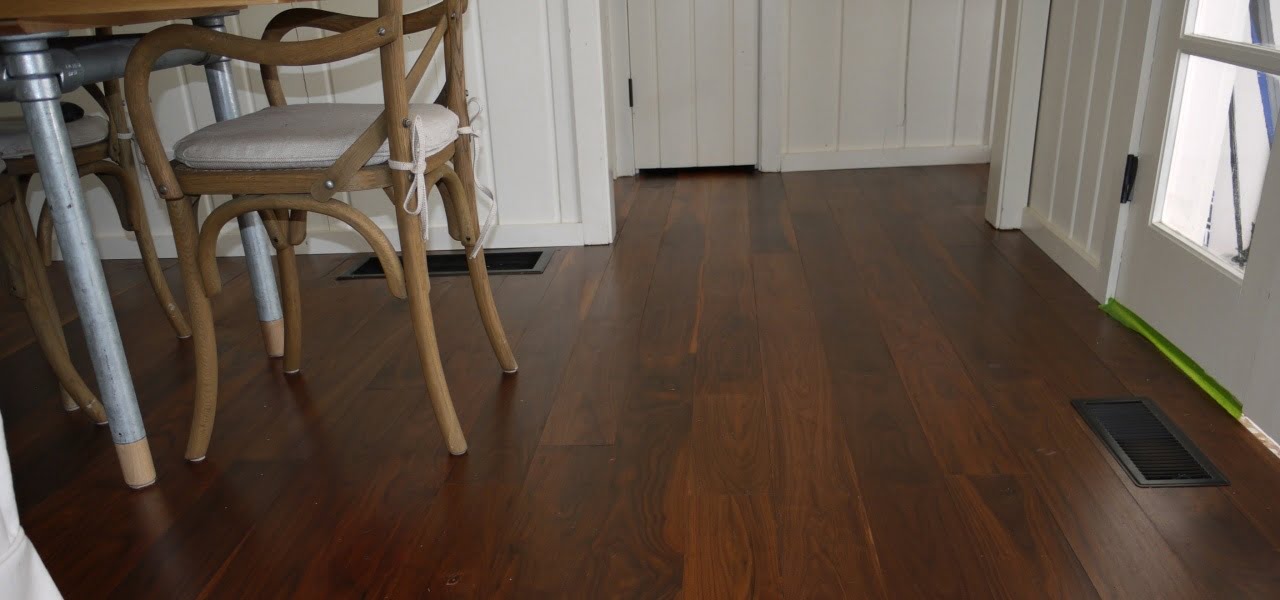
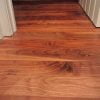
To finish our floors we choose a matte finish oil polyurethane (DuraSeal brand) for our floors. They turned out perfect! We love the matte finish and soft, warm feel of the finish that perfectly compliments the natural wide-plank walnut flooring. The finished flooring almost feels like it doesn’t have a finish on it – just the beauty of the wood.
Before You Start Your Wood Floor Installation
Once you have decided on installing hardwood flooring and walked through the multiple options for your flooring, you should consider best practices and have the following in place prior to beginning:
- A sound, flat, suitable subfloor to attach your hardwood flooring to. For additional details: National Wood Flooring Association Wood Flooring Installation Guidelines and Methods – revised 05-2012
- Wood flooring acclimated to the installation site prior to installing. This typically means allowing the wood flooring product to acclimate to the install site for at least 3 – 5 days. Acclimation and flooring installation should occur after most other finishes (dry wall, painting, etc.) are complete and the building has a functional HVAC system which has been in operation for 5 days or more prior to the acclimation process. The goal is to install a stable product that has acclimated to a stable, low humidity environment.
Wood FLooring Follow up Images of Our Floors Years After Use
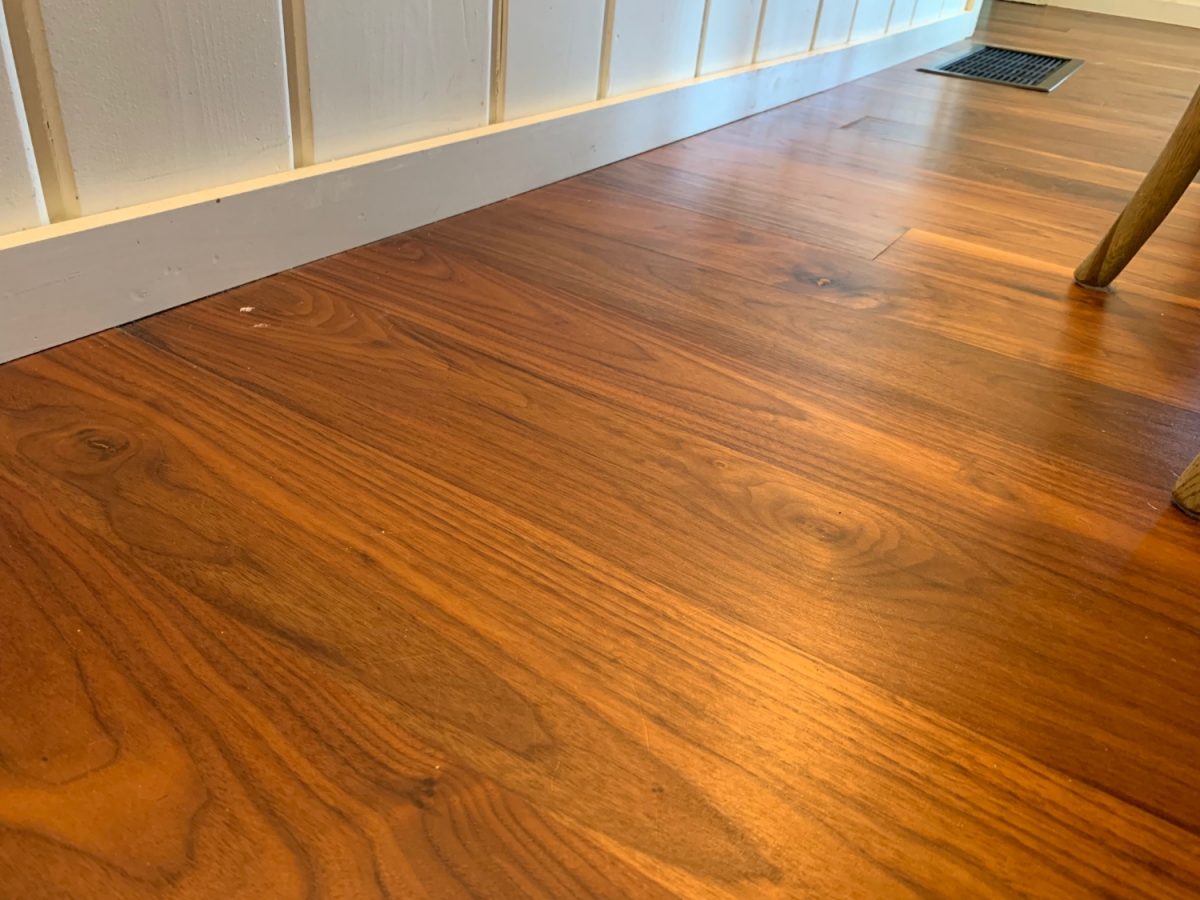
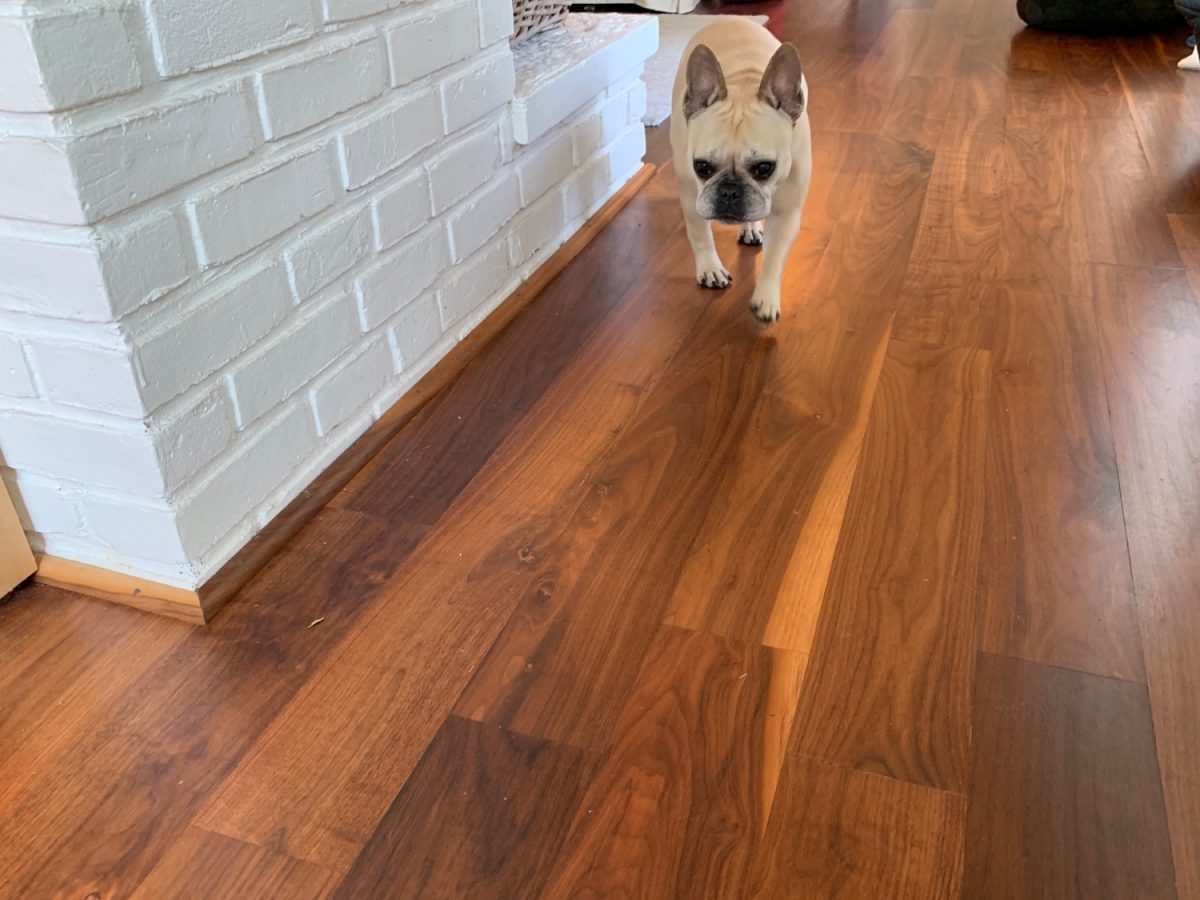
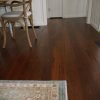
Here is a view of what our floors look like today after use for 7 plus years.
OVERVIEW | Install Wood Flooring
SUPPLIES LIST | Install Wood Flooring
TOOLS LIST | Install Wood Flooring
STEPS | Install Wood Flooring
- Acclimate the hardwood flooring to the interior space.
Acclimate your hardwood flooring product to your home for at least 5 – 7 days prior to install. You can leave the flooring in cardboard packaging for the acclimation process, but it will take longer to equilibrate – consider leaving it in the space for 2 – 4 weeks.
The acclimation process allows the wood flooring to equilibrate to the moisture levels of your home before installation, increasing the dimensional stability of the flooring prior to installation.

- Ensure proper subfloor.
If not already completed, install a proper subflooring for the hardwood flooring install.
For most nail or staple down wood flooring installations, you should have at least 5/8″ plywood or 23/32″ thick OSB. Thicker is better.
If you are unsure of the existing subflooring material and thickness, check your subfloor thickness by finding an opening through the subflooring – a HVAC vent, pipe run or similar – which will allow you to visualize the cross sectional thickness of the existing subfloor.
If you are unable to find a suitable penetration through the subflooring that will allow inspection, drill a 1/2″ or so hole through the subflooring to allow you to determine the subflooring thickness.
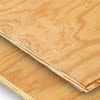
If you have concerns regarding the quality or thickness of your existing subfloor, consider adding a layer of 5/8″ or thicker sub-flooring plywood (I used 23/32″ tongue and groove plywood) prior to installing your hardwood floor.
Like most finishes, the quality of the end product is heavily dependent on the prep and base work under the finish.
In addition to ensuring the proper thickness of the subfloor, make sure the flooring is flat and secure. Add flooring nails or screws to the subfloor to secure any loose subflooring. Take time to set or remove any proud fasteners and scrap or sand flat anysubflooring high spots.

- Undercut door jams and trim.
If you are installing hardwood flooring with existing trim and door jambs in place, you will need to undercut or remove them prior to installing your flooring.
If you choose to remove them, remember that you will need to cut them prior to re-installing them.
My preference is to remove shoe and baseboard trim and undercut door jambs. Once the floor is installed, you can re-install baseboard trim above the new flooring. Some will leave baseboard trim in place, install the floor to the trim with a proper expansion gap, then install quarter round or similar shoe molding to cover the expansion gap and finish the base of the trim.
There are multiple options for undercutting jambs. Commercial power jamb saws are available that will provide very accurate, clean cuts. Hand jamb saws are also available and typically cost less than $30. You can also use a reciprocating saw as we did. When cutting jambs or trim use a scrap piece of the hardwood flooring as a guide to provide proper cut heights.
You may want to add additional height for expansion depending on your climate, home conditions and the product you are using. This project was completed in Central Minnesota using engineered hardwood flooring and I did not add additional expansion height (aside from the saw kerf height)
- Install the underlayment over the subfloor.
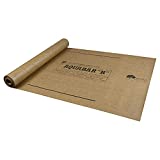
- Prior to laying hardwood flooring, cover the subflooring with an appropriate underlayment for your project. The proper underlayment depends on the conditions in your home, the subflooring surface and the type of wood flooring product you are using.In general, use should use a permeable or semipermeable underlayment for solid or engineered wood flooring products. Impermeable underlayments like plastic sheeting can trap water and promote mold growth and rot.I used Aquabar “B”, a semipermeable kraft paper-asphalt-kraft paper assembly recommended by the manufacturer of the flooring product I am using. For more information on underlayments for wood flooring, refer to the National Wood Flooring Association Wood Flooring Installation Guidelines and Methods.
- Consider and plan flooring layout and orientation.
Prior to beginning the installation of you hardwood flooring, consider a plan for the space where you plan to install the wood flooring. Plan the direction of the flooring and consider specific board patterns or groupings you may like.
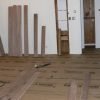
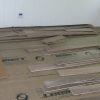
For my project, I removed all of the flooring from their boxes and spread the boards out for inspection. With the flooring out and visible, I was able to see all of the boards and make decisions regarding color grouping, specific board placements (tighter grain boards in higher traffic areas) and decide how to best use the material I had.
We ordered a lower grade of flooring that included a wide range of color between flooring boards. We liked the natural contrast of these colors, but preferred to have a more uniform, darker floor in the common living areas and more color variation in the bedrooms.
In addition, lower grades of flooring will have more knots and other flaws that add character, but may make those board less durable over time. Knowing this, we tried to keep the majority of boards with a greater concentration of knots and other flaws in areas of low traffic or in areas that would like be covered with furniture (under the bed areas of the bedrooms or in closets for example).
We also tried to use the few tight grain boards (Rift-sawn and Quarter-sawn boards) over areas of highest traffic – like at the entrance to the bathroom.
We also tried to place our favorite boards in locations we could enjoy them over the years, like at the sides of our future bed location in the bedroom and in the kitchen in front of the sink.
Take some time to plan your floor layout before you rush to install it. You will have many years to appreciate the extra care of a well planned floor.
Prior to laying boards, consider your layout options and the direction of the flooring.
Traditionally, plank wood flooring is installed parallel to the long axis of the space you are flooring. Many also try and install the rows with the direction you enter your home or the room were the flooring will be installed.
Some considerations sun light direction, feeling that board seams are less conspicuous if they are inline with the incoming light.
In addition to aesthetic considerations, your floor may benefit structurally if it is installed perpendicular to the direction of the flooring joists.
Flooring perpendicular to joist direction is often better supported and less prone to seam flex. Floors installed on a subfloor on top of the older style 1″ diagonal flooring boards are stiff enough to install wood flooring without regard to joist direction.
Always consult the installation instructions for your product for installation recommendations for more information.
Once you have established an installation direction for your space, measure the rooms and check for squareness of the rooms. If you have rooms that are not square, determine the offset you will need and if the offset is significant, plan the install so that one half of the offset will be on each side of the room.
If the offset is less than your planned expansion gap, additional spacing should be added to provide the minimum expansion spacing.
In addition to correcting for out of square dimensions of a room, you will need to add an expansion gap at all walls and fixed boundaries. Floor expansion depends on the type of flooring you are using – solid flooring expands more than engineered flooring, and the environment the flooring is installed in.
In general, hardwood flooring should have an expansion gap of at least the thickness of the flooring product you are using. Typically:
– 5/8″ expansion gap for engineered wood flooring
– 3/4″ expansion gap for solid wood flooring
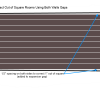
– check with manufacturers recommendations for the product you are usingFor larger rooms or wide spans of flooring, use larger expansion gaps and consider starting the flooring at the center of the room, installing it from the center of the room to the walls.
Installed tongue and groove wood flooring tends to expand in the direction of the tongue. This is due to the direction of the nails or staples, which are driven through the tongue toward the center of the flooring boards.
Large room installations beginning at the center of the room can be installed by starting with two starter boards located started at the center of the space installed groove-to-groove using a spline. This way the flooring can be installed “tongue out” from both directions from these starting boards toward the walls.
Installing your flooring tongue to the wall in both directions, gives the flooring two directions to expand and limits the expansion to a shorter distance on both sides.
- Layout and install the first row of flooring.
Once you have decided on the direction of the flooring, pick a wall to start the installation and begin. Consider starting a the side of the room with the longest wall.
If you room is very wide (20 feet or more), starting the install at the center and moving out in both directions may help to avoid excessive seasonal floor movement.
For the first row, use straight, long boards. Line them up along the length of the starting wall, tongue-side out with the appropriate expansion gap from the wall – typically the width of a single piece of the flooring you are using.
If your floor is significantly out of square, mark the floor first to make allowances for any out-of-square correction you plan to add. Once the first row of boards is aligned and laid out with the proper gap from the starting wall, use a straight edge or similar to check the row is straight.
After the first row is laid out with the proper wall gap, aligned and straight, nail it to the subfloor.
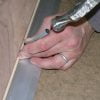
Typically, the first several rows will need to be hand nailed until the width of the rows allows space for the nailer you are using. When hand nailing the first row, nail across the back of the board with fasteners spaced appropriately for the nail you are using.
Although not necessary, I try and pre-drill any hand nail paths. Under size the drill bit to just provide a guide for the nail and to help prevent splitting of the wood.
Once the nail is in, finish with a nail set to set the head into the board to allow for sanding and to hide the nail with putty or filler. When starting and ending rows, be sure to leave an expansion gap just as you did for the starting row.
When cutting the end pieces for the rows any saw that will give you a straight, clean cut will work. I used a 12″ compound miter saw with excellent results.

- Rack and continue to install flooring.
After the first row is installed and nailed, rack several rows of flooring behind it and continue to install the flooring.
Racking a floor is the process of arranging to be installed boards behind the installed boards. This process allows active planning and arrangement of boards prior to installation.
The benefits of racking the floor include, installation efficiency and planning for color and seam layouts. When you rack the flooring, choose boards that will provide the visual effect you desire. We racked our floor to help blend the color and pattern transitions between our fairly irregular walnut flooring planks.
In addition to color planning, choose board lengths to help efficiency use the wood you have and to limit the number of cuts needed.
Boards should also be arranged to avoid having adjacent board end joints fall to close between rows – they should typically be at least 6″ (more for wider boards) apart.Stagger end joints between row to avoid repeating seam patterns that can be visually distracting and create weak spots in the flooring.

- Continue installing flooring rows.
With the first row of boards installed and several rows racked behind and waiting, install the second row of boards.
Depending on the width of the boards and the nailer you are using, you will need to install the frist several row of boards by hand nailing until you have room for the nailer. Since we were using 5″ boards we only needed to hand nail the first two rows.
When hand nailing, I used 6d finishing nails through predrilled holes and a hammer and a nail setter punch. An alternative is to use a pneumatic finishing nailer. If you use a pneumatic stapler / nailer, be sure to drive the nail heads below the surface of the flooring for any top nailed boards as the nail heads may otherwise interfere with sanding the floor.
Once the first several hand nailed rows are installed and there is room for a flooring nailer or stapler, begin fastening the flooring rows using the flooring nailer or stapler.
Manual or pneumatic assisted flooring nailers are available for rent or purchase and are invaluable for properly fastening flooring. The nailers have specially designed jigs to drive fasteners at the proper angle while protecting the flooring surface and tongue.
There are many different makes and models of flooring staplers / nailers, but their function is similar, they drive nails (cleats) or staples at an angle through the tongue of hardwood flooring. I recommend using a powered nailer if possible. It is much easier to obtain consistent results with the powered units, especially if installing a large area of flooring.
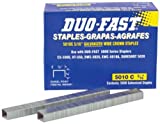
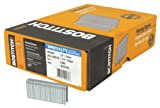
I used a Bostitch MIII stapler I purchased from Amazon as a factory reconditioned unit. The unit worked perfectly for this project. I used 15 1/2 gauge 1 1/2″ flooring staples for the project.
When you are ready to start using the floor nailer/stapler, you will likely need to do a bit of tweaking to get the proper fastener depth. You will be able to adjust the fastener driving force (and resulting fastener depth) by adjusting the air line pressure from the air compressor.
I found a compressor line pressure of around 80 psi was about right. Adjust the compressor line pressure using the regulator valve on the compressor. The regulator valve on my compressor (6 gal Bostitch pancake compressor) is located on the front panel.
The goal is to have your fastener driven flat into the corner between the tongue and side of the board. If the fastener is proud (high) increase the line pressure, if the fastener is deep, decrease the line pressure.
Once you get the line pressure for your nailer correct, continue installing the flooring. When installing the flooring, make sure the rows are tight against each other prior to setting the fastener. Do this by gently tapping the row to be nailed back against the previously installed row using the rubber end of a flooring mallet. With most nailers, you can tap the foot plate of the nailer using the floor mallet to ensure the board is snug against the previous row prior to deploying the fastener.
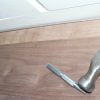
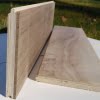
Another method of tightening the rows of flooring is to use a scrap piece of flooring as a pounding block. To do so, place the groove side of the scrap piece against the tongue of the row and strike the scrap piece with a hammer to transmit the hammer force to the row without damaging the tongue of board (notice the hammer and pounding block in the picture below).
Once the row is tight against the previous row, deploy the fastener and fasten flooring according to the flooring manufacturers’ recommendations. In our case we used 15 1/2 gauge 1 1/2 staples every 4″ or so. Deploying a fastener with your nailer will depend on the model nailer you are using. Our Bostitch deploys fasteners by hitting the activator at the top of the nailer body with the rubber end of the flooring mallet.


- Continue installing flooring across the width of the room.
Repeat installing flooring rows until you cover the entire floor. When you get close to the finish wall, again you will need to hand nail the last several rows, as the nailer will typically not fit close to the wall.
When installing the last few rows, you not have room to tap or pound the rows tight and will need to use another method to tighten the rows prior to nailing.
To tighten the last few rows of flooring there are several styles of jacks available for this purpose. I found using a few blocks of wood and a pry bar worked for me, although if using a pry bar it may be helpful to have a helper hold the row tight while you drive the fasteners.
To install the last row, you will need to cut the boards to width needed to fill the final gap. Remember to leave the proper expansion gap when determining the right width of the final row. The boards for the final row will need to be ripped lengthwise with the tongue side removed.
This last row is then hand nailed similar to the first row, using finishing nails and a hammer or a pneumatic finishing nailer. Remember to set the heads of the nails to allow for sanding.

- Prep installed floor for finishing (if installing unfinished flooring).
If you installed pre-finished flooring, you will obviously not need to finish the floor onsite and once the installation is complete, you will just need to install your trim and you’re done!
If like me, you installed unfinished flooring, you will need to finish the flooring prior to completing the project.
The good news is if you did choose the unfinished flooring route, you will be rewarded with an awesome, flat, sealed old-school-site-finished floor that takes time but will reward you for years when the floor is done.
That said, I actually didn’t do the finishing myself. For the time, money and mess, it was an absolute no-brainer for me to hire this part out.
Sanding hardwood floors, especially relatively soft woods (like my walnut), is often better left to those who do it everyday. I knew local pros could sand and finish my 700 sq. ft. of flooring for less than $800. They can also work while you are away.
If you would like to do it yourself there are many excellent resources for learning and many places to easily rent equipment. The Home Depot has a variety of floor sanders for rent and offers beginner friendly square buff and orbit floor sanders for rent. Many smaller, local flooring firms will rent sanders and provide some instruction before you start.
Prior to sanding the floors, you will need to closely inspect the flooring for any high or unset nails or fasteners. A high nail can seriously damage a floor sander. Imperfections and s
et nail holes will need filler putty. Some will add filler prior to sanding and some will wait until the floors are sanded and a coat of sealer is applied.
Cover ducts, floor vents and other penetrations prior to sanding and finishing the flooring. Remove or carefully cover furniture and anything else you do not want to get covered with wood dust from sanding. Take some time to do this, the fine wood dust really does get into everything left exposed.
Some sanders are cleaner than others and have vacuum attachments. I high recommend vacuum connected sanders if your flooring work is being done as remodeling in a completed, furnished home.
- Sand and finish your new wood flooring.
Although sanding and finishing a wood floor is well within the scope of most DIYers, I decided to hire this portion of the job out.
The additional incremental cost of having a local pro do it for us was more than worth it. Our bid for sanding and finishing our new cabin flooring was $600! Hard to argue with that!
If you choose to finish your floors yourself, there are many resources online and often local shops that not only rent equipment, but will provide sanding and flooring instruction as well.
Our floors, like many high quality engineered unfinished flooring, only required a very light sand prior to finishing. Starting with a flat subfloor helps set the stage for a flat floor install and in the end, helps reduce the amount of sanding required before finishing.
Our finisher was able to use a floor polisher with a finish screen to lightly sand the floor prior to finishing. Once sanded and vacuumed, he finished the floors with DuraSeal matte oil polyurethane.
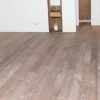
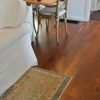
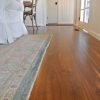
The results were fantastic! Here are a few images of the finished floors:











GIPHY App Key not set. Please check settings