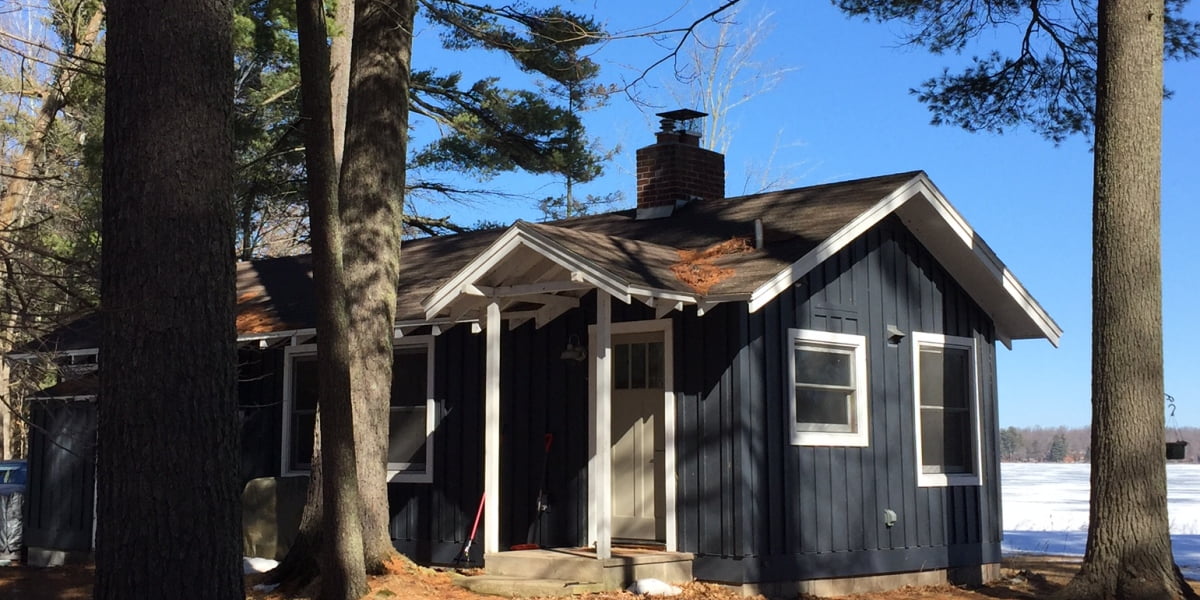
Years ago, while on vacation in Northern California, my wife and I stayed in the cutest little cottage just south of wine country. Much of the charm of the cottage was its’ traditional board and batten siding.
This same cottage, years later, would be a big part of our inspiration to buy our own cabin in Northern Minnesota. Naturally, after we bought the cabin, we decided to re-side with board and batten, and this article documents our DIY board and batten siding installation.
Board and Batten Siding: Benefits, Cost and Installation
Like most things DIY, installing board and batten siding is relatively easy with the right tools, a bit of time and a bit of information and education.
A Bit About Board And Batten Siding
Board and batten siding is a terrific exterior siding system. It looks good and is easy to install and maintain, and it’s relatively low cost and very durable.
Board and batten siding is thought to have originated in Norway and Sweden, where it was used to protect the exterior of log buildings. The technique was brought to the United States in the mid to late 1800s becoming popular on homes and barns in the Western United States.
Today, board and batten siding has regained popularity in the United States do in part to the rise of retro-modern style architecture.
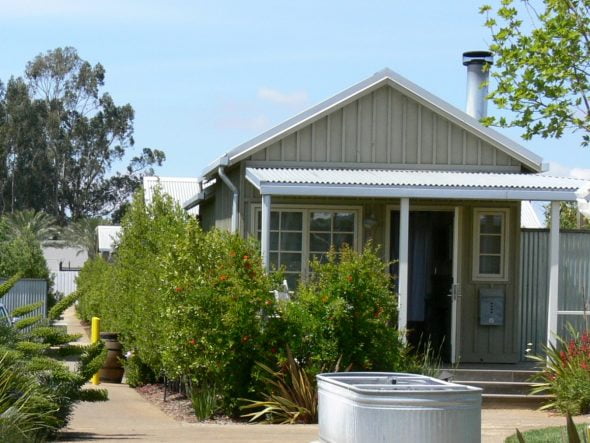
So, what is board and batten siding? Board and batten is a fairly simple exterior siding system of gaped wide vertical boards with overlying vertical battens covering the gaps between the boards. The technique is time-tested and durable, as the system allows for the natural expansion and contraction of the siding material.
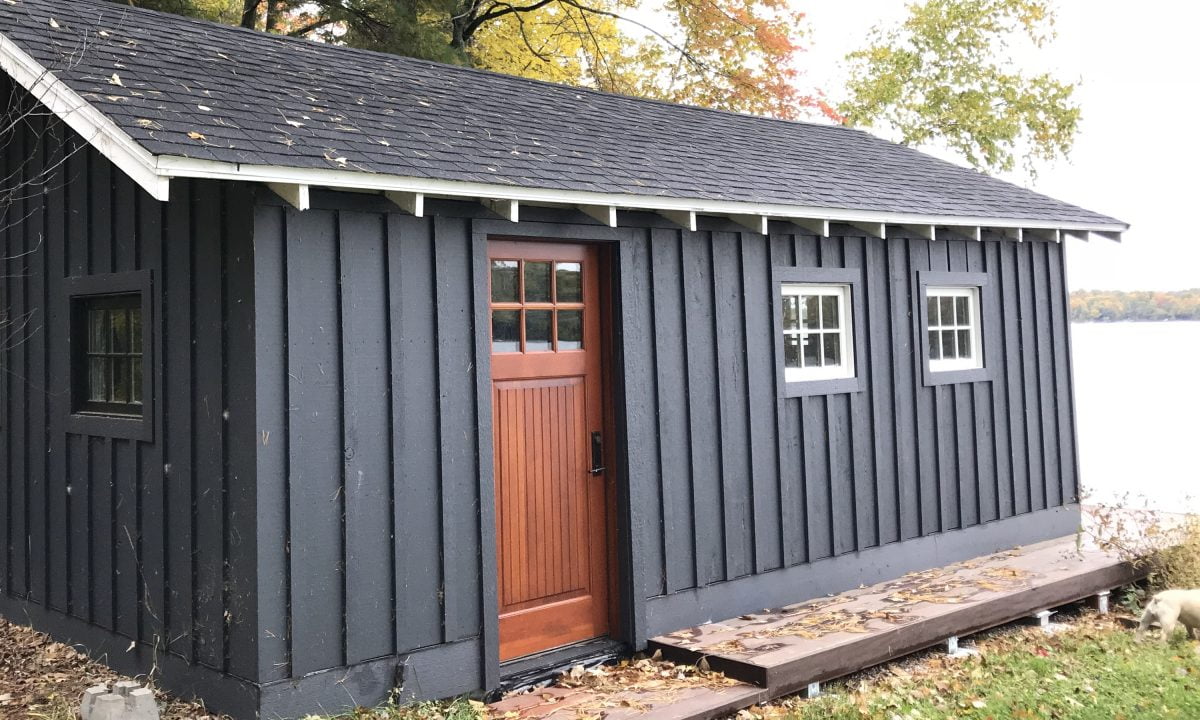
While traditional board and batten siding uses wide boards and narrow overlying battens, there are a few installation variations.
Reverse board and batten or batten and board, installs wide boards on top of narrow battens. Board on board, like it sounds, installs boards over boards in alternating fashion.
These alternative installation techniques are mainly used to provide different visual patterns, but add complexity of installation and fastening patterns and probably are less desirable for DIY projects.
Traditional board and batten style is probably the simplest to install and likely the most durable of the various board and batten install styles.
To install board and batten siding in the traditional style, simply install wide boards, gapped one board width apart and cover the gaps between the wide boards with narrow battens installed over the board gaps, overlapping the board edges to hold down the boards and cover the gaps.
When installed properly, this traditional board and batten install technique secures siding boards while still allowing them to expand and contract without splitting or bowing.
The wide boards are fastened at the centers, avoiding edge fasteners and allowing the board edges to expand and contract. The overlying battens are also fastened at their centers with passed fasteners also avoiding the underlying board edges, passing just through the gaps. The fastened overlying battens can then hold the board edges flat while still allowing expansion and contraction of the underlying boards.
This simple fastening system creates a sound, dynamic exterior wall that holds up to large climate changes and temperature swings.
This traditional method of board and batten installation is the method we used for our cabin install.
How To Install Board and Batten Siding
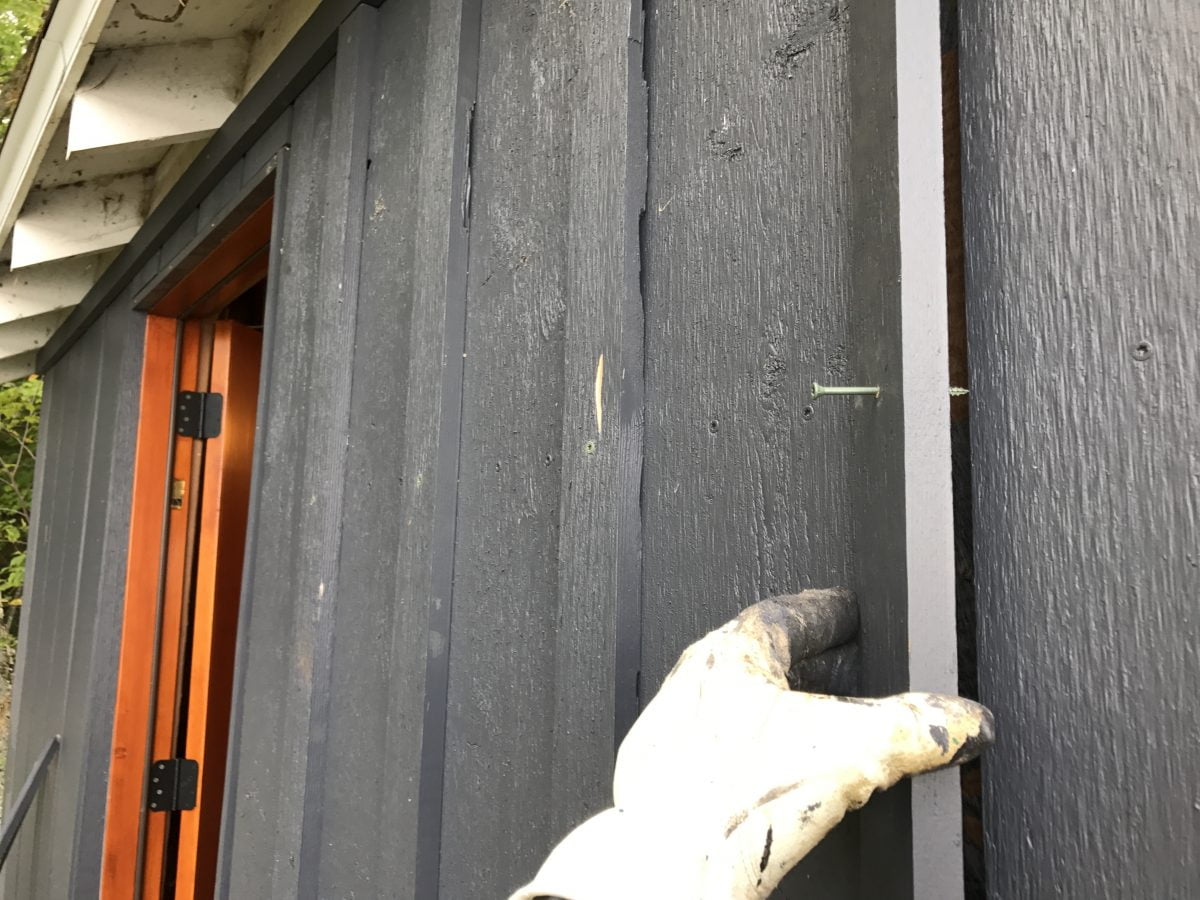
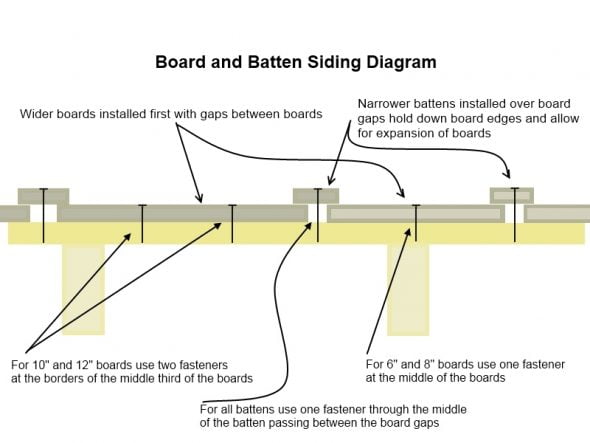
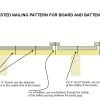
To install board and batten siding, first install wide vertical boards, spaced approximately one board width (7/8″) apart. Secure these boards using fasteners fasteners placed at the center of the siding boards. Centering the fasteners allows the boards to expand and contract without bowing or splitting (see diagram below).
After the boards are installed, cover the gaps between the boards with narrow battens. Secure the battens with centered fasteners passed through the gaps between the boards without passing through the boards.
Installed correctly, the battens cover the gaps between the boards and hold down their edges without restricting the boards movements under the battens. This technique allows the boards to freely expand and contract with humidity and temperature changes without cracking.
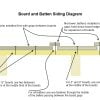
Board and batten siding fastening diagrammed:
The Nitty Gritty of Board and Batten Siding
Installing board and batten siding, like any vertical siding, presents the challenges of fastening vertical siding boards to vertically framed stud walls.
Boards installed up and down (vertically) do not regularly intersect stud framing members like horizontally installed boards do. This issue was traditionally solved by adding horizontal framing pieces between studs called blocking, then attaching the vertical to the installed blocking.
While this method works, installing blocking is a lot of work and may be impractical for remodeling. Blocking also reduces the space in the wall cavity for insulation and can make it hard to run wires and plumbing in the walls.
Alternatively, you can fasten vertical siding boards directly to the wall sheathing you are using. This method relies on using screws driven into sufficiently thick wooden wall sheathing, i.e. 1/2″ or thicker plywood or 23/32″ of thicker OSB (oriented strand board).
If using nails to fasten your siding and you would like to nail directly into the sheathing, you will need a wood sheathing material of at least 1 1/4″ thick (like sold pine boards or two layers of plywood).
The existing original sheathing on our cabin was a dense cellulose fiberboard, limiting my options to removing the fiberboard and installing either horizontal blocking or sufficiently thick plywood or OSB sheathing.
I chose to remove the fiberboard and install 3/4″ plywood sheathing. The thicker plywood sheathing allowed me to fasten the board and batten siding directly to the plywood sheathing with screws and the plywood provided a big structural upgrade for my walls.
Oriented Strand Board (aka OSB) could also be used as the sheathing under the board and batten siding, but OSB has some limitations compared to plywood. OSB tends to have lower fastener holding strength compared to plywood, and doesn’t handle water and moisture as plywood.
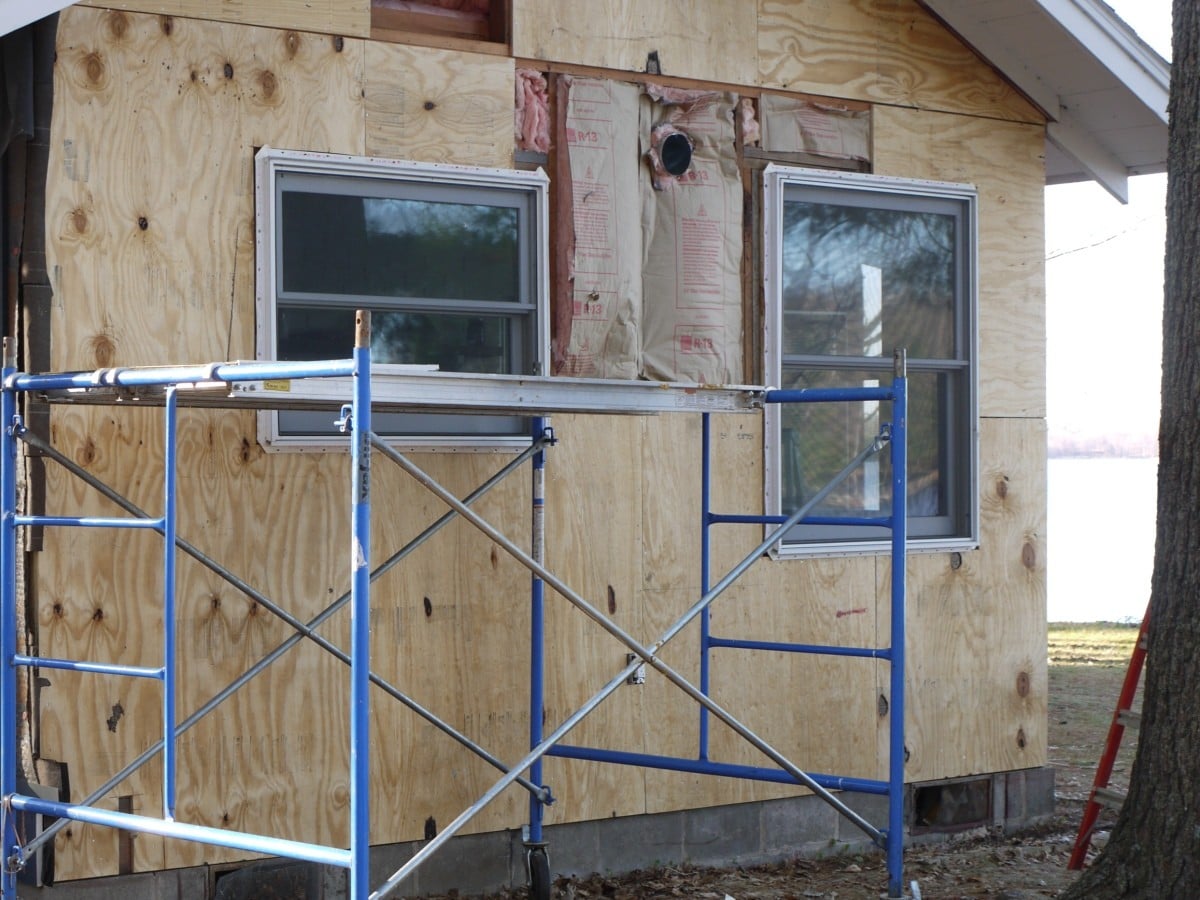
By swapping the old fiberboard for 3/4″ plywood, I was able to install the board and batten siding using deck screws. I no longer had to worry about hitting the framing studs with the fasteners. If using this technique of screwing directly into the exterior wall sheathing, be sure to using thick enough plywood or OSB.
Fastener Details for Board and Batten Siding Install
| Nails | Screws | |
| fasten into | at least 1 1/4″ solid wood (studs) | at least 1/2″ plywood or 23/32″ OSB |
| fastener grade | exterior grade – stainless, coated or galvanized | exterior grade – stainless, coated or galvanized |
| fastener style | siding: spiral or ring shank | flat head coarse thread |
| fastener length (boards) | siding thickness + 1 1/2″ | siding thickness + 3/4″ |
| fastener length (battens) | batten + siding thickness + 1 1/2″ | batten + siding thickness + 3/4″ |
If using nails to fasten your siding, no matter what you plan to nail them into, use exterior-grade nails designed specifically for installing the wood siding, like exterior-grade ring-shank or spiral shank style nails for siding.
Nails should also be compatible with the specific wood species you are using. Some woods will react with certain fasteners causing discoloration at the fastener site. Stainless steel or hot-dipped galvanized nails are typically the best choices.
Many siding nails will have specially designed tips to help prevent the splitting of the siding. Nails will need to be long enough to pass through the siding and into a solid wood substrate at least 1 1/4″.
Typical nails for one-inch thick siding are 2 1/2″ long and 3 to 3 1/2″ long for battens. Remember to add length for any material (like furring strips or rain screen mat) between the siding and sheathing.
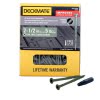
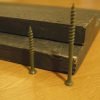
If you use screws as I did, look for an exterior grade screw (stainless or coated) compatible with the wood species you will be using. Most deck screws will work well. I used the green colored DeckMate screws I purchased locally from the Home Depot.
Screws need to be long enough to pass through the siding and into a suitable (solid wood, plywood or OSB) sheathing substrate of sufficient thickness. If using screws, the screws should penetrate 1/4″ or more through the sheathing. Fastener lengths can be calculated by adding the thickness of the siding boards and sheathing + 1/4″ plus the thickness of any material (rain screen membrane or furring strips) between the siding and the sheathing.
For my project, I added the following materials to determine my screw lengths:
- 7/8″ thick siding material (1″ material)
- 1/4″ rain screen membrane (under siding airspace membrane)
- 3/4″ plywood sheathing
- 1/4″ fastener penetration depth through the sheathing
- 2 1/8″ thickness total for boards (single siding board) and 3″ for battens (double siding board thickness)
After adding the above, the recommended length of fasteners for the boards (first siding layer) was 2 1/8″ and 3″ for the battens which are stacked on top of the boards. Because the screws would be just slightly countersunk, I settled on 2″ screws for the 2 1/8″ fastener length for the boards and 3″ for the battens.
Screw Length and Size for My Board and Batten Siding Install
Siding boards: DeckMate 2″ #8 Star bit flat-head deck screws
Batten boards: DeckMate 3″ #9 Star bit flat-head deck screws
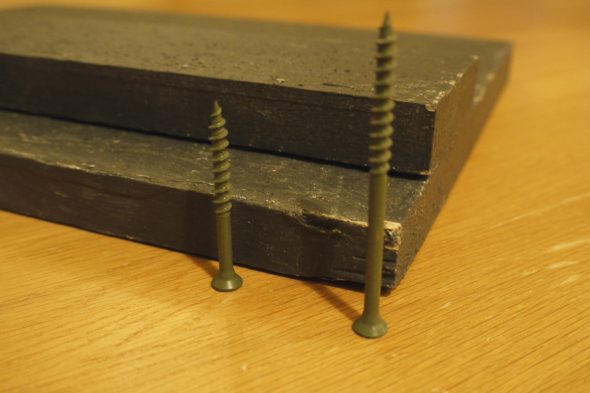
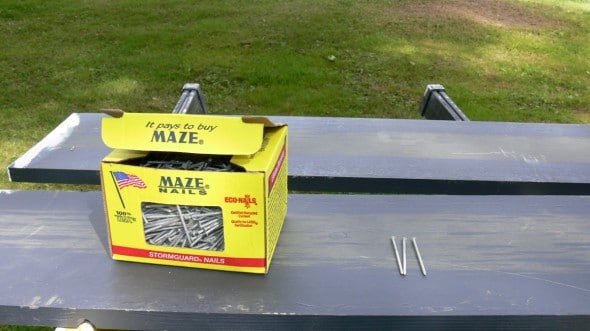
If you are planning on using nails, they should be marked as for siding and either hot-dipped galvanized steel or stainless steel.
Choosing a Material for Your Board and Batten Siding
Board and batten siding can be constructed from a variety of materials. Wood, engineered wood products, fiber cement boards, and polymer (vinyl) products are all suitable materials for board and batten siding. Of these, fiber cement boards and natural wood boards are excellent choices, and both have advantages and disadvantages.
Fiber cement board products (HardiePanel, etc.) have the advantages of concrete; low maintenance, long life, dimensional stability and moisture, and fire resistance.
Natural wood boards have the advantages of wood; natural beauty, the ability to take a stain, improved sound and thermal insulation and ease of cutting and installation.
Cement board products also have the disadvantages of concrete; heavyweight, difficult to cut and install, silica dust formation when cutting, and an artificial look.
Wood products have the disadvantages of wood; dimensional instability, tenancy to crack or split, need for repeat staining, susceptibility to woodpeckers, insects, and rot, and the lack of fire resistance.
I chose natural cedar for my board and batten siding. The natural beauty of wood and the durability of cedar made it an easy choice for me. Unfortunately, the recent increases in the price of natural cedar may make this material cost-prohibitive to use. Other locally milled wood species may be more cost-friendly compared to cedar.
No matter the type of wood you choose, all-natural wood products are susceptible to moisture and rot. While several species of wood have naturally enhanced protection against moisture and decay, all will benefit from the protection of an applied stain or paint.
If you plan to paint or stain your siding, consider finishing all six sides (front, back, and both ends) prior to installing them. Finishing only the exposed surfaces of installed siding allows moisture into the unfinished surfaces of the boards. This can lead to paint or stain durability problems and warping, cracking and twisting of the siding boards and battens.
In addition, if you plan to use a solid color stain or paint, a base primer coat may be beneficial. Some paints and stains perform well without a primer, but even with these products, most will benefit from more than one coat of finish and/or starting with a primer coat.
Properly applied finishes take time. Applying a coat or two of primer, allowing it to dry and then applying a coat or two of finish is a long process. Not only is this time-consuming, but the quality of the finish is very dependent on the conditions, tools, products, and process used to apply any primer or finish.
One excellent alternative to finishing your siding material yourself, it to buy the siding materials prefinished.
Yes, it will probably cost more, but for many, the time saved and the quality of the finish is worth the additional cost. I found the price of ordering prefinished fairly competitive with the cost of what I could get the unfinished wood for locally. My cost for 1″ x 10″ knotty western red cedar in mixed 8′ and 16′ lengths was less than $2.50 / lineal ft (this was late 2011, long before our trade issues with Canada)!
I haven’t priced prefinished material lately, but even if it is priced a buck or so a foot more, the convenience and quality benefits may be well worth the additional cost. And, its hard to overstate just how awesome it is to receive a shipment of factory finished wood ready to install.
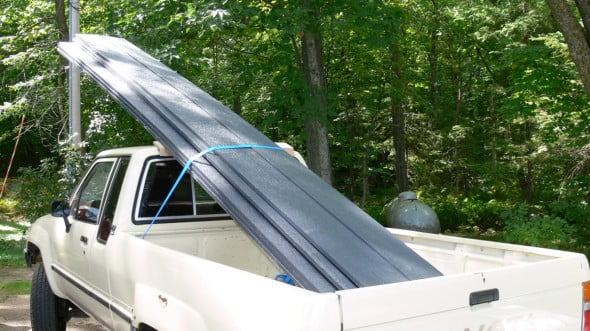
Ordering prefinished material saves a ton of time, and the siding is sealed with a professionally applied, factory-controlled finish. You still should prime and paint field cut ends, but that’s easy.
The supplier I ordered from also recommends a field coat of finish over the exposed surfaces after the product is installed. Again, a fairly easy step – especially when compared to painting rough cedar from scratch. The field coat of finish also seals your fasteners, enhancing the durability of the siding.
For my project, I ordered prefinished cedar boards from Cedar Shingles Direct of Wyoming, Michigan. Their factory applies a Cabot finish of your choice – for us, a latex solid stain applied over a solvent-based primer. The product was shipped via semi-trailer truck and arrived well packed, undamaged and ready to install. The quality of the finish on the wood was exceptional. I highly recommend them.
Consider Best-Practice and Add a Vented Rainscreen Air Space Under Your New Siding
Prior to installing your siding, consider upgrading your exterior wall assembly to a rainscreen-style wall by adding a vented air space (also referred to as an “air chamber”) to the exterior wall build. A rainscreen is a system of wall building to help control moisture within the wall assembly.
Rainscreen walls separate the weather-resistant barrier (house wrap, asphalt felt, etc.) from the siding boards allowing the wall assembly to “breathe”, helping prevent moisture damage and mold within your exterior walls. The rainscreen wall aims to address moisture problems all to common with modern air-tight construction materials and techniques.
Traditional exterior wall construction, known as “redundant barrier” construction, relies on a sealed siding material and a second, “redundant” water barrier (often asphalt felt, a.k.a “tar paper”) directly under the siding. This style of wall construction worked well with older, more air-permeable home construction and was typical of residential construction for most of the last century.
Unfortunately, redundant barrier techniques with newer synthetic house wraps and “airtight” construction is prone to water trapping which can lead to rot and mold problems. In reality, all exterior walls will eventually leak, and the rainscreen wall provides a way for them to dry when they do get wet.
Building Walls That Dry – Rainscreen Walls
Rainscreen wall construction originated in Norway as a method to protect exterior walls from driving rains. Walls constructed in this way not only protect the inner wall from the weather but are designed to dry out once wet.
Vented rain screen walls allow any penetrated water to drain down and out of the wall and air to freely flow up the rainscreen wall cavity, helping dry the wall assembly. The air space also provides a pressure and capillary break within the wall, interrupting water as it attempts to move through the wall.
Building a rain screen wall system requires a bit of additional work when compared to traditional techniques, but the reward is a long-lasting, healthy exterior wall. We have had our rainscreen board and batten siding for nearly 10 years and it looks brand new.
To construct a vented rain screen wall, add a vented air space between the redundant barrier – that is the weather-resistant barrier (WRB) and siding. See the layers below:
Redundant Barrier Wall Layers vs. Rain Screen Wall Layers
TRADITIONAL WALL: framing | sheathing | weather-resistant barrier | siding
RAINSCREEN WALL: framing | sheathing | weather-resistant barrier | vented air space | siding
The air space in a rain screen wall system is the key to the rain screen wall. This air space within the rain screen wall can be created by a variety of methods:
- furring strips
- rain screen spacer mats
- textured house wraps
1. Furring strips are thin strips of wood or other material that are installed vertically to lift the siding off the weather-proof barrier covered sheathing. Furring strips can be created using 1/4″ or thicker material cut from the sheathing, or other, or you can use one of the many manufactured products. Furring strips work well with horizontally installed siding (and therefore not well with board and batten siding). Some manufacturers create a vented furring strip intended to be installed horizontally, allowing for easy use with vertical siding.
2. Rainscreen spacer mats provide another method of creating a vented airspace. These thick, permeable mats are installed over the WRB and create an air-space under the siding material.
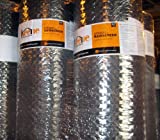
I used a spacer mat product by Keene called Driwall Rainscreen 020-1 for this project. The Keene product provides a 1/4″ airspace and is installed on top of your weather-resistant barrier under the siding.
In addition to helping to keep walls dry, rain screen wall construction can help protect your weather-resistant barrier (WRB). Many weather-resistant barriers degrade after exposure to certain tannins and wood extracts. Separating the WRB from the siding boards via a rain-screen wall design may help limit contact of the two.
3. Textured or Wrinkled House Wraps. Certain specialty house wraps are also marketed to serve as an all-in-one WRB and air space mat. These are typically house wraps with a textured or raised surface to create a slight gap between the wrap and the overlying siding. These product can work, but usually don’t provide the same air space as furring strips or dedicated rainscreen mats.
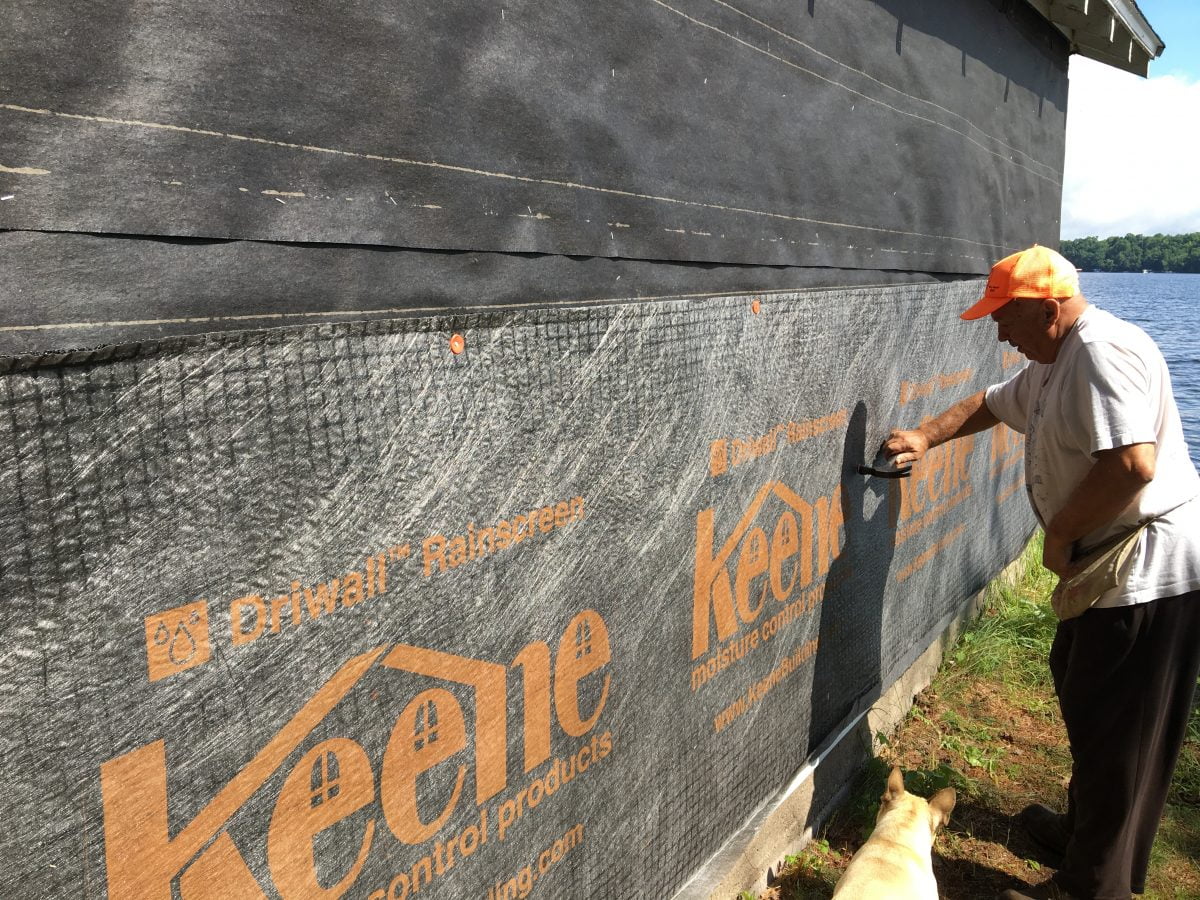
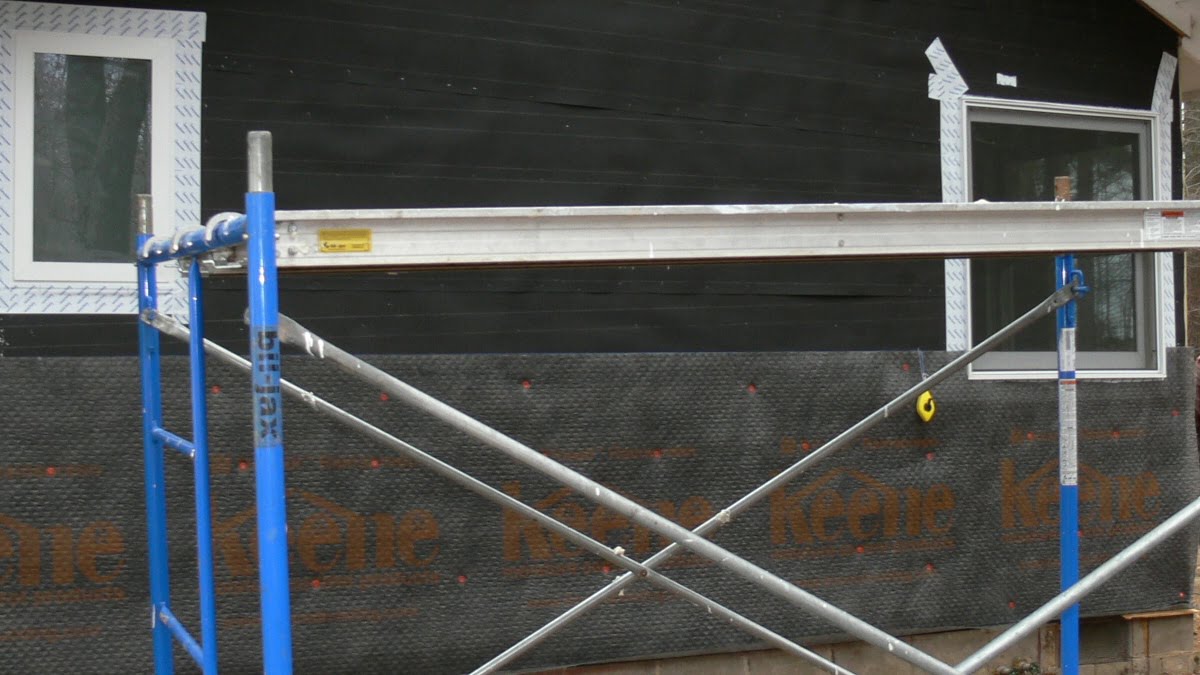
A summary of the layers I used to build my exterior wall (from inside to out):
- 2×4 studs 16″ oc
- R-13 Fiberglass batt insulation
- 3/4 Plywood (CDX exposure 1)
- 30# builders felt (roofing felt)
- Driwall Rainscreen mat by Keene
- Cedar board and batten siding
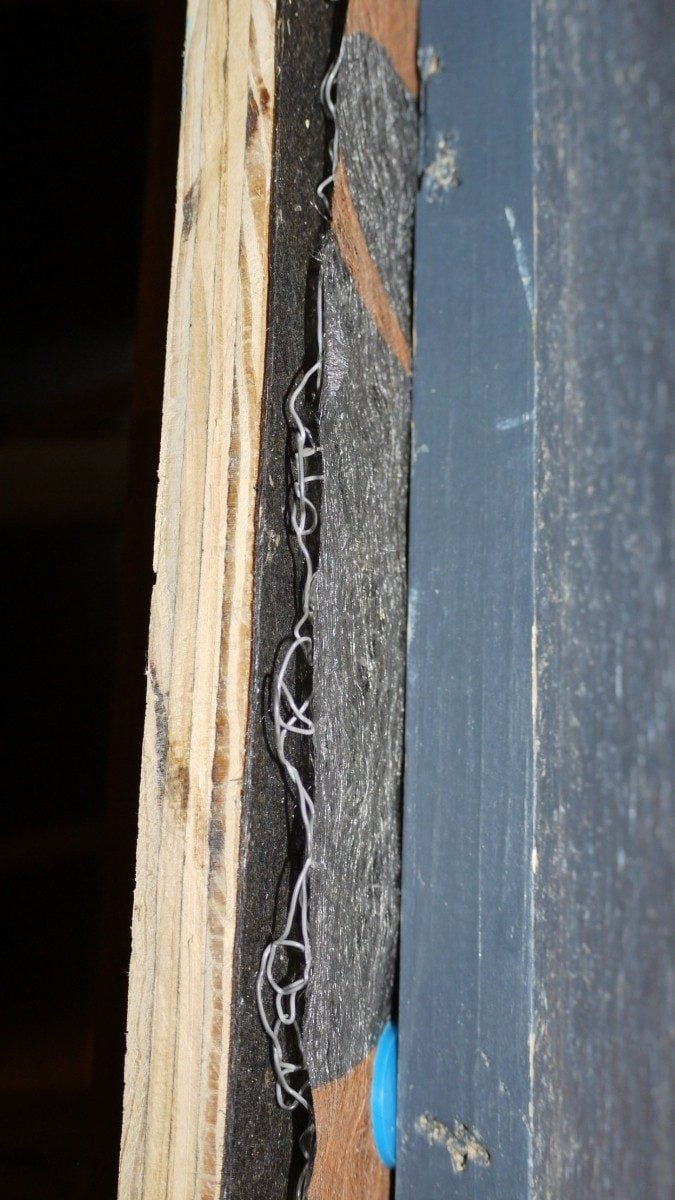
If you are interested in reading more about the details of building a vented rain screen exterior wall please see my article “How and Why to Build a Rainscreen Wall”.
Plan for the Install of Your New Board and Batten Siding
Once you have settled on the details of your wall reconstruction and installed the weather-resistant barrier and optional vented air space, the final task is to install the siding boards.
To install your siding, you will need sufficient access to your walls. Ladders work, but scaffolding may work better. If you can, borrow, rent or buy some scaffolding for the project. Scaffolding will give you a stable platform to work from that is generally safer than ladders or ladders with planks.
In addition to material and ladders or scaffolding, you will need to gather all the necessary tools and organize your work site. For my project, I found it best to set up a few specific stations for individual tasks. Although you can install siding by yourself, as I did, a helper is great.
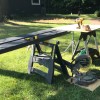
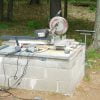
To organize my work site, I had made one station for measuring, and cutting the boards, and another station for marking and starting the fasteners – I preinstalled the screws before putting the siding boards on the wall. I found having several small areas for each task allowed me to keep my tools organized and my workflow efficient.
As for your siding material, plan ahead. If using wood, your stock should have time to acclimate to your job site. And, as discussed above, I highly recommend having your siding material painted or stained prior to putting them up.
For most of my material, it was already primed and stained as I ordered it factory finished (I highly recommend doing this!). I did, however, need some additional material that I had to prime and finish myself. I used the weekends prior to the start of the install to prime, finish and allow finished boards to dry.
Then, with the material finished and ready to install, I simply prime sealed the cut ends prior to installation. After the boards had been installed, I finished the entire surface with a final field coat of finish.
Read on for the step-by-step of my board and batten siding install.
OVERVIEW | Board & Batten Siding
SUPPLIES LIST | Board & Batten Siding
-
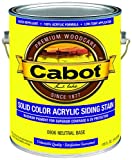 Siding Stain
Cabot Solid Color Acrylic Siding Stain - Dark Slate
Color: Dark Slate
-
 Asphalt Felt WRB
Asphalt felt #30 weather resistant barrier
Cheaper to buy locally due to shipping costs
TOOLS LIST | Board & Batten Siding
STEPS | Board & Batten Siding
- Order Siding Materials and Supplies, and Organize the Necessary. Tools.
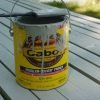
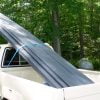
Plan for your project by ordering the necessary siding materials and supplies. I used 1″ x 10″ cedar boards for the boards and 1″ x 3″ cedar boards for the battens for this project. Most of the material was ordered pre-finished with from Michigan Prestain, the finish was Cabot solid acrylic siding/deck stain in the color dark slate.
I needed some additional boards later in the project and purchased those from my local lumber yard. I pre-finished these boards with the same Cabot solid color acrylic siding stain (of note, recently the siding stain seems less densely pigmented compared to older versions of this stain, but I did find that the solid color acrylic deck stain seemed more like the original siding stain I used).
If purchasing pre-stained materials, plan ahead, as the process took several weeks and required shipping from Michigan to my site in Minnesota.
Order any other materials you plan to use prior to your planned install. If replacing the exterior wall sheathing, plan ahead and have it ready for the start of your project.
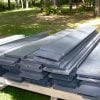
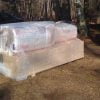
- Prefinish Siding Boards and Battens (optional but recommended).
If you are not purchasing a prefinished siding product, consider painting or staining all six sides of your material prior to installing it.
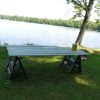
At the very least prime the backs of the boards prior to putting them up and finish them once installed. Some of my cedar siding boards where purchase from my local lumber yard. For this materials, I pre-finished the boards and batten material by applying a primer coat and two additional latex finish coats. I did this the weekend before I installed the siding, allowing it to dry prior to installing them.
Painting or staining all sides of the siding boards will provide the best protection for the boards and may help prevent negative interactions between your weatherproof barrier (house wrap, asphalt felt, etc.) and extracts and tannins from your siding boards. Extracts from siding boards, especially cedar, can degrade house wraps and their water resistance. Sealing the backside of siding boards can limit the amount of extracts house wraps are exposed to.
- Remove Old Siding. Remove and Replace Sheathing, Weather Resistant Barrier as Needed.
Remove any existing siding, if present. A flat shovel, and a flat pry bar are helpful tools for old siding and fastener removal. Once the siding is removed, remove and replace the weather resistant barrier.
Depending on the type and condition of your exterior wall sheathing, you may wish to remove and replace this as well. This is a larger job, but might be desirable if you plan to insulate the wall cavity or upgrade the sheathing for screw fastening (at least 1/2″ solid wood or plywood or at least 5/8″ OSB for screw fastening of siding boards).
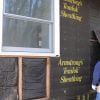
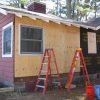
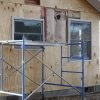
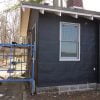
My existing sheathing was a dense cellulose sheathing marketed in the 1950’s as an insulating wall board. I removed it, added fiberglass batt insulation and closed the wall with 3/4″ plywood. On top of the plywood, I installed asphalt felt (tar paper) as a weather resistant barrier. I highly recommend asphalt felt instead of house wraps. House wraps can trap moisture within the wall cavity. Asphalt felt, a.k.a. tar paper, is a semi-permeable membrane that can help keep your walls dry and has stood the test of time. Many top building scientists still recommend asphalt felt as a weather resistant barrier.
- Flash Weather Resistant Barrier to Windows (if replacing WRB).
Prior to installing the siding boards and battens, I finished the weather resistant barrier install by flashing around windows and penetrations and adding a rainscreen airspace using the Keene Driwall mat.
If you are not replacing the weather resistant barrier (house wrap), you will not need to flash it unless it is damaged or improperly installed.
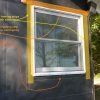
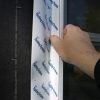
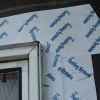
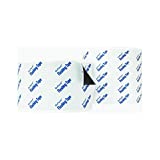
If you did install a new WRB (weather resistant barrier), the main flashing project will be flashing the windows. The general approach to window flashing is to install peel-and-stick tape flashing in a layer fashion around the sides and top of the widow, sealing the widow to the weather resistant barrier.
The sides should be flashed first, followed by the top edge of the window to create a shingled layering of the flashing tape. The bottom edge of the window is typically not sealed with flashing as it may prevent water from escaping from the window if needed.
Additional details regarding rainscreen wall design can be found here: Rainscreen Siding System
- Plan Siding Install.
With all the preliminary work completed, plan for the installation of your board and batten siding. The general order of my board and batten project was as follows:
Board And Batten Siding And Trim
1. Install 10″ x 1″ water table (skirt board) at base of wall.
2. Install drip flashing on top edge of skirt board.
2. Install 10″ x 1″ vertical siding boards from top of water board drip flashing to top of wall spaced ~ 1″ apart.
3. Install 3″ x 1″ border trim at top of siding. This covers the top gap for rainscreen ventilation (optional).
4. Install 4″ x 1″ window and door trim (casing).
5. Install 3″ x 1″ vertical siding battens over siding board gaps.
6. Install 4″ x 1″ corner trim (optional).
7. Apply field coat of finish.Before putting up boards, you will first need to plan for board selection, layout, and fastener use.
For traditional board and batten siding, boards are installed first. These boards are spaced to allow for natural expansion and contraction of the siding material. The correct amount of spacing depends on the material you are using, but, in general, should be great enough to allow for board movement yet narrow enough to be sufficiently covered with installed battens.
Using 10″ wide boards and 3″ wide battens for our siding, we used a ~ 7/8″ gap between boards. This just so happens to be the thickness of the 1″ material we were using, so scrap pieces of material worked well to gap the boards.
When deciding how much spacing to have between the boards, consider the material you are using (wood, cement board, etc.) and the amount of expected expansion and contraction of that material. Obviously, wood will have much more movement compared to cement board.
In addition, consider the width of the battens you would like to use. Narrower battens will obviously require a narrower gap between boards. To get an idea of the needed width for the battens, consider the main functions of the battens: 1) cover the gaps between boards 2) to hold down the edges of the boards they are installed over.
Battens, in general, should be wide enough to cover the planned gap plus at least 3/4″ overlap on each side of the gap. For my install; a 1″ board gap plus the 3/4″ edge overlaps which equals 2 1/2″. The actual width of 1″ x 3″ lumber is 2 1/2″ – exactly the width I needed.
So, for my board and batten siding, I used; 1″ x 3″ battens over 1″ x 10″ boards spaced 1″ apart.
No matter what width of boards you plan to use, most do not recommend using battens that are less than 3″ nominal width (1″ x 3″ boards).
When using 1 x 3″ lumber for the battens, the actual width of the battens is only 2 1/2″. This doesn’t leave a lot of overlap of the boards, especially if your batten boards are not very straight.
Some warping and twists can be straightened when installing the battens, but if too much correction is attempted battens can split or crack. Most will use 1″ x 3″ or 1″ x 4″ boards for battens.
- Plan Fastener Spacing and Location For Siding.
Properly installed board and batten siding is secure but free to expand and contract naturally. Install board and batten fasteners in a manner that will not significantly limit the natural movement of the siding boards.
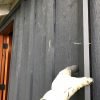
In general, boards for board and batten siding should be fastened toward their center, leaving the edges of the boards free to expand and contract.
This centered style of fastening boards may seem contrary to traditional methods, with fasteners placed close to the edges of the material to hold the edges of the boards down. The beauty of the board and batten system comes from the coordination of the center fastened boards and the securing overlying battens holding down the board edges while allowing them to move.
Battens are fastened with single centered fasteners that pass between the underlying boards. Do not fasten battens at the edges passing through the underlying boards as this will restrict the movement of the underlying boards and tend to result in cracked and split boards.
Place fasteners at the bottom and tops of the boards and battens and every 16 – 24″ along their length. I used #9 coated deck screens.
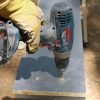
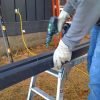
Prior to installing the boards (and battens), I recommend pre-drilling the pilot holes for your fasteners. Pre-drilling is a good idea even if you plan on using nails. A small pilot hole will help you avoid splits in your boards and help keep your fasteners in line and straight.
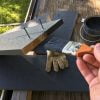
To create consistent pilot holes between boards, I made a few drill jigs using spare pieces of siding material. After drilling the pilot holes, I preinstalled the fasteners (screws in my case) in the holes, making it very easy to fasten the boards and battens once on the wall.
- Begin Siding Install With Skirt Board (Water Table) And Drip Flashing at Base of Wall.
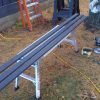
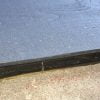
Begin the siding install by first installing a skirt board (a.k.a. band board, water table) at the base of my siding.
I used the same 1″ x 10″ cedar material for this skirt board as the boards for the siding. Prior to installing the skirt board, I beveled the bottom edge of the board using a 45-degree router bit to help direct water away from the wall. After running the router over one edge, I re-primed and repainted the routered edge. Once beveled, install the water table at the base of the wall with the bottom edge (bevel sloping outward) starting just at or slightly below the level of the rim joist.
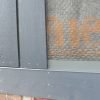
Of note, this is the same level as the insect screen installed at the bottom edge of the rainscreen mat. Once positioned correctly, fasten the boards to the wall with three fasteners every 18″.
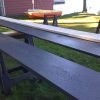
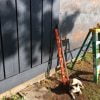
After the skirt board is installed, install a drip flashing over the top of the skirt board top edge. I used pre-painted gray metal flashing I ordered from a local lumber yard. You can use roofing nails to hold the flashing in place or wait until you start installing the boards of the siding whose bottom fasteners should pass through the flashing.
While traditional flashing techniques suggest that the top edge of flashing pieces should be under the weather-resistant barrier, with the vented rainscreen wall design, I decided to install this flashing piece on top of the rainscreen mat.
The reason I did this is to allow an uninterrupted flow of air through the rainscreen mat. If I had installed the flashing piece back to and under the asphalt felt (WRB), it would interrupt the drainage of water and flow of air through the rainscreen wall.
- Install the siding Boards.
With the skirt board and top metal flashing in place, begin installing the boards of your board and batten siding.
Start installing the horizontal boards from the edge of the wall or at the edge of a window or doorway in an effort to decrease the number of difficult cuts needed.
In general horizontal board spacing should be fairly consistent, and you can cheat a bit and vary slightly to avoid awkward cuts or very narrow board cuts.
Start your board install with a single board. Set the board on top of the skirt board drip flashing, gaped slight (1/4″ or so) above the flashing to create a water break between the board bottom edge and the drip flashing. to create a consistent gap, I used a paint stir stick as a spacer, resting the board on top of the stir stick prior to leveling and fastening.
Drive fastener heads just flat to the board surface and avoid over-driving the fasteners which can create fastener divots that can hold water. Remember that fasteners should anchor into sufficiently thick plywood or OSB sheathing, or framing members (blocking).
Install fasteners at least every 2′ vertically. I started with two centered screws at the base of the boards about 1 1/2″ above the bottom edge of the board. This starting position allowed the fasteners to penetrate the base skirt board drip flashing. I then added a pair of screws every 2′ up the board and a final pair about a 1 1/2″ below the top edge of the boards.
To keep fastener position uniform, I used a pre-drilled board jig as a guide for fastener holes. I pre-drilled the screw holes after cutting each board and preinstalled screws just into the boards prior to putting the boards on the wall. Once in place, you then can simply drive the preset screws in.
Continue installing boards along the wall, cutting them as needed to fit around windows and other obstructions. Windows and other penetrations (fan exhaust, etc.) should be already flashed to your weather resistant barrier prior to installing the siding.
When working boards around windows and other areas requiring cutting, you can adjust your board spacing slightly to help the boards fit better or avoid some cuts.
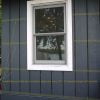
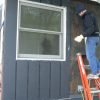
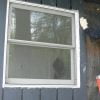
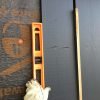
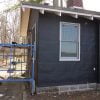
Be sure to reseal the cut surfaces of boards before installing them. Notice the white primer added to the cut edge of the board bordering the right side of the window in the above image.
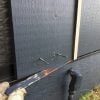

- Apply a finish coat of stain or paint over the installed boards.
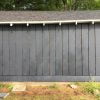
Once the boards installed, I applied a quick field coat of finish. Even with pre-stained material, the supplier recommends a field-applied coat of finish after installing the boards.
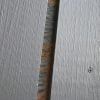
This field coat adds an extra layer of protection and seals the fasteners. Notice the image below demonstrating how the field-applied finish coat covers the fasteners on the boards prior to installing battens.
I could have waited until the battens were installed to finish everything at once, but I’ve found its much easier to apply a coat of finish on the flat surface of just the boards prior to having the battens installed.
Once the battens and trim are installed, I applied an additional coat of finish to cover battens. I found that using a painting pad or mini roller worked well to apply these field finish coats.
- Install trim prior to installing the battens.
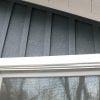
Prior to putting up the battens, install the top, window and other trim you plan to use.
Once the trim is in place, it will be much easier to measure and fit the battens next to the installed trim.
If using a top trim piece, install this first. This piece will server as a finish for the top edge of the trim and works to hide an air gap if your wall has a air-gap rainscreen design (mine does).
Battens then install between the top trim piece to just above the drip edge flashing at the base of the wall. If the batten intersects a window, the batten installs between the top trim and the window trim.
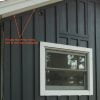
For my project, I used a horizontal trim piece at the top of the siding, but none at the bottom. The top trim piece is simply a batten installed horizontally. I gaped the top of this trim piece slightly between the top edge and the bottom edge of the frieze board to provide top ventilation for my rainscreen air gap.
If you are installing board and batten siding over a vented rainscreen wall, you may need to design a more elaborate trim detail at the top of your walls to protect the top ventilation from rain and other elements. My top ventilation gap was well protected by my generous 12″ overhang and did not need additional protection.
- Install Window and Door Trim.
Install the window and door casings.
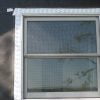
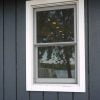
There are countless styles of window and door trim that you can use. I opted for a very basic butt-joined flush edge box casing for the windows and doors, using 1″ x 4″ cedar material that I ordered pre-finished in white.
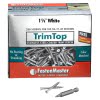
I installed the trim pieces using white trim screws. Prior to installing the window trim, you should have properly flashed window and door penetrations, which I had already completed using Dupont peel-and-stick flashing tape.
See my article on building a rainscreen wall for a more detailed discussion of how to flash existing windows with flashing tape.
Keeping with the rustic, simple theme of board and batten, I used a simple square cut boxed cashing style around the windows and doors. I left a slight gap between the cashing and window frame as a caulk gap. I did not caulk the outside edge of the window cashing adjacent to the siding. Water penetration here is drained by the rainscreen wall detail.
To fasten the window and door trim, I used white trim head stainless steel screws. I used a pair of screws spaced along the boards. Once the trim boards were installed, I used color matched caulk between the window frame and trim edge and at the cut edge seems of the trim boards.


- Install the battens.
With the boards and trim pieces installed, it’s time to install the battens.
Fasten the battens with a single fastener centered on the batten that passes through the gaps between the boards without penetrating the boards.
Use fasteners long enough to pass 1 – 1 1/2″ into framing or the thickness of your sheathing + 1/4″ if using screws into sheathing.
Consider pre-drilling screw holes in the battens and installing screws into the battens before they are on the wall. When pre-installing the screws, allow the screw to penetrate 1/2″ or so through the back of the battens to make it easier to position the fasteners into the board gaps.
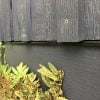
At the bottom of the battens, bevel the bottom edge to help shed water away from the wall. I did this using my compound miter saw when cutting the battens. After cutting the battens, remember to reseal the cut ends with primer.
Cut batten lengths to fit from the bottom edge of the top trim piece to flush with the bottom of the boards installed above the skirt board drip flashing.
When measuring batten length, keep in mind the bottom bevel of the batten, which will lengthen the batten by the amount of bevel you plan to add (I beveled my batten bottom edge 15 degrees).
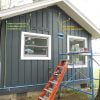
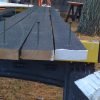
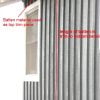
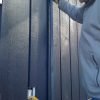
Once battens are cut to length, install them over the gaps between the installed boards. Fasteners should pass between boards passing through the board spaces without passing through boards. Use a level to plumb battens then drive fasteners to secure.
Make sure the battens sufficiently cover the board edges on either side of the battens prior to fastening. Drive fasteners to just bring fastener heads flush with the batten surface to maximize hold and help avoid water pooling in fastener divots.
Continue installing battens. When installing battens, do not caulk the lateral edges of the battens. The battens should be snug against the boards, but allow the boards to move under the batten in response to changes in humidity and temperature.



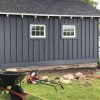
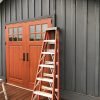
- Install corner trim pieces if not already installed.
Finish the outside corners of the siding with trim that is slightly wider than the batten material. We used 1″ x 3″ battens and 1″ x 4″ trim for the outside corner trim (and window trim).
Keeping with the simplicity of the rest of the trim, I butt-joined the trim boards to form the outside corners. Secure using the same screws you used for the battens. It may be helpful to install a few screws at the outside corner edge of the overlapping piece into the butt-end trim piece to draw the edge tightly together. Pre-drill these fasteners or the boards may split.
- Apply final field coat of finish to cover battens.
As I noted above, I applied a finish coat of stain (using a mini roller) just after installing the boards.
This coat went on very easily as the boards already had a finish matching the color of this field coat. Now, apply one last coat of finish to cover the battens, trim and their fasteners.
Carry this last batten and trim finish coat onto the boards to ensure good coverage of the outside corner of the batten against the boards. I do not recommend sealing the edges of the battens with caulk or other sealants that could restrict the movement of the underlying boards.
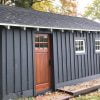
IMAGE GALLERY | Board & Batten Siding
FOLLOW UP | Board & Batten Siding
Our Cabin Board And Batten Siding Install Follow Up
As of this year, 2015, the siding has been in service for 3 1/2 years. Other than needing the occasional cleaning with a stiff broom to remove cob webs and pine needles, our siding has been maintenance free. The siding still looks like we just put it up. The finish has no signs of age and has not chipped, peeled or failed in any way.
I have also not had any issues with the installed siding boards. None of the boards have cracked, warped or otherwise misbehaved. There has been no issues with water or signs of moisture issues on the exterior or interior of our cabin – it seems as if the combination of the vented rainscreen wall and the cedar board and batten siding are a perfect match.
If I had to do it again, I would not do anything differently. I am very pleased with our board and batten siding!
Update October 2018
OK, its been 7 years! The siding is still going strong with no issues. No paint chips, cracks or peeling. No board cracks. No fastener failures. It really still looks like I just put it up.
The rough surface of the cedar boards is loved by spiders and other cacoon-building insects. But other than the need for cleaning, the siding and the Cabot finish has held up incredibly well, especially considering the weather conditions in Northern Minnesota – hot humid summers, windy, rainy springs and falls and bitterly cold winters.
















A great article with a great guide! You did it very well! My husband and I are now actively looking for a house in Connecticut and we really like this kind of siding. Moreover, we keep horses, and this style will fit perfectly. Thanks!
Wow, I think this is the most in-depth guide on siding, from start to finish, that I’ve seen so far!
Embrey Wood Products. We sell all kinds of cedar siding including board and batten. We also do lap siding. Check out our Facebook page or google us.
great site lots of tips for the home handy man.
question; I am replacing the 40 year old vinyl siding on my home in N.B, Canada with real wood board and batten. In your application you used a dri-wall type product between the building sheathing and the board and batten which I have also seen used when siding with cedar shingles.
In my case I will have a one inch styro-foam between the existing wall sheathing and the board and batten. Back in the day it was a common practice to put styro-foam behind vinyl siding.
would you recommend also using the dri-wall sheet or is the dri-wall type layer required?
Wow! This is an amazing “how to”. So well thought out and informative. You can tell a lot of time went into this post. We will be following this on the weekend on our own boathouse. Wish us luck!!
hello
thank you very much for your informations. I’m plannig to install the batten over a plywood directly, instead of board. Is ıt ok ? Is there any problem with this design?
Hi,
Such a great how-to!!! We have a cabin, located between two creeks…so it is damp. The portion we want to add board and batten to is cinder block…how would we add to cinder block?
Thank you!!!
Cindy
Hi Cindy,
Thanks for the interesting question.
The best solution for your goal of installing wood siding over concrete block really depends on the specifics of your project and home. In general, adding siding over concrete block presents several challenges within the following categories:
Prior to addressing specifics, it would be important to know more details about your project; is the block wall below grade, moisture concerns, is the space behind the wall conditioned, do you need to insulate the wall, and are there wall thickness matching issues for other (above) portions of the wall?
Not knowing more about your details, it would be hard to make specific recommendations, but in general, I would recommend the following:
These are just some of my ideas on how I would consider installing board and batten siding over concrete block. Let us know what you decide to do or follow-up with additional details that I could respond to. I would research topics related to your project including masonry rainscreen wall construction techniques.
Gary
You have worked long and hard to make instructions that are easy to follow. Well done! The way you have pictured and described the built it is easy to say, “I can do that!”
Thanks Stan.
Thank you for your greatly detailed descriptions. What did you use to fill the gaps between the hardie board pieces and to cover the screws? I have asked a few people and gotten many different responses.
Thanks, Sandy
Thanks Sandy,
I used latex fortified tile thinset reinforced with alkali-resistant fiberglass tape at the backer board seams. I just used the same thinset I used to put on the tile.
Good luck and let me know if you have any other questions!
Gary
Sandy, this article discusses it a bit: https://cabindiy.com/how-to/tile-a-shower/
I would like to add insulation, rainscreen, board and batten to a 1933 log cabin, and would appreciate your advise.
Hi,
Thanks for your thorough article and explanations. I appreciate the historical facts too. I live in Canada and must consider 4 seasons of weather. That you mentioned Norway reassures me that B +B is a good siding for me.
I need to replace windows too. In which order do you reccommend I do the work? Windows first or B+B first?
Thanks, Ruth
Hi Ruth.
Sorry for the late reply, I somehow missed your question earlier.
I love our board and batten siding. I has been problem-free since putting it in almost 7 years ago. I would recommend adding a “rainscreen” drainage plane under the siding, as I really believe it helps keep the siding healthy and the wall dry.
Regarding your question, I would put the windows in first. You will need to flash the windows to the weather resistant barrier (house wrap, asphalt felt, etc) and this would not be practical once the siding is up.
Good luck with your project and reply with a photo or two if you’d like.
Gary
Hi,
Thanks for your thorough article and explanations. I appreciate the historical facts too. I live in Canada and must consider 4 seasons of weather. That you mentioned Norway reassures me that B +B is a good siding for me.
I need to replace windows too. In which order do you reccommend I do the work? Windows first or B+B first?
Thanks, Ruth
Hey I love your post!
This has answered so much for me.
I am planning on using 12 inch boards with 3 inch battens and your detail for the skirt board and trim was so helpful.
I do however have a high wall side and will need to use a “trim board” horizontal in the middle where the two 8 foot vertical board would meet and I am still confused. Would I have to run that horizontal board first or can I run it after the vertical boards similar to the trim for the windows? I am hoping that I can run it later because I recently had a knee injury and would like to stay close to the ground for a bit.
Thanks again, very impressive project!
I messed up.
I live in Louisiana, and installed about 74 peripheral feet (42′ side and two 16′ ends) of a small residence.
On the boards: I installed external grade screws (approx #10 by various appropriate lengths) in 10″ wide (7/8 thick) cypress boards with screws spaced approximately 19″ from top to bottom (with extra at the bottom sill and joist).
On the battens: I used galvanized 2″ nails, alternating about 10″ left, 10″right, 10″ left etc (about 20″ between nails on the same side).
Should I extract and start over (repairing the underlying Tyvek with tape) ?
Thanks,
Paul
This is an amazingly detailed and helpful article. Was going to bookmark it, but decided to print it.
Your effort to document your project is greatly appreciated. It helped me in cedar BnB for a rear extension wall. Was surprised that you would paint the cedar black, as I appreciate the natural color and grain of the wood, but your boat house does look nice!
I was going to use a drainage layer, but it was too far to drive to get it, and I simply bought Pressure treated Lattice, disassembled it and used the pieces to create a horizontal layer under the cedar siding that would allow air circulation and water drainage. Also coated the cedar with an oil semi transparent stain to keep the look of the wood. Brand is Wolman.
I am re-siding my old garage. It was originally Board and Batten and I plan to maintain the look. The original cedar siding was bad but underneath I discovered heavy builders felt and under that sheathing of 3/4″ x 6″ siding boards in remarkably good shape. I’m thinking of prepping the existing sheathing by putting 3/8″ exterior plywood over it to smooth the surface, seal air holes and add strength. It seems like a waste to toss all that old sheathing. What do you think?
Hi Mark,
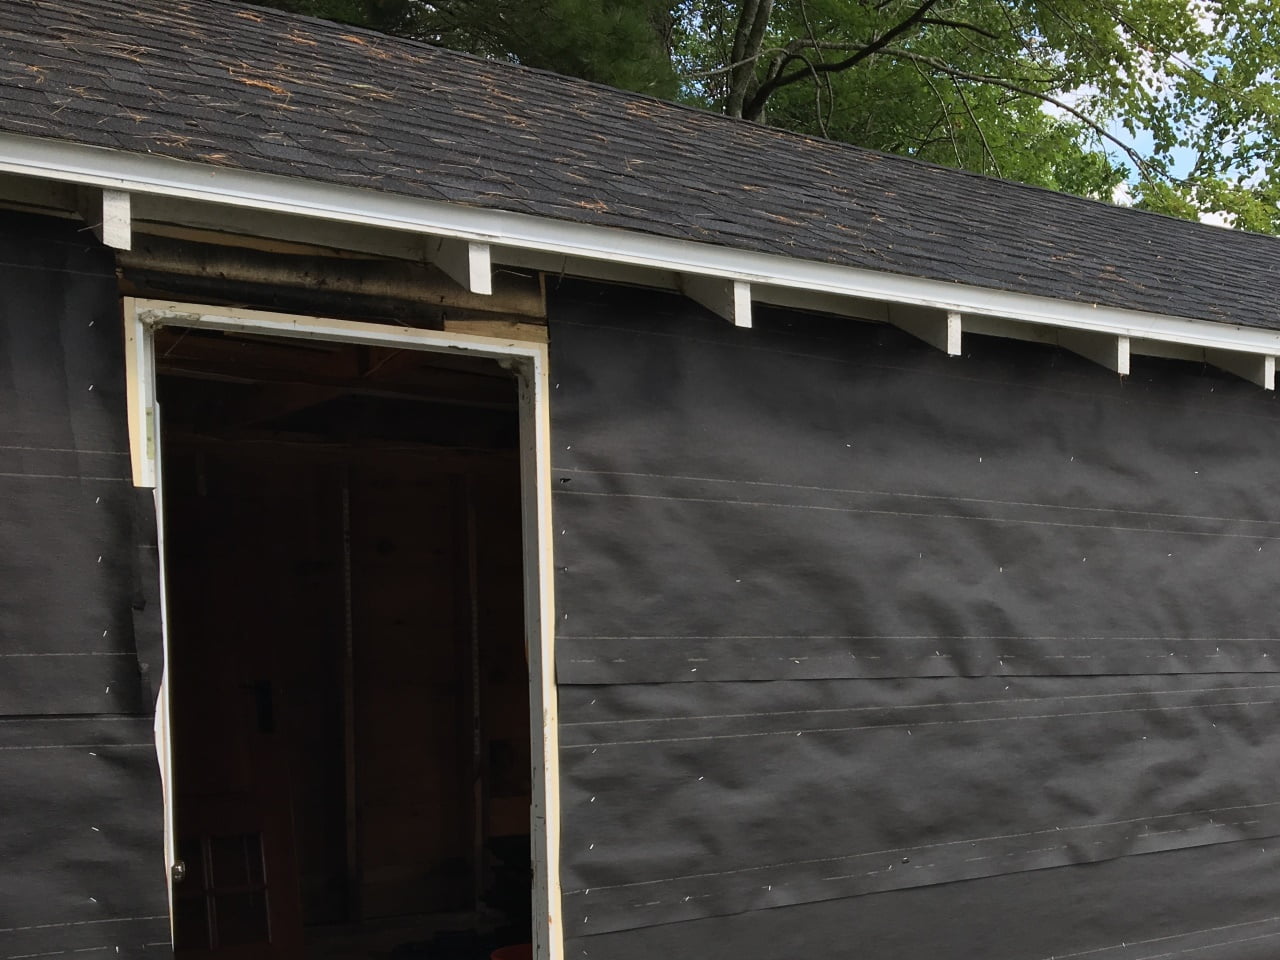
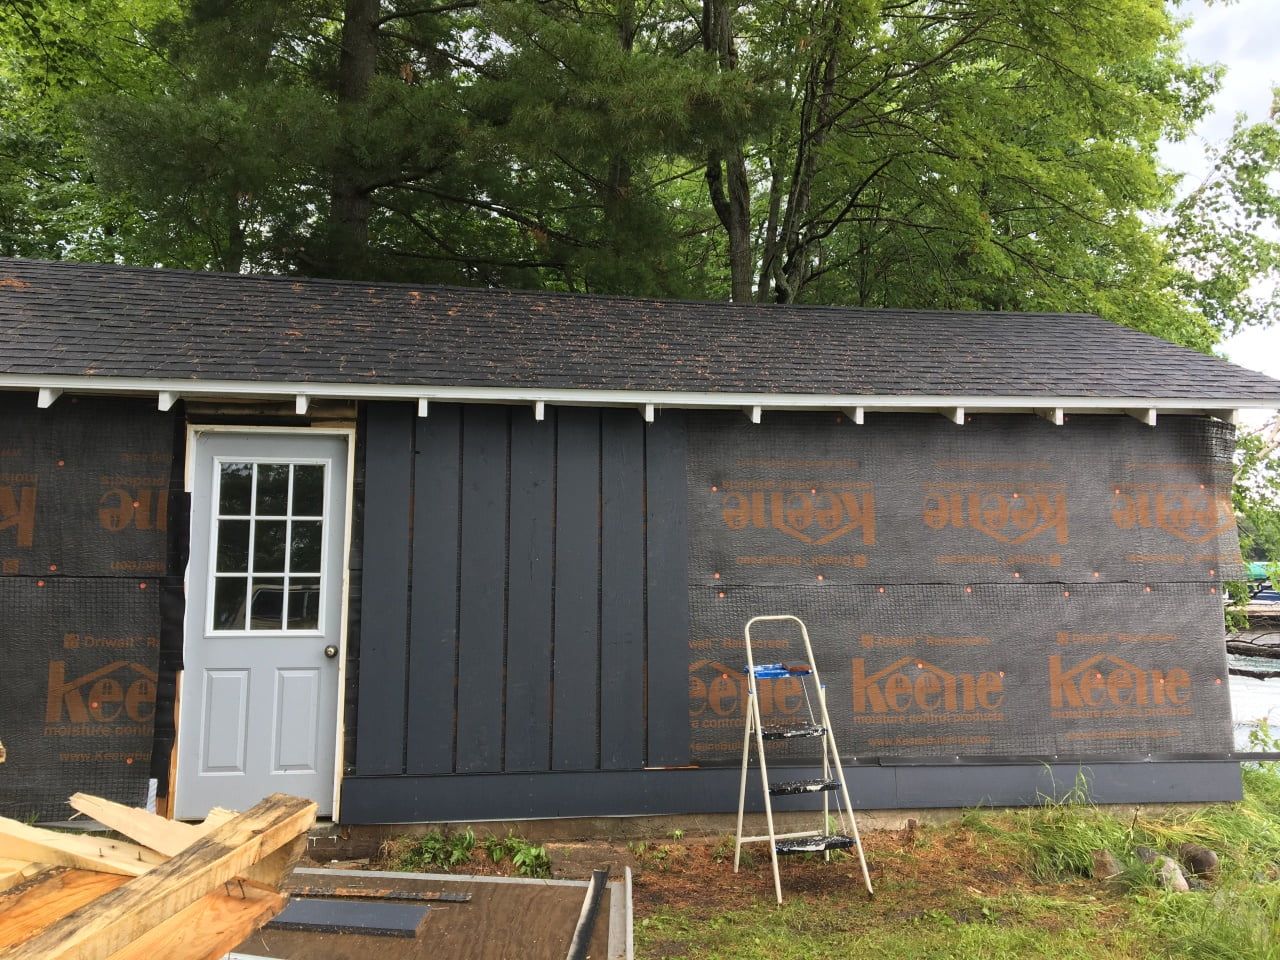
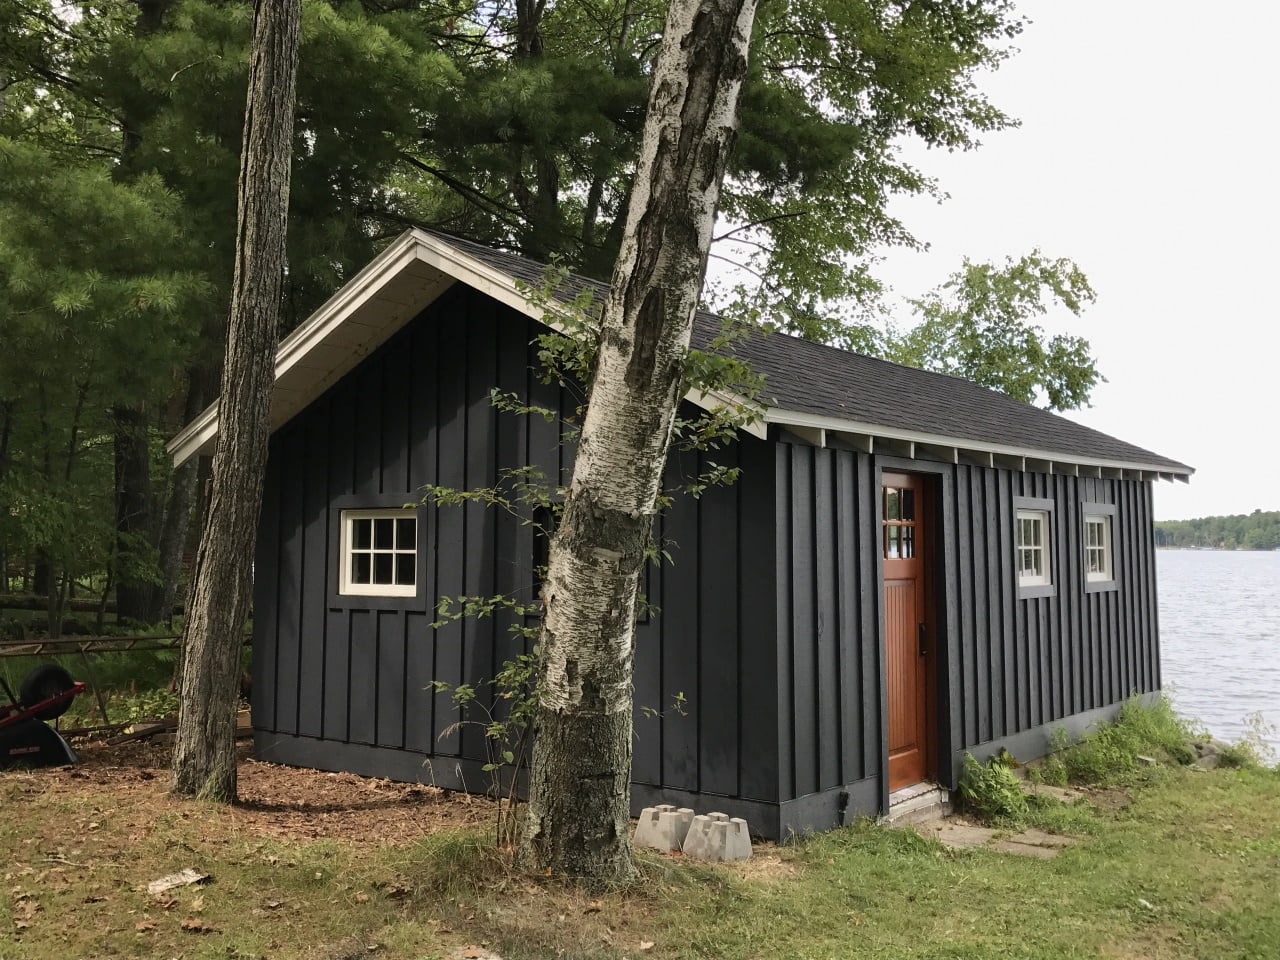
Interesting that you should ask as I just finished re-siding our boathouse at the cabin.
Our boathouse was build similar to you garage with 3/4″ pine sheathing and asphalt felt as a weather resistant barrier.
After I removed the old siding, I planned to keep the 3/4″ pine sheathing and whatever builders felt that was still in good condition. I simply attached a new layer of 30# asphalt felt over the old. I did not add plywood or other sheathing.
On top of the builders felt, I installed a rain screen mat – Keene’s Driwall 020 1/4″ mat. This is the same rain screen mat I used on our main cabin.
On top of the rain screen I installed 10″ cedar boards and 3″ cedar battens.
For your project I would not bother with the additional plywood. Just use screws to attach you siding. One of the nice side benefits of the driwall mat is that it will give you a bit of padding to make up for surface irregularities of the sheathing boards.
Here are a few pics:
Thanks for sharing and let me know if you have any other questions,
Gary
For 45 years I have painted my bat and board five different times with high quality exterior latex paint and it always bubbles up and flakes off in big pieces. How can I prevent this?
Would you know the pros and cons of installing 4×8 sheets of plywood and then just placing battens over top of that?
Thanks,
Gary P
Hi Gary,
Thanks for the question. I believe you could use exterior grade plywood as a cladding material with battens over it to give the look of traditional board and batten siding. The downside would be the durability and look of the plywood. Here is a discussion about this very topic:
Using plywood as exterior cladding – Green Building Advisor
Gary
Hello… As I write this (12/2016) I’m hoping this site is still up and running… I have a few questions…
First, does the rainscreen layer extend beyond the painted metal drip edge? In other words, does the rainscreen layer reach down to match (and go behind) the bottom of the watertable board? A cross-sectional graphic would be helpful to understand the construction.
Second, what additional guidance would you provide where a home is more than one level? My home is two stories, so understanding how to handle the install of board and battens for these long length conditions is of great interest to me.
Third, it seems that a careful measuring and layout of how the boards (and battens) get installed on any particular elevation is important, but still, issues can remain. For instance, did you adjust the gap between the boards to accommodate the width of the exterior wall, or did you cut certain boards to accommodate the width of the exterior wall? If the latter, how many boards were cut to make the layout work and where were those cut boards installed on any particular elevation? And secondarily, what if (notwithstanding layout) the window trim partially covers or entirely covers a gap over which a batten would occur?
Hi Carmine,
Thanks for the questions. It may help to look at my article on rainscreen wall design here which includes some better diagrams of the wall build. I will respond more completely to your questions this weekend. Thanks!
Gary
Great, detailed article. We have just purchased a small lake home that has board and batten siding on the main level of the house. The house has an unfinished walk-out basement on the lake side that we are planning on finishing out this year. The outside of this basement is currently cinder block walls. About a third of the way through you article, you listed the layers of your construction:
————————————————————————————————-
Here are the layers I used to build my exterior wall (from inside to out):
2×4 studs 16″ oc
R-13 Fibergalss batt insulation
3/4 Plywood (CDX exposure 1)
30# builders felt (roofing felt)
Driwall Rainscreen mat by Keene
Cedar board and batten siding
————————————————————————————————-
In my case, where I do not have the wall studs and insulation, what would you recommend as layers for my project starting with the base layer of cinder block? I am wondering if I install the moisture barrier next to the block, followed by furring strips, then the rainscreen, and then the board and batten, if that will work. Or should I install 1/2″ plywood to the block walls, then follow your layers indicated above?
I appreciate your thoughts!
Hi Kenny,
Thanks for the positive words and thanks for the question.
In considering your wall build, I would recommend an excellent article by Joseph Lstiburek of Building Science Corp which discusses general concepts regarding moisture barriers and directly answers your question regarding building over cement block (see partway down the article to Figure 1: Concrete Block With Exterior Insulation and Brick or Stone Veneer).
I would recommend following his advice and assemble your wall layers as follows from inside to out (block outward):
concrete block
weather resistant barrier – vapor and air (paint-on or membrane)
exterior rigid foam insulation (thickness may be limited by the need to match existing board and batten siding above)
drain plane (rainscreen mat or furring strip or similar)
cedar board and batten siding
Reading Joseph’s article will give you a general sense of do’s and don’t regarding vapor barriers and should offer some insights to your specific build. For example, if you have an impermeable barrier installed under the interior walls, you may want to use a semi-permeable barrier on the outside to allow the wall to dry if needed.
I hope this helps and good luck with the project!
G@CDIY
do I caulk around windows? they are leaking from old caulk I think
Hi Dennis,
I did caulk around the windows, filling the gap between the window frame and the trim boards. I did not caulk the outer edge of the trim board to the siding.
Here is an image of the detail on my window caulking for this project:
Closeup of window caulking detail for board and batten install - caulk inner edge between window frame and trim board. No caulk applied to outside edge of trim board.While caulking around the frame of the window is important, the details of your window install below the siding is probably more important. Ideally, windows should be installed in a fashion that seals the windows to the weather resistant barrier (house wrap, tar paper, etc.). Water should be able to flow down the inside of the wall and around windows without leaks.
When windows are installed, house wrap should be cut with a shingle-like “flap” at the top of the window, and sealed to the window with specialized window flashing tape. Depending on the specifics of the window, the bottom portion of the window may be left unsealed to allow moisture to escape.
Window manufacturers will include specific install instructions which should be referenced when installing new windows. These instructions can also be helpful in understanding the general concepts currently used for window installation. Here is an example from Anderson Windows: Anderson Window Installation Guide
I have installed hardi 4×8 sheets and 1×4 battens of hardi now I am ready to paint, do o need to caulk each batten board, of do what is the best call to use and the best paint, using brush and roller?
Hi Jesse,
You do not typically need to or want to caulk between the boards and battens. One of the main concepts of board and batten siding is to allow the boards to move under the battens, and caulk would limit the ability of the system to expand and contract. Obviously, if using Hardi board material, allow the system to expand and contract is much less important. In addition to allowing movement, an un-caulked board and batten sided wall will dry better if water gets behind the siding. It is important that you have a proper weather resistant barrier under the siding to prevent water passing into the sheathing and/or framing of the wall.
G
Very good and helpful information as we are learning how to put up 6inch under windows and around chimney. Thank you for putting this detailed information on here, we loved this. Liz and Ken
Can you give us an estimate on how much it cost you to reside the cabin? Roughly.
Hi Dawn,
Sure. I’ll break it down by items, some of which you may not need for your project:
Estimated Square feet of siding coverage: 760 sq ft.
So, not too bad considering I used pre-stained cedar (from Michigain Prestain). I believe the price of pre-stained cedar is a bit higher now. I would definitely recommend using pre-painted or pre-stained cedar if you can – mine has held up well and still looks new.
Gary
The cabin looks gorgeous! What paint and colors did you use?
Thanks for the article,
Lauren
Thanks Lauren,
The colors are Dark Slate and White (trim) from Cabot. The stain was factory applied by Michigan PreStain.
G
Excellent instructions on the Board and batten DYI projects. Just
one question. I am using board and batten for siding on a chicken
coop, can I use 5/8″ CDX for sheathing? Will it hold the screws?
Hi Ron,
Yes, when using screws generally 1/2″ or greater plywood is sufficient to provide a sound fastener base for your siding. 5/8″ CDX plywood should provide excellent hold for screw-fastened board and batten siding. Consider your project, 5/8″ should work very well.
CDIY
I am using 10 inch board and 3 inch batten western red cedar. Using screws to fasten boards to sheating. Some people have suggested using scews on one side of the board only for wood expansion and you show using 2 screws near the middle. Does your method allow for expansion and if I do use 2 screws, could I install the screws at the outer edge of the board so that the screws would be hidden after I install the batten over the boards?
Thanks
Roy
Hi Roy,
Thanks for the question. From my reading and experience, there are many methods to fasten board and batten siding. I would guess the most important detail is to allow the batten fasteners to pass between assembled board without penetrating them. This will allow the boards to slide and move under the battens allowing for expansion and contraction.
For my install, as you can see in the pictures, I’ve chosen to fasten the boards with two screws placed equally spaced at the center of the boards. My board and batten siding has been up for over three years without a single board bowing, cracking or otherwise failing with this fastener pattern. That said, I have read many who use the technique you describe with a fastener on a single side. Again, I suspect as long as you do not fasten both edges of the boards, a variety of method will work. Also, finishing the boards and battens on all six sides, and using dry, acclimated lumber will likely help minimize exaggerated movements of the siding boards.
Enjoy your project and feel free to upload a few images.
Gary
My builder moved on to another job and left the board and battens under a tarp in the yard for 5 months. It’s yellow pine and was cut with a band saw. Should I attempt to use it on the outside after some bleaching or use it inside after some bleaching? It was spaced and appears to be still straight, just discolored in places.
Hi Susan,
Thanks for visiting and thanks for the question. The decision regarding how to use the wood you have depends on many factors. From your description, it sounds like the wood was intentionally placed and set to air-dry and has been protected from rain and direct sunlight. It may be fine to use as you would like.
I don’t think you would need to bleach the wood unless you wanted to do so for aesthetic reasons, and likely would result in uneven color and tone if you used it just to remove the discoloration in places. Also, the time required to bleach the wood properly – sanding, bleaching, drying – might not be worth it depending on the amount of wood you would need to treat.
If you have access to the mill that cut the wood, I would contact them and ask for suggestions. For board and batten siding (and any siding), using properly dried wood is preferred and will result in less movement and possible twisting of the boards as the dry and equilibrate with the environment. For your boards, if stacked and set up properly, they should be near dry and likely ready to use.
Here is a link to some further information regarding drying wood from WoodMagazine.com: drying wood fresh cut wood
Gary
Thanks so much for sharing such a detailed post on your siding installation!
I’m building a tiny house down in Georgia and would like to install board and batten on the lower part of my wall. However, we used 1/2″ plywood to sheath the exterior (as well as 3/8″ plastic furring strips for the rainscreen). It seems a little unclear to me on whether we could move forward with the board/batten installation if we chose not to install blocking behind the plywood, and used screws. Any further thoughts on the matter?
Hi Amy!
From my reading (and experience), you can install vertical siding boards – like board-and-batten siding – using screws into 1/2″ plywood sheathing.
Here is a recommendation from the excellent building publication Fine Homebuilding:
Remember to use exterior grade screws and beware some galvanized screws can discolor cedar and other natural woods. I used coated deck screws for my project and have had no issues with discoloration.
Structurally the screws have performed very well since we installed them.
Good luck with your home build! Please feel free to reply with a photo of your board and batten project.
Gary